Showing posts with label toy. Show all posts

Friday, July 08, 2011

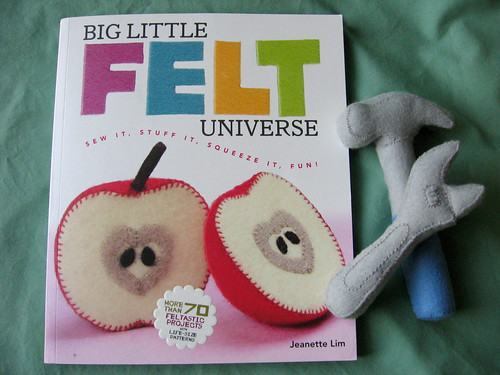
Big Little Felt Universe Book Review

Big Little Felt Universe

After I mentioned in my post about making felt food that my carrot was based on the design in Big Little Felt Universe but I didn't actually own the book, the publisher Lark Crafts contacted me to ask if I would like a copy to review.  Having had a chance to look through the book briefly, I knew how great it was and didn't hesitate to say yes!  This book really goes above and beyond in the quality and detail of instructions and, with over 70 patterns, is a great value if you have ever wanted to make felt food or other felt softies.  All the patterns in this book are handsewn, and there are a projects with a range of difficulty from simpler vegetables to an intricate cake with individual icing swirls and berries on top.
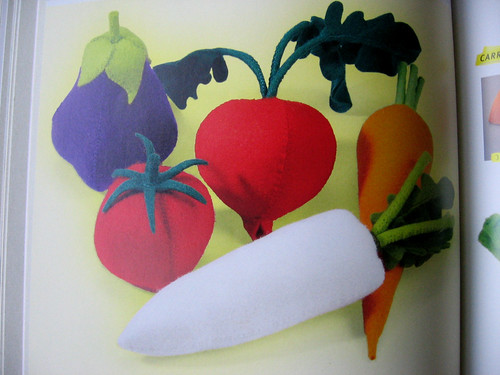
Veggies

I tend to think of food first when thinking of softies to make from felt, and this book has some really great ones.  They have a really nice set of veggie patterns - I love the way they have you make a little tube for the stems, making them more sturdy and realistic.
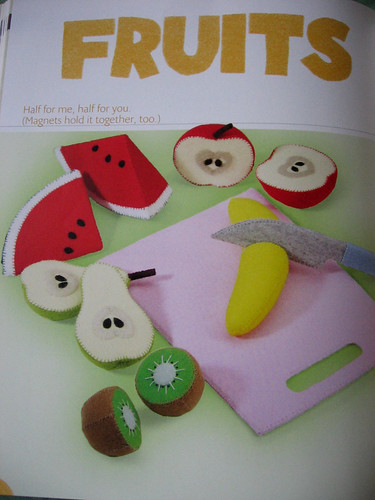
Fruits Page

The fruit patterns are amazing and are all designed with either velcro or internal magnets to hold together two halves that can then be "cut" apart with a play knife.  I think this is a great idea that would definitely make them more interactive for a kiddo to play with, but if you wanted you could easily modify the pattern and just make one half without worrying about the velcro part, or combine the two pattern pieces to make a whole fruit that doesn't separate.
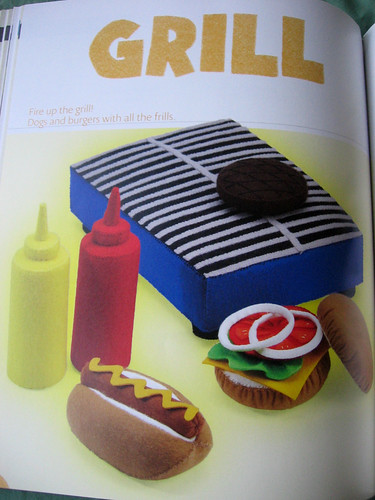
Grill Page

I also loved the hamburger (or, in our household, black bean burger) with veggie toppings - I can definitely see myself making one of these in the future.
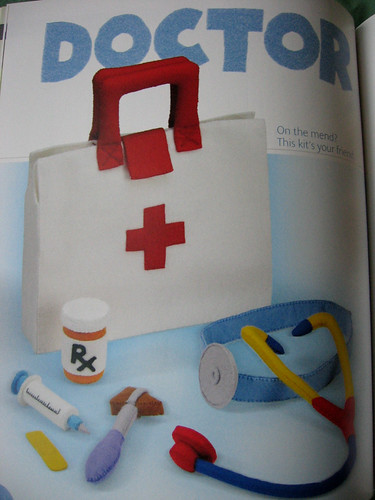
Doctor Page

While I immediately gravitated toward the food patterns, the book also has lots of other imaginative pattern ideas, from the doctor set above, to an office set (complete with laptop, calculator, and stapler), to a little girls purse with a cellphone and makeup.  It took some serious self restraint not to include photos of every chapter intro page here, they are all so cute!
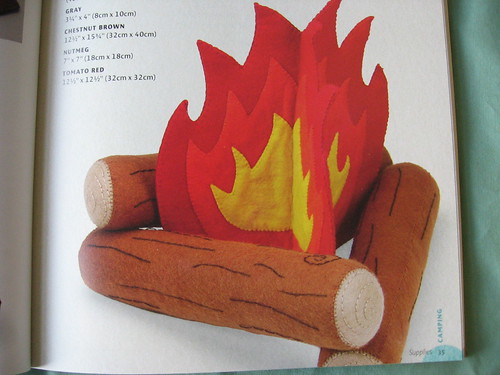
Campfire

There's also a whole camping set including this adorable campfire - another one I can definitely see myself making in the future.
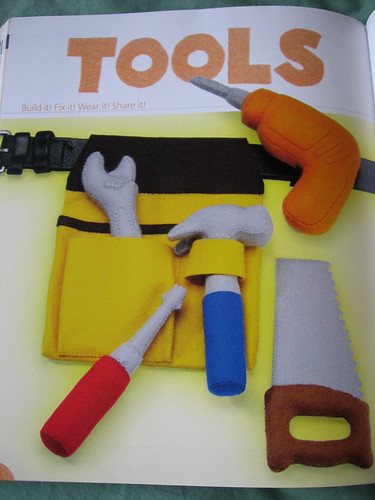
Tools Page

I wanted to try out a pattern to be able to do more than just gush about the cute pictures in this review, and while I was tempted by all the fun fruits and veggies, I decided to branch out since I just made a whole slew of felt food.  While my adorable nephew is a bit young to play with felt softies, I decided it wouldn't hurt to start making some for him that his parents can give him when he is old enough to play with them.  Since my brother is a contractor and works with tools all the time, I thought some of these cute play tools would be a surefire hit!
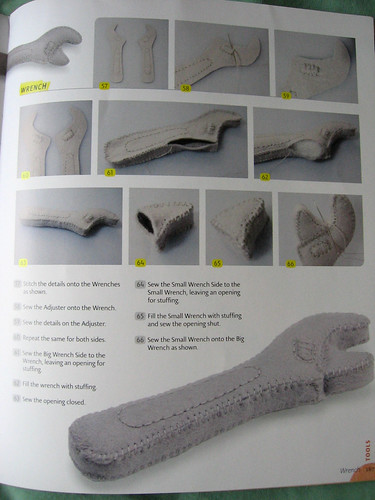
Wrench step by step

In addition to the large number of projects, something that makes this book stand out among other craft books is the fact that it includes full-size patterns for each project and super detailed instructions with step-by-step photos showing how to assemble the item.  I love that when the urge to make something strikes, you can trace the pattern with paper at home rather than having to run out to the copy shop to enlarge a pattern.  The patterns are well-designed and with the step-by-step instructions you aren't left wondering how they got it to turn out that way or scratching your head at cryptic written instructions.
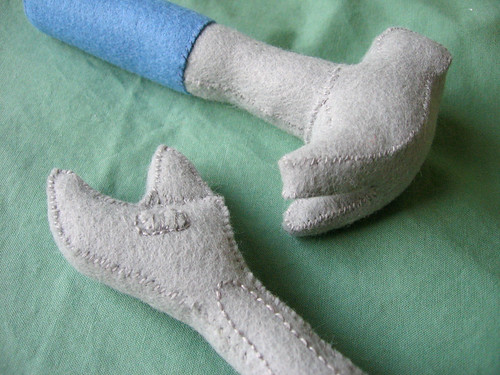
Felt Tools

I made the hammer and wrench and may well make more items from the set in the future.  I loved how these both had great details - the little screw adjustor on the wrench and the claw on the hammer in particular.  I was hanging out with my mom and a bit distracted when I started making the hammer and I messed up the head a bit, but it turned out great on my second try (I did tweak the order of construction a bit and found that the hammer head came together better when I slightly modified one of the pattern pieces - but I am the kind of person who always finds a way to make the pattern my own way).

There are a lot of free patterns for felt softies and especially felt food on the internet, so I imagine some folks don't feel like they need a book.  This book really takes it to the next level, though, with creative, detailed ideas - and includes a lot of complicated items like the wrench and hammer above where not only would I not have thought of the idea myself, but I would have been hard-pressed to just make up my own pattern if I was trying to wing it.  I really appreciate the fact that this book includes these types of more complicated projects - it seems like often craft books are aimed only at the beginner/intermediate level market, while this is a book that I think a crafter of any level of experience could enjoy and find a project to challenge them.

Thanks again to Lark Crafts for the chance to review this excellent book!

Tuesday, June 07, 2011

Felt Peapod Tutorial

Felt Peapod Tutorial


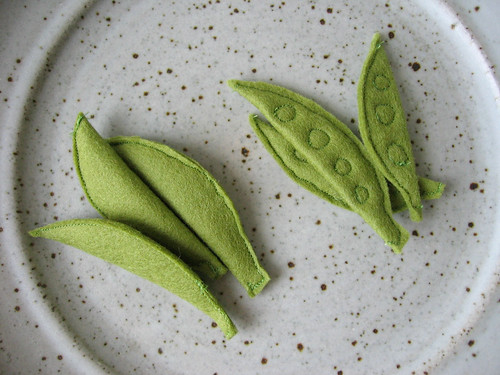
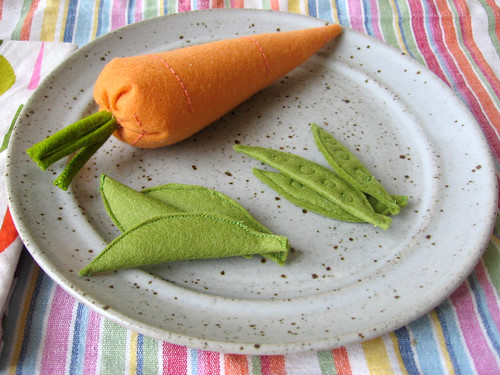
As I mentioned in my last post about making felt food, in addition to all the fun patterns I tried that I had found on the internet, I also made up a pattern for felt peapods - I think they look most like snap peas/snow peas.  Wouldn't it be cute to make up some of these and make a felt stir fry with pepper slices and tofu cubes?

I saw some other patterns online that use felt balls for the peas in the peapod, but I wanted to take a simpler approach.  As shown above, you can either make these pods plain, or you can add stitched "peas" as a fun detail.  They are really quick to make!  If you make some, I would love to see how they turn out, you can share them in the Needle and Spatula Flickr Pool.

TERMS OF USE:  As with my other tutorials, this pattern is for personal, non-commercial use only.  If you are interested in making these peapods for small-scale commercial sales (eg craft fairs, etsy), please contact me and we can discuss a licensing agreement.

Materials:
  • Green Felt (I prefer wool felt but you can use whatever felt you like)
  • Scraps of quilt batting (or if you don't have batting, you could use felt instead)
  • Green thread
  • Peapod pattern - DOWNLOAD HERE
I made these with a sewing machine, but if you don't have a sewing machine or prefer to work by hand, that would work too!  On the sewing machine, you can sew them either with a regular foot or with a free motion foot (useful if you are sewing the peas detail).

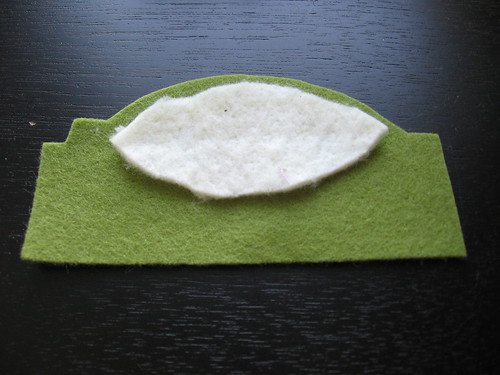
Felt Peapod Tutorial Step 1

First, cut out your felt and batting and lay the batting on top of the felt as shown.

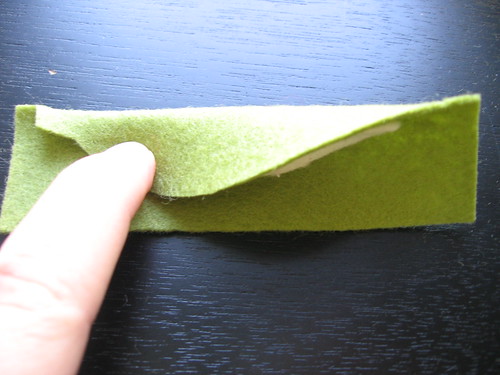
Felt Peapod Tutorial Step 2

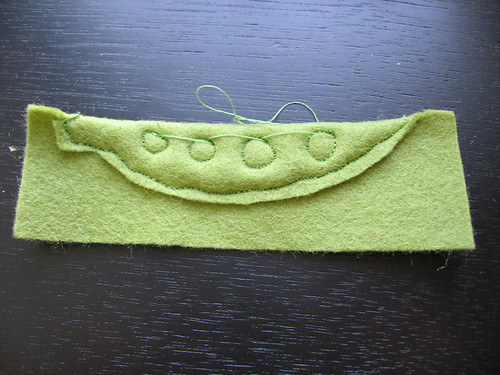
Fold both the batting and the felt in half (along the dotted lines shown in the pattern).  The felt should fully cover the batting.

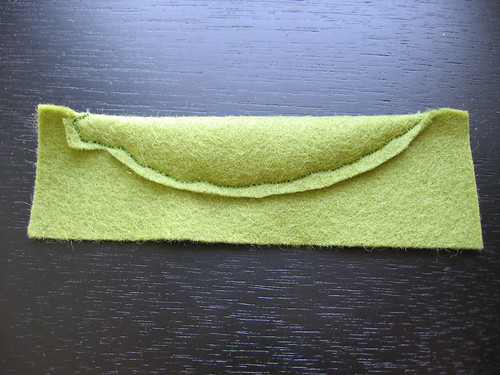
Felt Peapod Tutorial Step 3

Sew along the edge of the pea pattern, making sure the batting is fully enclosed.  I used my free motion foot for this step because I didn't want to change the foot to sew the peas, but it would have been more even if I had used my regular foot!

Felt Peapod Tutorial Step 4

If desired, sew small circles inside the peapod to look like peas.  I used my free motion foot for this, but you could also sew this with a regular foot and turning the piece as you sew a small circle.

To finish, clip all the threads and cut out the second side of the felt to match the peapod shape.

If you want to hand sew, cut out both sides of the felt in the peapod shape initially, then whipstitch or buttonhole stitch around the open edges, and sew the pea detail (if desired) using a running stitch.

Thanks and happy sewing!

Sunday, June 05, 2011

Fun Making Felt Food

Felt Fruit

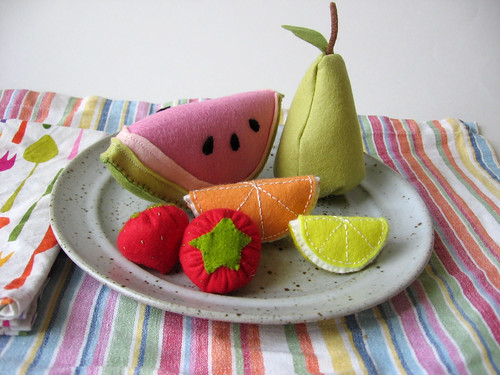
I was reminded by this post on Skip to My Lou recently that I really wanted to try making felt food, and it seemed like it would make a gift for a few kids I know who are about to become big siblings, so I decided to jump in and try making some.  I had so much fun, it really is pretty addictive!  I used the new bundle of beautiful wool felt that I won from A Child's Dream Come True in the Felt Week giveaway on Stumbles and Stitches (and some other wool felt from my stash), and a bevy of great ideas and tutorials from around the internet (although I confess, I often just looked at the patterns to get the general idea, rather than following them exactly).

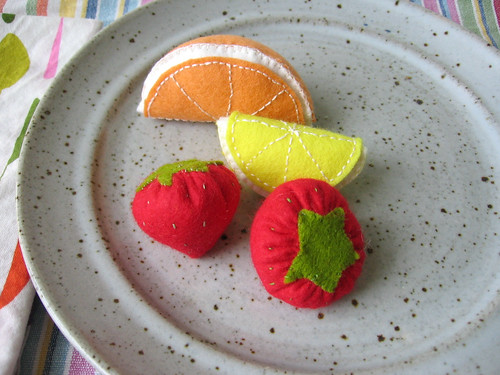
Felt citrus and strawberries


I mostly made fruit; the orange slices pattern (which I also used for the lemon) and the strawberry pattern are among many great patterns on Helping Little Hands.  The pear pattern is from here (although I also added a stem), and my watermelon is similar to this one but I added the light pink and light green edges, drew my own shape, and omitted the cardboard (I find the idea of adding cardboard to a softie kind of weird, although it definitely gives the shapes more definition). 

Felt Peas and Carrot

I also made a few veggies - the carrot is inspired by/similar to the pattern in Big Little Felt Universe, which I sadly do not own but have perused a bit.  The peapods are my own design, and are really pretty basic to make, but I may go ahead and post a pattern for them later this week in case anyone would like instructions to make them.

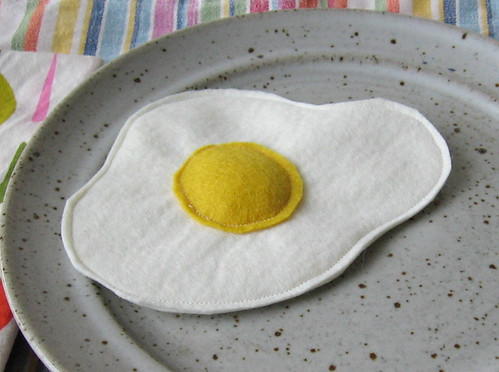
Felt Egg

I didn't refer to a particular pattern for the egg - I have seen them in a number of places - but the way I did it was fairly similar to this tutorial, except that I sewed all the way around the yolk and then cut a slit in the top layer of white to stuff it from the back (and sewed it back up) before sewing together the two layers of whites.  But actually the way they do it in the tutorial is probably a better and easier method.

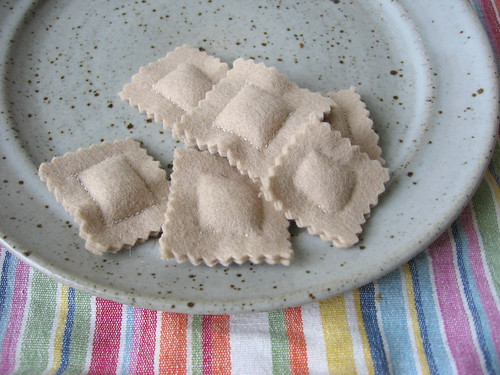
Felt Ravioli

I don't remember where I saw the ravioli, but there is a pattern here - it is pretty intuitive how you make them.

As you may be able to tell from the photos, I did a mixture of hand and machine sewing on these.  I like the look of the hand embroidered details and it is a good project to do while watching a movie/tv, but much of the sewing can also be done by machine if you want to make them faster.

Some other felt food items that I didn't get a chance to make but would like to in the future:
and I am sure there are more!

If you are looking for patterns for felt food, I also found that fairyfox had a number of good tutorials posted, and the Olsen Family Journal had a good list of links.

Have you ever made felt food?  What were your favorite things you made?

Tuesday, May 31, 2011

Needle Felting

I was super excited when I won the Felt Week giveaway on Stumbles and Stitches a few weeks ago, since the prize from A Child's Dream Come True included a large bundle of beautiful sheets of wool felt, and a needle-felting kit.  I knew I would get lots of good use out of the sheets of felt but I was possibly even more excited about the kit, since I have been wanting to learn how to needle felt (especially after reading more about it in the posts during Felt Week!).

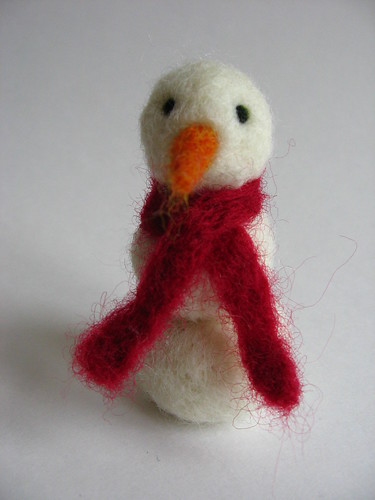
needle felted snowman

I was really impressed with how fast their shipping was - the needle felting kit came just a few days after I found out I won the giveaway!  I was so excited that I started playing with it right away, and found it easier and more intuitive than I expected.  After making a few basic shapes, I jumped in and made the snowman above.  I figured I may not have much use for needle-felted items in my everyday decor, but they would make great holiday decorations - I'm not sure if this guy will be left as is or turned into a tree ornament (although I do plan to make several more buddies for him).

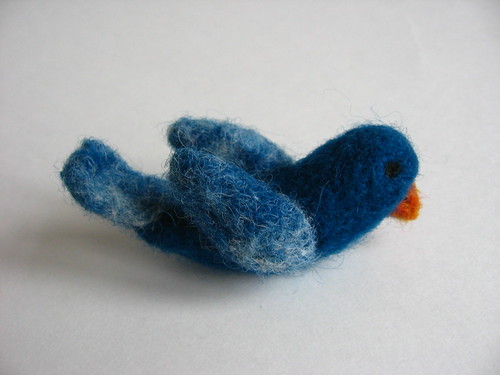
blue needle felted bird

I am thinking this bird will be a Christmas tree ornament too, especially since we have a bit of a bird theme in our ornaments (especially after I made several last year out of wool felt).

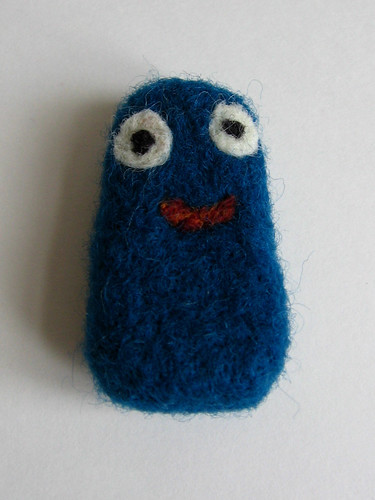
The other thing I immediately thought to make was little toys for some of the kiddos in my life.  I always love the way the tiny knitted or crocheted amigurimi monsters and animals look, but I don't have the patience to make something so small and deal with all the shaping on tiny needles.  So I figured needle felting would be a good way to make some similar little monster guys.

blue needle felted monster


I wanted to start out simple so I made this blue monster guy... he is a bit funny looking and kind of shaped like a chicken nugget, but still pretty cute I think.

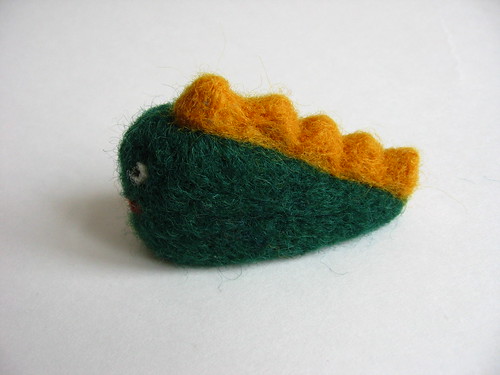
needle felted dinosaur toy

I also made this little dino guy although he maybe could be confused for a fish. 

I found that getting basic shapes was pretty easy but making smaller parts was a bit trickier for me - I should probably actually read some tutorials online to get more tips on how to make more complicated items.  Have you ever tried needle felting and do you have any tips to share?

Monday, February 28, 2011

Bunnies for Craft Hope Project


Today I finally finished making all the bunnies for the Craft Hope project to make safe birthing kits for Haiti, hooray!  It's a good thing, too, since they asked for kits to be mailed by March 1st... I am planning to take the completed kits to the post office tomorrow, so I am getting in just under the wire.  As I mentioned in my last post about this project, I may have slightly overcommitted myself by deciding to make 12 kits, each of which needed a receiving blanket, tote bag, stuffed toy, and the various other supplies.  Luckily I had some nice friends help me out, especially with the supplies and the bunnies.


I used the wee wonderfuls free bunny pattern, and while I am loath to complain about a free pattern I will say this wasn't my favorite pattern ever.  Note to self: don't commit to making 12 of something in the future if you have never tried the pattern before.  I wasn't super thrilled with how some of the bunny faces turned out kind of pointy, although I did find that clipping the curves extensively helped, and I also found that the pattern circle for the bottom of the bunny was a bit larger than ideal so I cut them a bit smaller.  I was trying to sew these pretty fast so you may notice that not all of the ears point up or that there are other minor sewing errors... but I am sure the babies will love them nonetheless.  My friends were nice enough to help out with embroidering the faces (and I love how they each seem to have a different personality as a result), and with cutting out the pieces.  I used a variety of fabrics that I had in my stash (and honestly, older ones that I wanted to use up, not my favorites), but I think they turned out cute!


I ended up trying a few different approaches for the ears... one pair I sewed and turned inside out, which I liked the look of but should have added a seam allowance for and I didn't want to go back and recut all the pieces.  I made a number with zigzag edges as the pattern suggests and then also hand-sewed some with a buttonhole embroidery stitch (like the bunny on the left above).  I also used the overcasting stitch and foot on my machine for some which made it a bit easier to keep the stitching right at the edge and catch the raw edges well.


I bundled each bunny up in the ziploc bag with the other supplies (and actually, all the other blankets fit in the ziploc too, this one was just a bit bulkier), put them in their respective totes, and packed the box up to ship tomorrow.  I felt a little sorry for the bunnies getting all squished in the bags...

I am still planning to do a tutorial for the tote bags, it has just taken me a bit longer than I expected - it should be up this week.


I'd love to hear if you have a favorite knitting or sewing pattern for a stuffed toy (since it seems I haven't found a favorite yet).
Related Posts Plugin for WordPress, Blogger...