Showing posts with label bloggers dinner party. Show all posts

Tuesday, October 08, 2013

Halloween Sewing

I'm still trying to get back to blogging regularly, as you can tell - in addition to being busy with the baby (and summer fun stuff until recently), I really have continued to struggle with what I should post about - I have such a backlog of fun things to share, I can't decide which to post so I just don't get around to posting! This is totally silly, I realize, but I do really want to share it all with you, so I'm going to just try to be better about jumping in and sharing something already. In this case, though, it was an easy choice since these photos have been sitting on my computer since last October and I wanted to be sure to share before halloween!

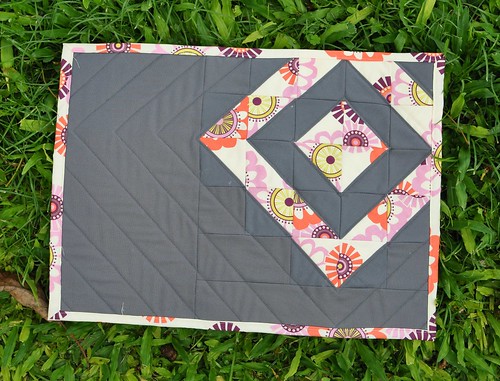
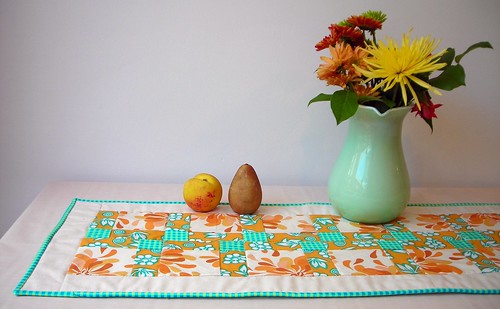
Halloween table runner

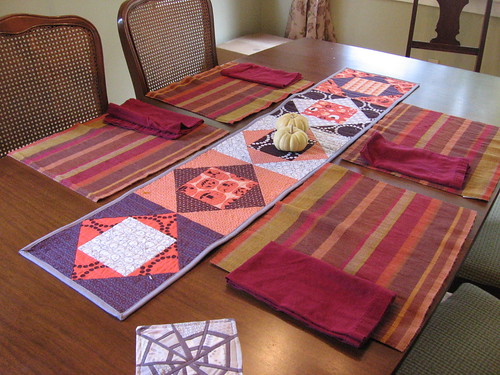
One of the wonderful things about owning a house and being somewhere we intend to stay a long time is that we have finally started acquiring grown-up furniture.  After years of having a tiny ikea dining room table that barely fit 4 placemats, we now have a lovely vintage dining room table with plenty of space for a table runner!  I have visions of making a whole slew of runners for our table but so far this halloween one that I whipped up last year is the only one that has come to fruition.
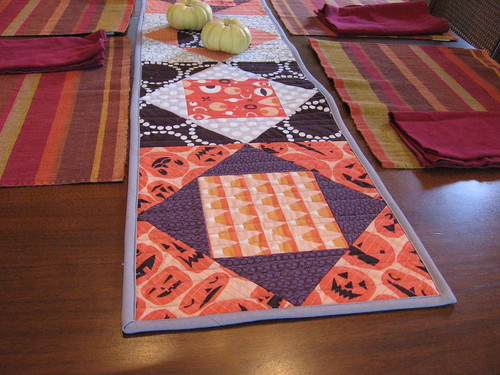
halloween runner 2

I had bought up this awesome Lizzy House halloween fabric last year and I was determined to actually use it rather than having it sit in my stash.  I thought these fun square in square blocks would be a great way to show it off (I am sure there is a real name for these blocks that I don't know - anyone?).  I just pieced them by measuring and cutting the squares and triangles but I realized after the fact that they would have been much faster and easier if I had foundation paper pieced them.

halloween runner 3

I backed and machine bound the runner with a solid grey kona fabric, with the goal of having the runner be reversible.  This is probably why I haven't motivated to sew any more runners since last year, the grey side of this has been a great all purpose, all season runner for our table that matches most of our placemats!  Making your runner reversible is a great way to get more bang for your buck (so to say), especially if you're making something like this where one side is really only useful for a few weeks a year.  I actually often lose track of the fact that this is actually our halloween runner and get a surprise when I take it off the table to wash it!  Which reminds me, it's been October for a week, I really need to go flip it over while it's still halloween season.
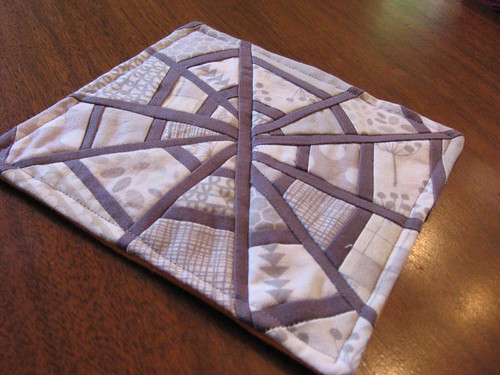
spiderweb coaster

In the top photo above, you can also catch a peek of this fun spiderweb mug rug that I whipped up last year.  It's a bit of a play on the traditional spiderweb block, but done in a more improv style.  This was also a fun chance to play around with my low volume grey fabrics!  Maybe this year (or realistically at this point, next year) I'll make a couple other cute mug rugs/trivets that are also halloween themed to make a set.

How about you, have you been doing any halloween sewing?

Thursday, October 06, 2011

Bee blocks and getting ready for Sewing Summit!

Sept Do Good Strip Block

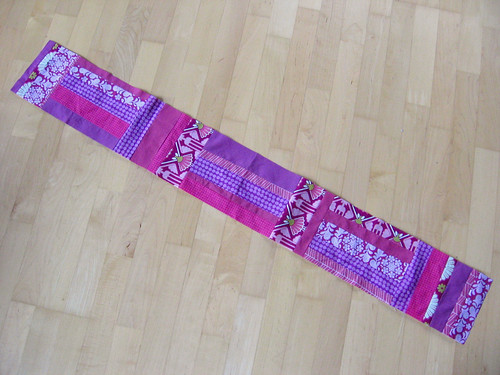
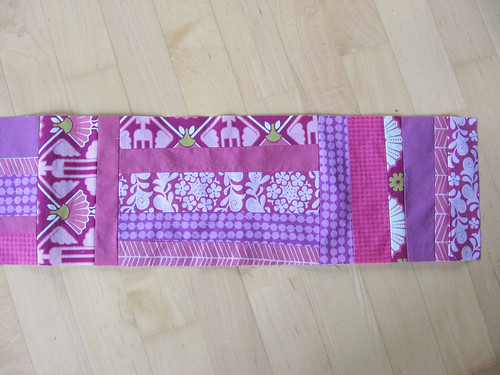
With everything we had going on, I waited until the very end of the month to sew my September blocks for the do. Good stitches bee - which was actually a long strip, rather than 2 blocks like usual.  Natalie asked us to use our imaginations and we each stuck to a single color - I got plum and others did red and golden yellow as well.  As usual, Natalie picked a gorgeous color palette and I can't wait to see how the final quilt turns out!

Sept do go stitches strip block detail

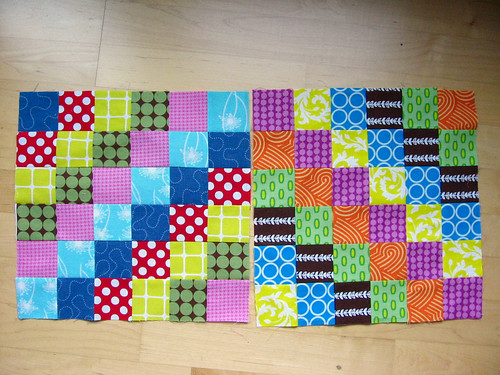
In a stroke of luck, Melanie of Texas Freckles had already posted the block design for October when I was working on my September strip, so I was able to do both at once.  She had us make trip around the world blocks using this great shortcut, it was super easy!  This was a fun block that I probably wouldn't have made otherwise, so I am glad I got a chance to try it out.

October Bee Blocks

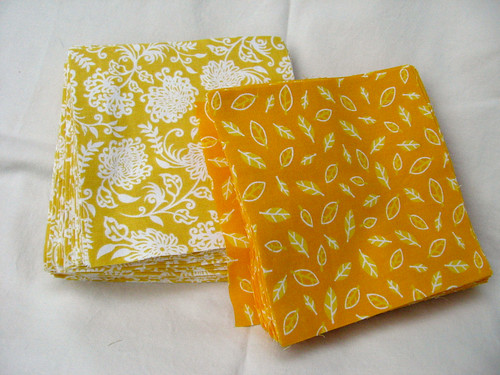
I am super excited for the Sewing Summit tomorrow!  There has been a kind of insane amount of email traffic on the listserv that I have been doing my best to keep up with, but I am hoping that I'll be able to just jump into things when I get there even if I haven't been completely keeping tabs on all the goings on in advance.  I did sign up for both the fat quarter swap and the charm square swap, so I have been pulling fat quarters from my stash to part with, and I bought two yards of fabric and cut them up into charms (good practice for the charms I'll be cutting for my Drunkard's Path quilt!).  It is a rainbow charm swap and I was assigned yellow and yellow-orange, so this is what I came up with.  I can't wait to see all the different fabrics I will be getting in exchange!!

Yellow charms

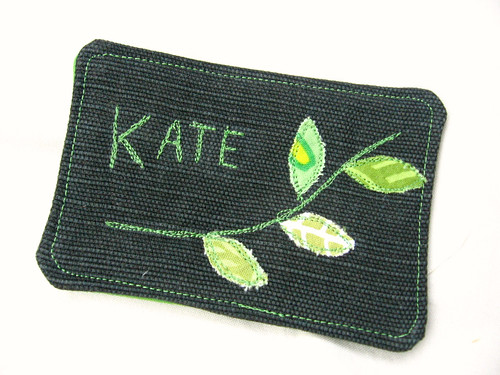
I also saw that a number of folks have been making themselves nametags for sewing summit, and I was inspired to make one too, although not patient enough to hand-embroider it.  Instead I went for a free-motion embroidery/applique design inspired by the leaf design on my messenger bag pattern.  It came together really quickly and I am happy to have something new homemade for the sewing summit since I didn't make a new bag or anything.

Sewing summit name tag

Oh, and I have been remiss in not giving an update on the Bloggers' Dinner Party!  It has been fun doing this party, but I think I have too much going on to keep it going any longer - so it will be retiring, or at least hibernating for now.  I may do one more month in December so folks can link up holiday projects.  Thanks again to Michelle from City House Studio for hosting this past month!!

Thursday, August 25, 2011

Odds and ends


Aloha from Hawaii! Amazingly we survived the rest of our packing and have really been enjoying our relaxing vacation here while our stuff gets moved across the country. We have wifi access today so I thought I would pop in with a few odds and ends.


First, a reminder, Lindsay Sews is hosting the bloggers' dinner party this month and there are a few more days to join in. Thanks again for helping out Lindsay!

Also I realized that I would need help next month too, and Michelle from City House Studio has agreed to host - so be sure to stop by her blog next month and check it out. Thanks so much Michelle!


Do you read Kristie's blog, obsessive crafting disorder? If you don't already, you should definitely check it out, she is hosting a fun bag lady week again next week including tutorials and giveaways, including a chance to win copies of my two patterns. Go check it out!
Oh, and you know how before I got swallowed alive by packing I mentioned that I was planning to host a drunkards path quilt-along this fall? I am super exited that Kristie and I will be hosting it together, stay tuned for the official announcement and more info next month!

Sunday, July 31, 2011

July Bloggers' Dinner Party Wrapup


Thanks to everyone who joined in this month's Bloggers' Dinner Party!

I have a confession... I got so caught up in the packing and preparing for our move, that I ran out of time to make my own project this month.  I was really sad because I was actually thinking I would make a table runner, I was so inspired after putting together the round-up.  There were lots of fun entries for this month, though, so hopefully you guys will enjoy checking them out and not mind that I didn't get to my own project.

Here are a few of my favorites:

Photo from B. Yazoo

B. Yazoo linked up a super-cute set of placemats that she made using Sugar Pop and Kona Coal, and she made each one in a different design - I had a hard time picking which to feature, they were each so cool!

Photo from City House Studio

Michelle from City House Studio showed off some fun projects for her kitchen nook, including a beautiful lattice pillow to match her cushions, and these matching double-sided napkins.

Photo from One Eleven

Tori at One Eleven entered this cute potholder - I love the fabrics she used and the red bias tape sets them off perfectly.

Photo from Lindsay Sews

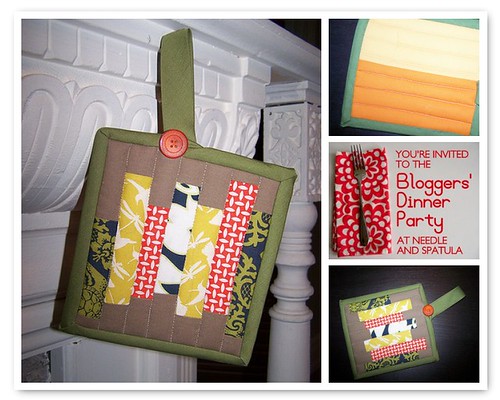
Lindsay of Lindsay Sews made a fun potholder, too - I love the block design she used and the cute button on the handle!

And the winner of this month's prize (pattern and fabric from my stash):


... Is B. Yazoo!  I'm sending you an email now.

Lindsay Sews

Finally, a big thanks to Lindsay of Lindsay Sews for volunteering to host the party next month while I am in the midst of moving!  I am excited to have the party travel around (while I am traveling around too) and can't wait to see what you guys make.  Head over to Lindsay Sews to see the great prize Lindsay rounded up for you guys (including something special from Sew Sara).

And in the meantime, I will be back with a few more posts about my sewing projects before I disappear for the move.

Monday, July 18, 2011

Table Runner Roundup

Thanks to everyone who has been joining in the Bloggers' Dinner Party!  It has been fun seeing your creations.  The party is open until the 28th so you have 10 more days to join in this month's party - and you'll have a chance to win a pattern and some fun fabric from my stash!  You can link up over at the Bloggers' Dinner Party page.

Bloggers' Dinner Party

In case you are looking for inspiration, I wanted to share a roundup of fun table runner techniques and ideas.  I have actually never made a table runner, since our current dining table is too narrow to fit a runner and leave any room to actually eat.  Looking at all these great tutorials made me really want to make one, though!  I'm thinking maybe I should just go ahead and make one, I can always use it on a coffee table or a side board in the future if we continue to have too small a table after we move.

Photo from The Long Thread

The simplest way to make a table runner is to sew two rectangles together with right sides facing, leaving a gap for turning the runner right side out, and then either hand stitch the opening closed or top stitch all the way around, closing the opening in the process.  The beautiful simple runner above from The Long Thread is an example of this technique, showing how with even minimal piecing you can get a very pleasing result.

Photo from Poppyprint

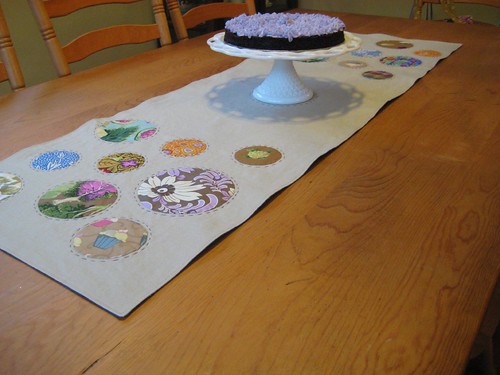
You can also use this technique with a more complicated top, such as the lovely crop circles pattern from Poppyprint above, or the beautiful log cabin runner that Amanda Soule made.   With this technique you can use batting in the middle and quilt as much as desired, or you can just use the two pieces of fabric.

Photo from A Sewing Journal

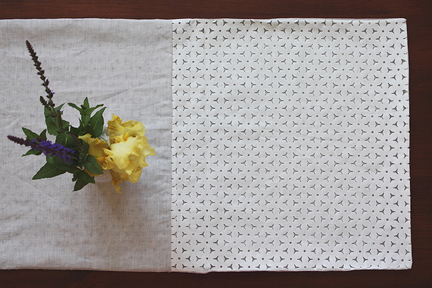
Another simple technique for a non-quilted runner is to simply use a single rectangle of fabric and turn the edges under and finish them, similar to how you would when making a napkin.  You can of course embellish the fabric with applique, contrasting fabric bands, stenciling/stamping or other decorations, just as you can with napkins.  The linen and lace runner above from A Sewing Journal is a sweet example using this technique.

Photo from Prudent Baby

You can also make a quilted table runner with binding, which is essentially a mini-quilt.  If you use extra layers of batting or insulated batting, this has the added benefit of protecting your table from hot dishes.  At the most simple, you can pick two favorite fabrics, quilt them together and sew on a binding, as in this tutorial from Prudent Baby shown above.

Photo from Diary of a Quilter

You can also make a striped table runner using this technique pretty easily, such as the quilt as you go table runner from Diary of a Quilter shown above.  Similarly, the Polka Dot Chair has a tutorial for a skinny table runner made from squares.

Photo from Spool Sewing

You can also use this technique to make a runner with many kinds of more complicated quilt designs, such as the disappearing nine patch design from Spool Sewing shown above.  Other tutorials to check out include:

Photo from Martha Stewart Crafts

And your table runner doesn't have to be a rectangle!  I love this pattern for a leafy runner made of bias-tape edged leaf shapes from Martha Stewart Crafts.  Or there's a cute pattern on Moda Bake shop for a runner made of layered circles.

What is your favorite table runner pattern or technique?

Friday, July 01, 2011

July Bloggers' Dinner Party and Moving News


Thanks again to everyone who joined in the Bloggers' Dinner Party in June! I know there were a number of folks who wanted to join in but didn't have time last month, I can't wait to see all your beautiful dinner items this month. I was also thinking I would broaden the party to include not just handmade items for serving dinner (placemats, tablerunners, napkins etc) as I said originally, but also include items related to making dinner - aprons, potholders, dishtowels and the like. How does that sound to you guys?

In personal news, Lawson and I have been looking to make a move from DC to the Pacific NW for a while now, and things are falling into place for us to hopefully move to Portland in the August/September timeframe! We are really excited about the move but it may mean a bit of a blogging slowdown for the next few months, especially August. I am weighing options for what to do for the dinner party and considering either suspending it for a month or two, or possibly doing a combined August/September party - let me know if you have suggestions for what you'd like to have happen!

In light of our impending move, I thought it would be good to give away a prize from my stash this month to help me start to make (a little) progress to reduce the amount of fabric and craft supplies I need to move.

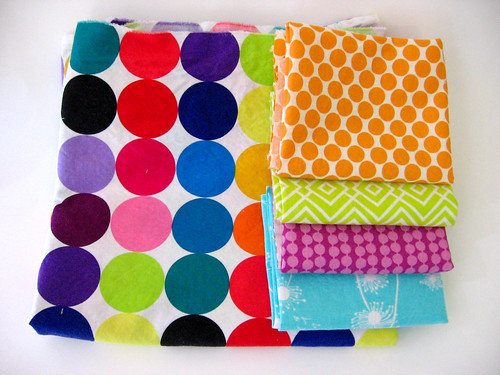
July Dinner Party Fabrics


The prize will include 4 fat quarters of fabric (handcut by me, so they may not be perfectly exact) - I will update later with a list of what these specific fabrics are - and a 1/2 yard wide by about 2 1/2 yard long piece of Michael Miller Disco Dot fabric.

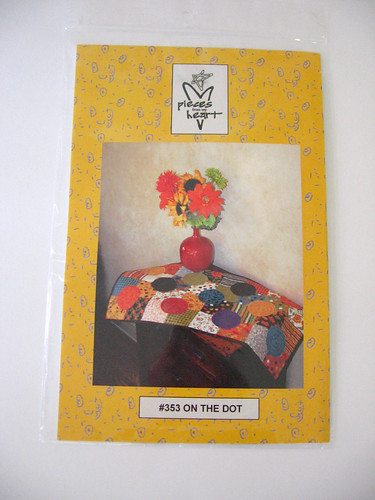
Table Runner Pattern


I'm also giving away this table runner pattern - I won it in a giveaway myself and while it is really cute I don't know that I will make it, so I wanted to pass it on in case someone else could use it.  It calls for a charm pack of fabric, so the fabric above is not intended to be enough to make this pattern, but you could certainly use the fabric prize and add some from your stash to make it.

So head on over to the Bloggers' Dinner Party Page for the linkup, details on how to enter, and the badge/button for your blog!  And remember, you can enter any item you have made in the past year, as long as you put up a new post - so feel free to show off something you already made if you don't have time to whip up something new.

Thursday, June 30, 2011

June Bloggers' Dinner Party Wrap-up


Thanks so much to everyone who joined in the first month of the Bloggers' Dinner Party!  It was so fun to see all of your creations and a few of your even shared recipes too (yum!).  Here were a few of my favorites...

Awesome flower placemats from Sara of Sew Sweetness

Sweet Crop Circles Tablerunner from Skooks Playground

Rainbow Quilt-As-You-Go Tablerunner from Michelle at City House Studios

You can see all the June entries at the Bloggers' Dinner Party page!

The winner of this month's lovely fabric prize is:


Skook's Playground!  Congrats Skooks, I will get in touch to get your mailing info so you can look forward to receiving this...


A huge thanks again to Peg and Becca at Sew Fresh Fabrics for donating this great prize!


Stay tuned, I will be back in another day or two to open the linky for July :)

Saturday, June 25, 2011

Spicing Up the Kitchen Swap Placemats - and a reminder!

SUTK Placemats

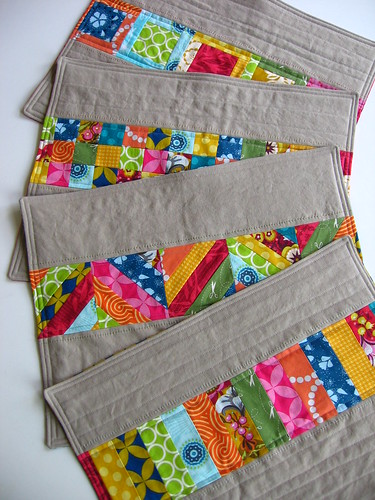
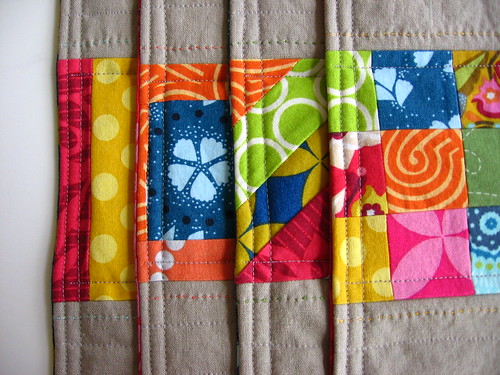
I just finished up my placemats for the Spicing Up the Kitchen swap and I am really happy with how they turned out!  This is the first big swap I have done, and I have to admit I will have a bit of a hard time letting these go... they are definitely nicer than any placemats I have made myself.  My partner said she likes Anna Maria Horner so I used a number of her fabrics and let that guide the color choices for the other fabrics I used as well.  I had a great time making the patchwork band on each one different and think they make a fun set.  Lawson was a bit befuddled by how much effort I put into something for a total stranger, but it was really fun to get to be inspired by someone else's taste (luckily very similar to mine) and I hope my partner loves them! 

Placemats Embroidery Detail

I added a line of running stitch embroidery echoing the band in a different color on each placemat, and then I did some straight line quilting.  Most of the quilting is just through the top and the batting and was done before I attached the backing.

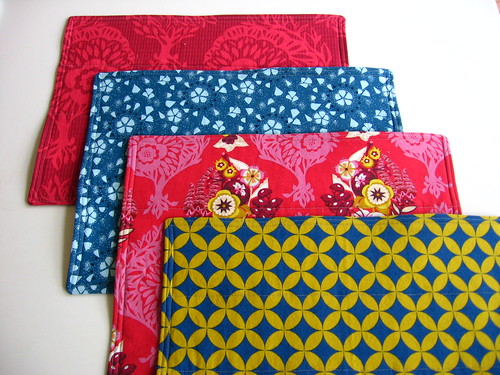
Placemat Backs

I used a variety of Anna Maria Horner prints for the backs, these could definitely be used on the reverse side as well.

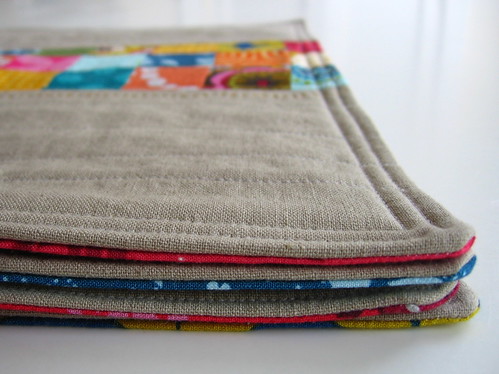
Placemats Edge Detail

I like how the backing peeks out at the side edge showing a bit of that color!

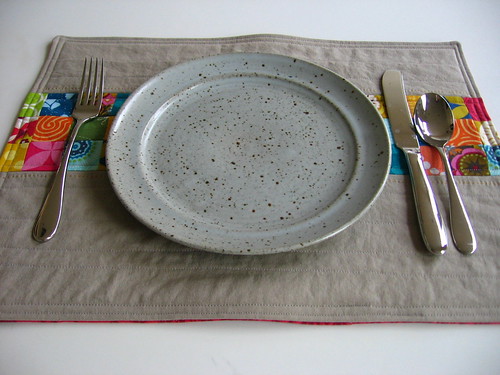
Placemat placesetting

I couldn't resist testing them out with a placesetting to see how they would look... I think this postage stamp one is my favorite of the set.  I may have to make another set for myself...

In addition to making these for the swap, they are also my item for this month's Bloggers' Dinner Party!


The party is open for three more days - through the 28th - so you still have time to enter for a chance to win this lovely fat quarter bundle from Sew Fresh Fabrics.  Remember, you can either enter a new project, or something you have made anytime in the past year, as long as you put up a new post!  The full details to enter are on the Bloggers' Dinner Party Page (and you can check out the lovely items that have been entered so far while you are there!).


Also, I'll be linking up to Sew Modern Monday on Canoe Ridge Creations on Monday - check it out to see others' modern sewing finishes!

{Sew} Modern Monday at Canoe Ridge Creations

Friday, June 10, 2011

Napkin Tutorial Roundup

Metro Cafe Napkins

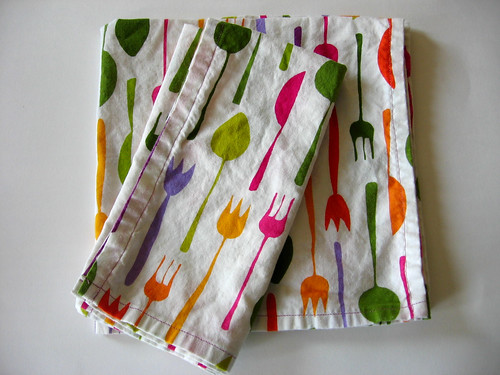
To get your creative juices flowing for the Bloggers' Dinner Party, I wanted to share a roundup of napkin tutorials and inspiration!  Napkins are a great project - quick and easy, they are a fun way to show off a favorite fabric, try out an embellishment technique, or just keep it simple with a beautiful solid.  We pretty much always use cloth napkins at our house, and in addition to a number of store-bought sets, I have a few fun sets that I made myself which we mainly use on our patio (with our bright red melamine target plates).

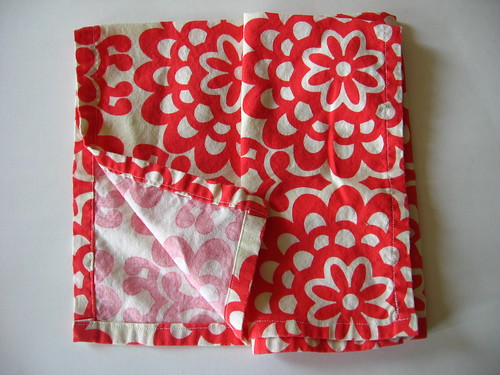
Lotus Napkin - Inside Edge

Both of these sets of napkins are made with a very basic technique, just starting with a square of fabric and then folding and ironing the edge over 1/4 - 1/2" twice and then stitching the edge in place - pretty much using the second technique in this skip to my lou post.  I started with fabric squares about 21-22" square, which is basically the largest you can cut them and fit two across the width of fabric - so with 1 and 1/4 yard of fabric, you can get 4 napkins.  In addition to your choice of fabric, you can spice these up a little by using a fun contrasting thread color.

I think these look great and are definitely fine for our everyday use, but if you want to take it up a notch, you can miter the corners for a more finished look.  There are lots of tutorials out there for mitered corner napkins - in addition to the first part of the skip to my lou post above, here are a few more:

For really quick everyday napkins, if you have a serger you could make napkins with a serged rolled hem, as shown in this video tutorial on Sew Mama Sew.

      Photo from Purl Bee
      Photo from Purl Bee
      Photo from Purl Bee

      If you want to make slightly more complicated napkins, the Purl Bee has a bunch of really great napkin tutorials:


      Photo from Sew Take a Hike

      Sew Take A Hike has a fun tutorial for colorful linen napkins with a wider contrasting edge with mitered corners - which she accents with embroidery stitches, too.  I think this would look great either with or without the embroidery!


      Photo from Sew4Home

      Sew4Home has some really cute napkin tutorials too, including the Italiano Kitchen Bistro napkins with a fun fabric band (above), and their Citrus Holiday Easy Napkins which have a fabric border at one end.

      There are a wealth of options if you wanted to embellish plain cloth napkins (either handmade or storebought) - here are just a few ideas that come to mind:
      • Applique a patchwork band on the napkin (similar to the Sew4Home tutorial above, but using a pieced strip instead)
      • Raw edge or traditional applique - geometric shapes or other fun designs
      • Embroidery - in a band or a border around the edge, or with a motif on the main part of the napkin
      • Fabric stamping - with either store-bought or hand-carved stamps and a permanent ink pad or fabric paint
      • Freezer paper stenciling or screenprinting
      • Bleach Pen decoration
      How about you - have you made napkins before?  What is your favorite napkin technique or tutorial?

      I hope you are feeling as inspired as I am now to whip up some fun cloth napkins!  Don't forget to link up with this month's Bloggers' Dinner Party for a chance to win a great fat quarter bundle from Sew Fresh Fabrics!
      Related Posts Plugin for WordPress, Blogger...