Showing posts with label roundup. Show all posts

Monday, July 18, 2011

Table Runner Roundup

Thanks to everyone who has been joining in the Bloggers' Dinner Party!  It has been fun seeing your creations.  The party is open until the 28th so you have 10 more days to join in this month's party - and you'll have a chance to win a pattern and some fun fabric from my stash!  You can link up over at the Bloggers' Dinner Party page.

Bloggers' Dinner Party

In case you are looking for inspiration, I wanted to share a roundup of fun table runner techniques and ideas.  I have actually never made a table runner, since our current dining table is too narrow to fit a runner and leave any room to actually eat.  Looking at all these great tutorials made me really want to make one, though!  I'm thinking maybe I should just go ahead and make one, I can always use it on a coffee table or a side board in the future if we continue to have too small a table after we move.
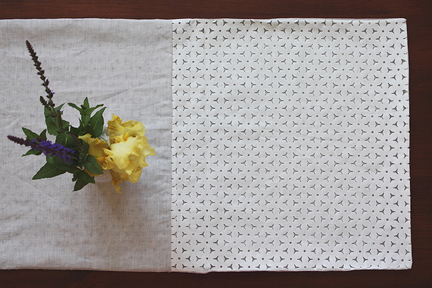
Photo from The Long Thread

The simplest way to make a table runner is to sew two rectangles together with right sides facing, leaving a gap for turning the runner right side out, and then either hand stitch the opening closed or top stitch all the way around, closing the opening in the process.  The beautiful simple runner above from The Long Thread is an example of this technique, showing how with even minimal piecing you can get a very pleasing result.
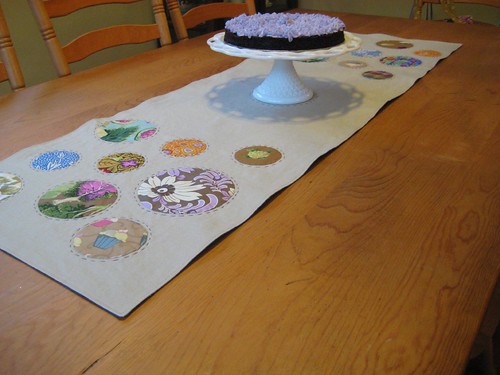
Photo from Poppyprint

You can also use this technique with a more complicated top, such as the lovely crop circles pattern from Poppyprint above, or the beautiful log cabin runner that Amanda Soule made.   With this technique you can use batting in the middle and quilt as much as desired, or you can just use the two pieces of fabric.

Photo from A Sewing Journal

Another simple technique for a non-quilted runner is to simply use a single rectangle of fabric and turn the edges under and finish them, similar to how you would when making a napkin.  You can of course embellish the fabric with applique, contrasting fabric bands, stenciling/stamping or other decorations, just as you can with napkins.  The linen and lace runner above from A Sewing Journal is a sweet example using this technique.

Photo from Prudent Baby

You can also make a quilted table runner with binding, which is essentially a mini-quilt.  If you use extra layers of batting or insulated batting, this has the added benefit of protecting your table from hot dishes.  At the most simple, you can pick two favorite fabrics, quilt them together and sew on a binding, as in this tutorial from Prudent Baby shown above.

Photo from Diary of a Quilter

You can also make a striped table runner using this technique pretty easily, such as the quilt as you go table runner from Diary of a Quilter shown above.  Similarly, the Polka Dot Chair has a tutorial for a skinny table runner made from squares.
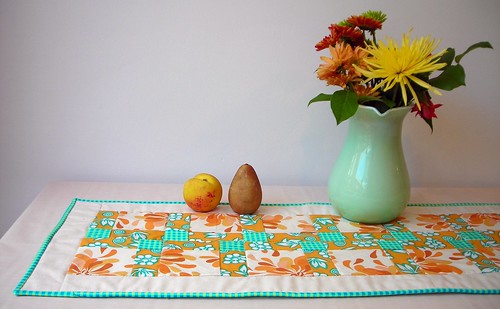
Photo from Spool Sewing

You can also use this technique to make a runner with many kinds of more complicated quilt designs, such as the disappearing nine patch design from Spool Sewing shown above.  Other tutorials to check out include:

Photo from Martha Stewart Crafts

And your table runner doesn't have to be a rectangle!  I love this pattern for a leafy runner made of bias-tape edged leaf shapes from Martha Stewart Crafts.  Or there's a cute pattern on Moda Bake shop for a runner made of layered circles.

What is your favorite table runner pattern or technique?

Friday, June 10, 2011

Napkin Tutorial Roundup

Metro Cafe Napkins

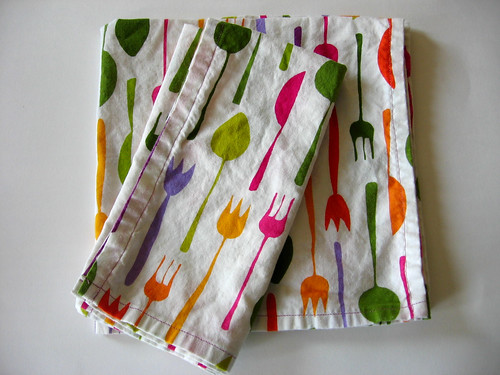
To get your creative juices flowing for the Bloggers' Dinner Party, I wanted to share a roundup of napkin tutorials and inspiration!  Napkins are a great project - quick and easy, they are a fun way to show off a favorite fabric, try out an embellishment technique, or just keep it simple with a beautiful solid.  We pretty much always use cloth napkins at our house, and in addition to a number of store-bought sets, I have a few fun sets that I made myself which we mainly use on our patio (with our bright red melamine target plates).

Lotus Napkin - Inside Edge

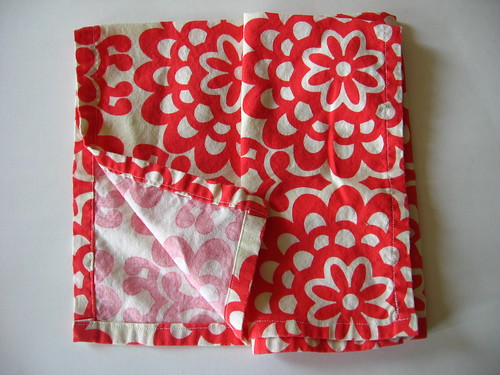
Both of these sets of napkins are made with a very basic technique, just starting with a square of fabric and then folding and ironing the edge over 1/4 - 1/2" twice and then stitching the edge in place - pretty much using the second technique in this skip to my lou post.  I started with fabric squares about 21-22" square, which is basically the largest you can cut them and fit two across the width of fabric - so with 1 and 1/4 yard of fabric, you can get 4 napkins.  In addition to your choice of fabric, you can spice these up a little by using a fun contrasting thread color.

I think these look great and are definitely fine for our everyday use, but if you want to take it up a notch, you can miter the corners for a more finished look.  There are lots of tutorials out there for mitered corner napkins - in addition to the first part of the skip to my lou post above, here are a few more:

For really quick everyday napkins, if you have a serger you could make napkins with a serged rolled hem, as shown in this video tutorial on Sew Mama Sew.

      Photo from Purl Bee
      Photo from Purl Bee
      Photo from Purl Bee

      If you want to make slightly more complicated napkins, the Purl Bee has a bunch of really great napkin tutorials:


      Photo from Sew Take a Hike

      Sew Take A Hike has a fun tutorial for colorful linen napkins with a wider contrasting edge with mitered corners - which she accents with embroidery stitches, too.  I think this would look great either with or without the embroidery!


      Photo from Sew4Home

      Sew4Home has some really cute napkin tutorials too, including the Italiano Kitchen Bistro napkins with a fun fabric band (above), and their Citrus Holiday Easy Napkins which have a fabric border at one end.

      There are a wealth of options if you wanted to embellish plain cloth napkins (either handmade or storebought) - here are just a few ideas that come to mind:
      • Applique a patchwork band on the napkin (similar to the Sew4Home tutorial above, but using a pieced strip instead)
      • Raw edge or traditional applique - geometric shapes or other fun designs
      • Embroidery - in a band or a border around the edge, or with a motif on the main part of the napkin
      • Fabric stamping - with either store-bought or hand-carved stamps and a permanent ink pad or fabric paint
      • Freezer paper stenciling or screenprinting
      • Bleach Pen decoration
      How about you - have you made napkins before?  What is your favorite napkin technique or tutorial?

      I hope you are feeling as inspired as I am now to whip up some fun cloth napkins!  Don't forget to link up with this month's Bloggers' Dinner Party for a chance to win a great fat quarter bundle from Sew Fresh Fabrics!
      Related Posts Plugin for WordPress, Blogger...