Showing posts with label recipe. Show all posts

Saturday, August 04, 2012

Creampuff Recipe (mini-eclairs)

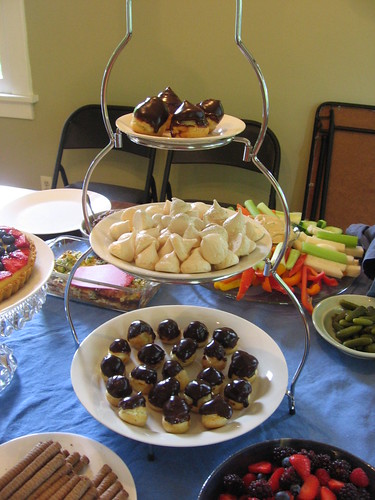
dessert tray


As I mentioned in my last post, about our bastille day themed housewarming party, I made creampuffs (eg, mini-eclairs) for the party and they were a big hit! I tried (arguably unsuccessfully) not to go too overboard with the baking, but I really wanted to try my hand at making an authentic french pastry - when I have visited france, the amazing range of delicious treats at the corner patisserie were one of my favorite things. Plus, it was a great excuse to get to use a new cookbook, Flour: Spectacular Recipes from Boston's Flour Bakery + Cafe, which I have been wanting to try out ever since I got it as a gift for the holidays.  While I visit Boston pretty regularly, I have never been to this bakery, but I had heard great things about the cookbook, and just from reading through it I could tell that a lot of thought and testing had gone into the recipes.  She has a lot of great tips in a techniques section, like just what temperature butter should be to best cream with sugar, how best to fold two ingredients together, and so forth - it's hard to absorb and remember in one reading but I'm sure I'll refer back to it over time to improve my baking.

So, I had pretty high expectations for the cookbook going in, and this recipe did not disappoint.  I have never made creampuffs before, but a guest mentioned that she had had trouble when she tried making them in the past and they didn't rise well - I can only think that they turned out well because of the excellent instructions, or possibly just dumb luck.  Hopefully if I make them again I can get it all to work as well!  I'm pretty tempted to try some of the other delicious recipes in this cookbook before I repeat these, however.  I had a lot of fun making them, but I'm not going to lie, as you can see from the extensive directions below, they were quite a bit of work - luckily, I knew what I was getting into and I did as much of the work the day before as I could and then basically just assembled them on the day of the party.


Chocolate-covered Creampuffs
Adapted from Flour

For the pate a choux (creampuff shells):
  • 1/2 cup (1 stick) unsalted butter
  • 1 tablespoon sugar
  • 1/4 teaspoon kosher salt
  • 1 cup water
  • 1 cup all purpose flour
  • 4 eggs, lightly whisked together
For the cream filling:
  • 1 cup milk
  • 1 teaspoon vanilla extract
  • 1/2 cup sugar
  • 3 tablespoons cake flour
  • pinch of salt
  • 1 egg
  • 1 egg yolk
  • 1/2 cup heavy cream
For the ganache (chocolate topping):
  • 2/3 cup semisweet or bittersweet chocolate chips (or 4 ounces chopped semisweet or bittersweet chocolate)
  • 1/2 cup heavy cream 

To make the creampuff shells:
Preheat oven to 400 degrees, and line two baking sheets with parchment (or butter them).  In a medium saucepan over medium heat (or I did this in a double-boiler to be sure I didn't overheat or scorch it), heat the butter, sugar, salt and water until the butter is melted.  Do not boil - you don't want any of the liquid to cook off.  Add the flour and stir until fully incorporated, using a wooden spoon.  The recipe directs to keep stirring over medium heat until the mixture starts to get thicker and looks like a loose dough more than a stiff batter, and leaves a thin film on the bottom of the pan; she says this will take 3-4 minutes but mine seemed to get there very quickly, I'd say less than a minute, so I just stopped then.
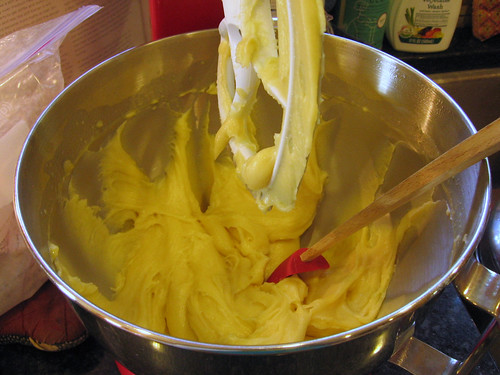
pate a choux batter

Transfer the dough to the bowl of a stand mixer, with the paddle mixer attached (I used the paddle attachment with built in scraper and it worked well).  Mix on medium-low for 1 minute - you will notice steam coming off. (The recipe notes, if you prefer to work by hand you can mix in a bowl with a wooden spoon for 2-3 minutes).  On medium-low speed (or beating quickly by hand), add the eggs gradually.  Once the eggs have been added, increase the speed to medium and beat for about 20 seconds, until the dough looks shiny.
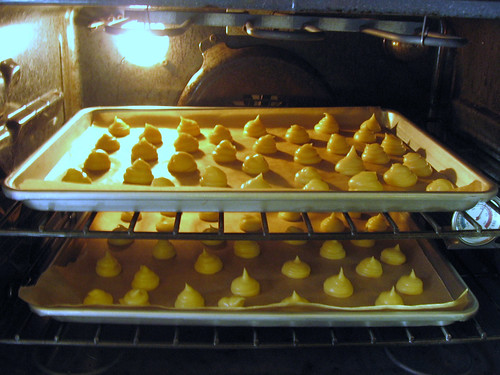
creampuffs baking

Using a pastry bag and the biggest tip you've got (the recipe calls for a 1 inch tip but I only had one that was probably 1/4", but it worked - or you could just use a plastic bag and snip off the corner), pipe out balls about 1.5" across onto the baking sheet.  As you can see in the photo above, I didn't space mine too far apart and it was fine, but you don't want them closer than an inch or so apart.  Bake at 400 for about 15 minutes, at which point the pastries should have puffed up and will be starting to brown.  Turn the heat down to 325 and bake for another 1/2 hour, until they are fully browned.  Place the pans on wire racks (or I just put them on empty burners on my stove) and let cool.  If you are making in advance, you can store in an airtight container - they can be frozen for up to 2 weeks, or stored at room temperature for up to 2 days.  To refresh, put them back on a baking sheet (straight from the freezer if frozen) and heat in a 325 oven - for 6-8 minutes if frozen, 2-3 minutes if not.  Again, let cool completely before filling.  (I made mine the day before and refreshed as the recipe directed and they didn't taste stale at all).

To make the cream filling:
The recipe uses a cream filling that is a mixture of a custard and whipped cream, which she calls "Tropez Cream" - it's a bit time intensive but I thought it was really delicious.

Scald the milk over medium high heat (heat until almost boiling, when bubbles begin to form around the edges, but do not boil) - the recipe suggests using a medium saucepan again, but I used the double boiler (probably not necessary for the scalding but I do think it makes the later steps harder to mess up - I pretty much always use a double boiler when I make custard for that reason).  While the milk heats, mix together the sugar, flour, and salt in a small bowl, and whisk together the egg and egg yolk in a medium bowl.  Slowly whisk the flour mixture into the egg mixture - it will be pasty and thick.

When the milk is heated, remove from the heat and slowly add it to the sugar/flour/egg mixture, whisking thoroughly as you go.  Once all the milk is whisked in, scrape the mixture back into the saucepan and put over medium heat.  Whisk continuously and strongly for 4-6 minutes (I found that it helped to hold the whisk in an oven mitt so my hand didn't overheat, but that may have also been from the steam from the doubleboiler).  Initially the mixture will be very liquid and foamy but it will start to thicken and the bubbles will go away.  When it thickens, you can stop whisking periodically and see if it is at a boil - when it bubbles, whisk again for 10 more seconds then remove from heat.

Pour the custard through a fine sieve into a heat-safe medium bowl, and stir in the vanilla extract.  Cover with plastic wrap placed directly on the surface and refrigerate for at least 4 hours, until cold.  Or you can refrigerate in an airtight container for up to 3 days (this is what I did, as I made the day before).  Just before assembling the creampuffs, whip the heavy cream until it has soft peaks.  Whisk the cold custard and then fold the whipped cream and the custard together using a rubber spatula.  Refrigerate if not using immediately.
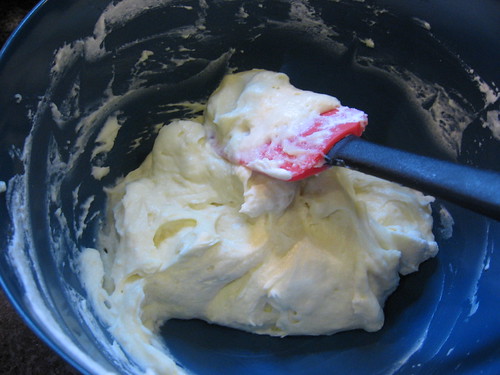
creampuff filling

To make chocolate ganache:
I was relieved to find that this step was much simpler than making the other two parts.  Like the creampuff shells and the custard, I made the ganache a day in advance and refrigerated it, but then I ended up having to microwave it to get it back to liquid (mostly because I hadn't given it long enough to come to room temperature).  Since it was so easy to make, if I were making these again I would just wait and make it on the day of.

Put the chocolate in a small heat-proof bowl.  Scald the cream over medium-high heat, and pour the hot cream over the chocolate.  After it sits for 30 seconds to a minute, slowly mix it together until the chocolate is all melted and the mixture is smooth, then let cool to room temperature.  (It can be stored in a container in the fridge for up to a week, and then brought back to room temperature to use).

To assemble the creampuffs:
Fill a pastry bag with the cream filling, using a medium sized tip.  Use the pastry tip, a knife, or just your fingers to open each puff enough to fill with the cream.  I opened them from the side, which wasn't as pretty, and just noticed in writing this up that the recipe actually says to poke a hole in the bottom - maybe that would have worked better, although it seems like the cream might seep out then.  There's a surprising amount of space in there for cream and I was impressed that the recipe made just about exactly the right amounts of cream filling and ganache for the cream puffs.  Turn the puffs upside down and dip the tops in the ganache, and then let rest for a few minutes to let the chocolate set.  (Maybe because I had microwaved it to get it softened up, mine never really set up so the chocolate was a bit runny - but still delicious - when I served them).  Serve that day, ideally within 4 hours.

creampuff assembly

Monday, October 17, 2011

Muhummara - Roasted Red Pepper and Walnut Dip

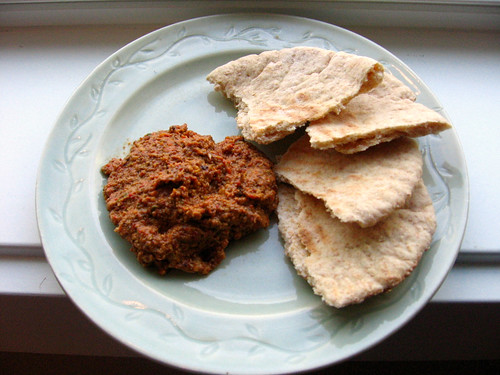
Muhummara

This is one of my absolute favorite dips, and is always a huge hit when I make it for parties, and I have thought about posting it here many times before.  Partly I hadn't posted it before because it always gets all eaten up and then I have nothing to take a picture of the next day!  But the bigger reason I have never posted it is because I felt silly posting a recipe that requires this many ingredients that I know most reasonable people will not own; we had friends for dinner recently who absolutely insisted we give them the recipe, so I figured it was time to go ahead and do a post about it.  The recipe is from a great, but very complicated, middle eastern cookbook - Spice by Anna Sortun (chef of Oleanna in Cambridge, MA).  Other than the strange ingredients, I have simplified this recipe a bit so that it is not too onerous to make, and it is well worth the effort.  The dip has a delicious spicy-smoky-sweet and slightly sour taste that really is a perfect balance.

Anyways, I have mentioned my love for Aleppo peppers several times here, including this post, and those are one of the obscure ingredients required to make this dip - you can get them at Penzeys if you have one near you, or at any number of places online.  The recipe also calls for Urfa peppers, which I know you can buy in person at Formaggio kitchen in Cambridge, but also looks to be available from several places online too (which also stock aleppos, so you could order them together).  If you didn't want to get both peppers, I think they are pretty similar in taste so you could also try just getting aleppos and then substituting them for the urfas.  Finally, this recipe also calls for pomegranate molasses, which I have found at upscale food stores like Formaggio kitchen in Cambridge and PastaWorks in Portland, or is also available online.  The recipe doesn't call for much and it keeps indefinitely in the fridge, so a bottle will last you quite a while.

Ok, enough explanation, here's the recipe - let me know if you try it!

Muhummara - Roasted Red Pepper/Walnut Dip
Adapted from Spice by Anna Sortun
  • 2 large red bell peppers, roasted and peeled OR 1 jar roasted red peppers, drained
  • 4 scallions, root ends trimmed off and the rest chopped
  • 1 teaspoon roughly chopped garlic
  • 2/3 cup chopped walnuts, lightly toasted
  • 1/2 cup ground toasted bread crumbs (about 1 slice sandwich bread - I use whole wheat)
  • 1 tablespoon lemon juice (juice of 1/2 lemon)
  • 1 tablespoon pomegranate molasses
  • 1 tablespoon aleppo chilis
  • 1 tablespoon urfa chilis
  • 1 teaspoon ground cumin
  • 1 tablespoon yogurt
  • 1/4 cup olive oil
  • 1 teaspoon kosher salt
I almost always make this using canned roasted red peppers and it turns out great, although I also bought a bag of roasted sweet peppers at the farmers market and used those recently and that was really great too.  If you are making bread crumbs from a toasted slice of bread, rip the toasted bread into pieces and finely grind it in a food processor first.  Then, add all the other ingredients and process until smoothly pureed.

Serve with pita bread, crackers, or vegetables to dip.


I'm linking up with Tuesday at the Table at A Quilter's Table!

Monday, July 11, 2011

Roast your Veggies!

Roasting vegetables is one of my favorite cooking methods - it's a great way to bring out the flavors and an easy technique when you don't feel like doing anything particularly fancy but want a delicious veggie dish.  I also find that I often roast vegetables when I am cooking a casserole or another dish in the oven - I figure, as long as I have the oven heated up, I may as well pop something else in to cook as well (this is also often when I cook pita bread or other bread).

These are two simple roasted vegetable "recipes" (really more of a technique) that I have been wanting to share, so I thought I would combine them into one post.

Kale Chips/Roasted Kale
Recipe from AllRecipes.com

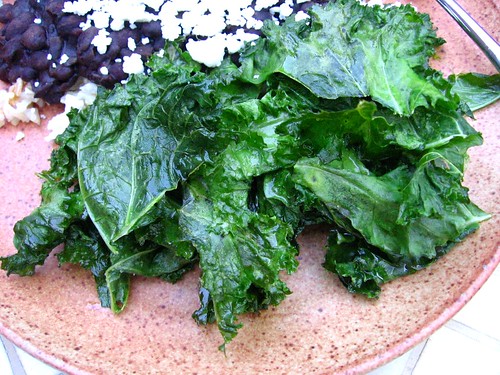
Roasted Kale

I basically followed the recipe at the link above so I won't retype it here, but I did substitute olive oil spray for the regular olive oil as suggested in the comments.  I also baked them on one of my silpat mats because I didn't have any parchment and it worked fine (I am sure you could also just bake them on the cookie sheet, too).  I think I baked/roasted them for about 8-10 minutes but I don't really remember.  These seemed more like a vegetable side dish to me than a finger food or a chip, per se, but they certainly were yummy so I definitely would recommend making them!

IMG_0631

Roasted Brussels Sprouts
Recipe adapted from Veganomicon

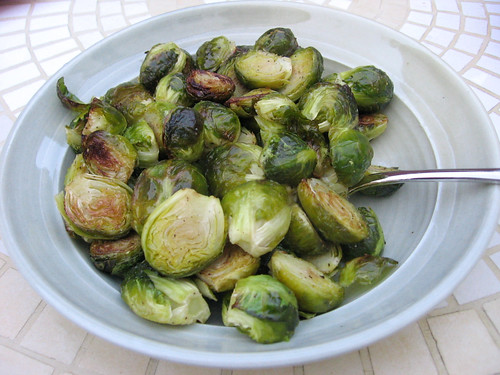
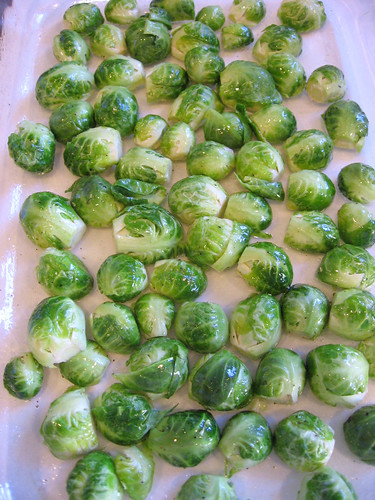
Roasted Brussels Sprouts

  • Brussels sprouts, cleaned, trimmed, and cut in half
  • Olive oil to coat
  • Salt and pepper to taste
Interestingly, this is basically the same recipe as the kale.  It really is the perfect way to bring out the delicious taste of the brussels sprouts without anything else to distract from them.  I just bought another bag of brussels sprouts so I plan on making these again soon!

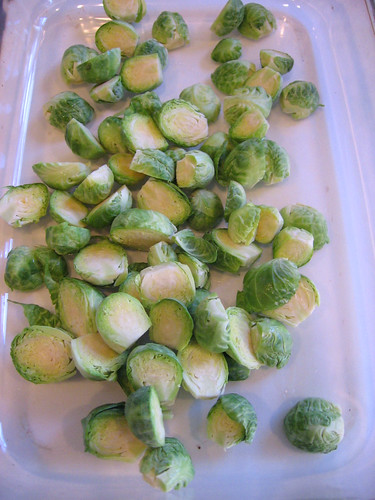
Cut Brussels Sprouts

To make these, preheat the oven to 400 F.  Toss the cut brussels sprouts with the oil, salt and pepper in a baking dish, than arrange them facing down on the baking dish.  Bake for 15-20 minutes, until they start to brown at the edges.  Serve warm.

Coated Brussels Sprouts

What are your favorite types of roasted vegetables?

Monday, June 27, 2011

Channa Masala - Chickpea Curry

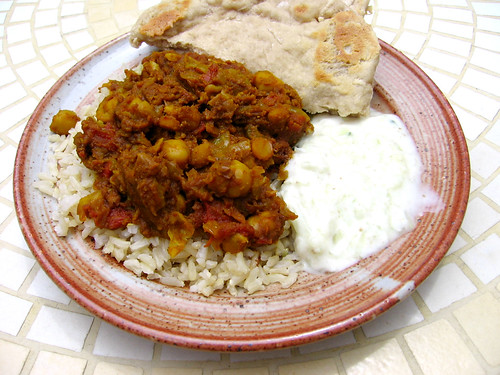
Chickpea Curry - Channa Masala

This chickpea curry with tomatoes and onions is a favorite recipe that I got from a friend a number of years ago.  I made it the other night for the first time in a while and remembered how much I like it!  It is pretty quick to make, so it makes a nice everyday dinner, or could be a good side dish to go with other Indian food and round out a meal.  As I usually do for Indian food, I served it over brown rice with homemade naan (flatbread) and raita (yogurt and cucumber sauce).  This recipe makes enough to serve 4-6, so if you are having a crowd you may want to double the recipe to make sure there is plenty for everyone!

Channa Masala - Chickpea, Tomato and Onion Curry
  • 2 onions, sliced
  • 4 cloves garlic, crushed
  • 1 tablespoon olive oil
  • 1 teaspoon chili powder
  • 1 teaspoon salt
  • 1 teaspoon turmeric
  • 1 teaspoon paprika
  • 1 tablespoon ground cumin
  • 1 tablespoon ground coriander
  • 2 (14 oz) cans of chickpeas, drained or about 3-4 cups of cooked chickpeas
  • 1 (14 oz) can diced tomatoes (not drained)
  • 1 teaspoon of garam masala spice mix (you may find it at your grocery store - they have it at whole foods for sure)
Heat the oil in a large skillet or a saucepan, then add the onions and garlic and cook until the onions are soft (about 5 minutes).  Add the spices (except garam masala), and stir for 1 minute.  Add the chickpeas and tomatoes and their juice and stir to combine.  Simmer, covered, for 20 minutes over low heat, stirring occasionally.  Stir in the garam masala and simmer, covered, for another 10 minutes, then serve.

Wednesday, June 22, 2011

French Lentil Salad with Raisins and Walnuts

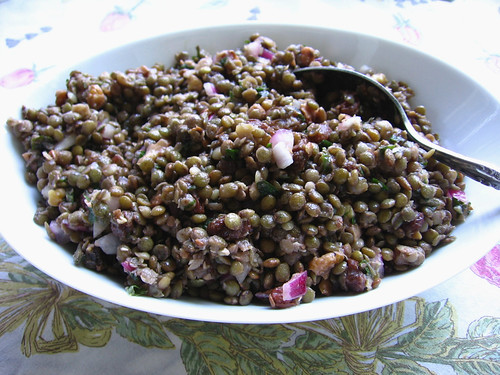
french lentil salad

This lentil salad is a perennial summer favorite in our household.  It is a great side dish to have on hand to eat throughout the week or to take to a potluck, and it keeps well in the fridge.  If you aren't familiar with french lentils, they are smaller than regular lentils, and have a more nuanced taste; they also keep their shape better when cooked, and are great in salads.  You may be able to find them in your regular grocery store, but if not they carry them at places like whole foods.  If you can't find them you can always substitute regular lentils (just be careful not to overcook them), but if you can find them they are totally worth adding to your pantry!  The recipe below is double what was called for in the original recipe, but I find it to be a better amount - if you don't want so much salad, feel free to halve the amounts.

French Lentil Salad with Raisins and Walnuts
Adapted from Entertaining for a Veggie Planet
  • 2 cups french green lentils
  • 1/2 cups raisins (or currants if you have them)
  • 1/2 cup lemon juice (2 lemons)
  • 1/4 cup olive oil
  • 1/4 - 1/2 cup finely chopped red onion (to taste)
  • 1/2 cup chopped walnuts, toasted
  • salt and pepper to taste
  • 1/2 cup chopped fresh mint
  • crumbled feta cheese (optional - I don't usually use but it is good)

Combine lentils with 4-6 cups of water in a saucepan.  Bring to a boil then reduce heat and simmer until tender but still somewhat firm, about 20-30 minutes (less if you are using regular lentils).  Drain.

In a bowl, combine all remaining ingredients and mix well.  Refrigerate and serve either chilled or at room temperature.

Thursday, May 26, 2011

Mixed Berry Ice Cream

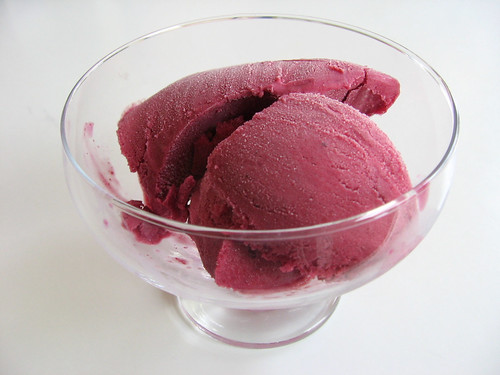
Mixed Berry Ice Cream

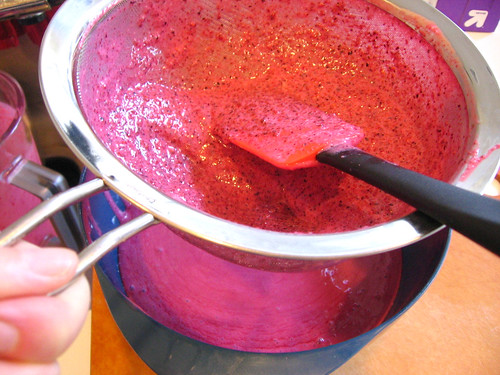
I don't know about where you live, but here in D.C. it has been feeling decidedly like summer.  Today it was over 90 degrees out!  I have been wearing skirts and dresses non-stop, and the other day I got the urge to make some ice cream.  I like to keep bags of frozen berries in the fridge as they are great for whipping up a last minute cobbler, pie, or sorbet, and I had been wanting to try making a berry ice cream.  Most of the times I have made ice cream I have gone all-out and made a custard but this time I kept it simple and made it "Philadelphia Style" which just means I used cream (or half-and-half, in this case) straight, with no custard.  As a result, this lands somewhere in between a rich ice cream and a light sherbet - deliciously fruity with a hint of creaminess.  This recipe is pretty low fuss, the only somewhat time consuming part is straining out the seeds, but it makes the texture of the ice cream much nicer so it is definitely worth it.

Straining Puree


Mixed Berry Ice Cream - Philadelphia Style
Inspired by a few recipes in The Ultimate Ice Cream Book
  • 2 cups half and half (or if you wanted it to be more like sherbet, you could probably use milk)
  • 3/4 cup sugar
  • 1 pound frozen mixed berries - I used a mixture of blackberries, blueberries, raspberries and strawberries, but really any berry mix should be fine
Take the berries out of the freezer and put them in blender to begin to defrost.  Put the half and half and sugar in a saucepan over medium heat and stir until sugar is mostly dissolved, not letting the half and half boil (it should be warm but not too hot at this point).  Pour the warm half and half over the berries in the blender and puree thoroughly.  Strain the puree through a fine strainer to get out the seeds.  The mixture should still be somewhat cool, but if it is not, refrigerate until cool, then freeze in your ice cream maker according to the instructions.  Enjoy!

Thursday, May 19, 2011

Creamy Mushroom Risotto


I made this risotto last weekend for our anniversary because it is one of Lawson's favorite dishes that I make (and one of mine).  It doesn't look like much but it is really rich and delicious... I think other times when I have made this I have cut back a bit on the butter but since it was a special occasion I went ahead and put it all in.  Yum.  In addition to all the butter, the homemade mushroom stock is what really gives this the amazing taste, so I wouldn't substitute store-bought.  As I have mentioned, I sometimes make risotto in the pressure cooker and you can certainly do it with this recipe - I went ahead and made it the traditional way this time, though.


Creamy Mushroom Risotto
Adapted from Vegetarian Cooking for Everyone by Deborah Madison

For the rice:
  • 5 1/2 to 6 1/2 cups mushroom stock - recipe here
  • 2 tablespoons butter
  • 1/3 cup finely diced shallot or onion
  • 1 1/2 cups arborio rice
  • 1/2 cup white wine
  • 1/2 cup cream or half and half
  • 1/2 cup freshly grated parmesan or romano cheese (I used a mixture)
For the mushrooms:
  • 2 tablespoons butter
  • 1 tablespoon olive oil
  • 1/2 cup finely diced shallot or onion
  • 1 pound mushrooms - white or cremini are fine, including some wild mushrooms if possible
  • 1 large garlic clove, finely chopped
  • salt and pepper to taste
  • juice of 1/2 lemon (~2 tablespoons)
Start by making the mushroom stock.  While the stock is cooking, chop the mushrooms and other ingredients.  When everything is chopped, heat the butter and oil for the mushrooms in a skillet, add the shallots or onions and saute for about 5 minutes until the shallots/onions are soft.  Add the mushrooms and cook over medium high heat, stirring frequently, for 5-10 minutes, until they release their juices.  Add the garlic, salt and pepper and lemon juice and stir to combine, then turn off heat and set aside.

Whenever the stock is cooked and strained, you can start the rice (may be while the mushrooms saute).  Keeping the stock at a simmer, melt the butter in a wide pot/stockpot, then add the onion and cook at medium for a few minutes.  Add the rice and stir to combine, cook for 1 minute.  Add the wine and cook, stirring frequently, until it is fully absorbed.  Add 2 cups of hot stock and stir to combine, then cover and cook at a good simmer until fully absorbed.  Add stock in 1/2 cup increments (tip: use a large ladle and test in advance to see how much liquid it holds so you know about how much you are adding) - stir continually after adding stock until fully absorbed and then add the next increment.  Add the mushrooms about halfway through or later.  After you have added the required about of stock and the rice is well cooked, add the cream and stir thoroughly.  Season to taste with salt and pepper.  Stir in the cheese, remove from heat and serve!

Sunday, May 01, 2011

Bulgur Salad with Mushrooms, White Beans and Arugula


I made this salad a number of times last summer and really enjoyed it, so it was a happy coincidence when I realized recently that I had all the ingredients sitting either in my fridge or in my garden and needing to be used up.  As you might expect with beans, mushrooms and bulgur, the salad is rich and earthy tasting (in a good way), but the arugula and paprika give it an interesting kick.  This is from the cookbook veganomicon which I use frequently although I am not a vegan - the recipes are great and stand well on their own, whether you are vegan or not.

I have modified the recipe pretty heavily from the original as I found it overdressed and kind of greasy when I first made it, and a bit too heavy on the red onion - but you can of course add more of either dressing or onion if your tastes differ.


I used baby arugula sprouts because I was thinning my arugula in the garden, but full-size works fine too.


Bulgur Salad with Mushrooms, White Beans, and Arugula
Adapted from Veganomicon

Salad:
  • 1 cup bulgur
  • 1 1/2 - 2 cups diced cremini or white mushrooms
  • 1 1/2 cups white beans (canellini or navy), drained and rinsed
  • 1/4 cup finely diced red onion
  • 2 cups arugula leaves, chopped
Dressing:
  • 2 tablespoons olive oil
  • 2 tablespoons red wine vinegar
  • 1 tablespoon balsamic vinegar
  • 1-2 cloves garlic, pressed
  • 1 teaspoon paprika (I used spanish smoked paprika but regular is fine too)
  • 1/2 teaspoon dried oregano
  • 3/4 teaspoon salt
  • ground black pepper to taste
Put the bulgur in a small pot or heatproof container and cover with boiling water, then cover the pot/container.  Let sit for 20-30 minutes then drain most of the excess water, leaving moist.  While the bulgur is cooking, mix together all the dressing ingredients in a medium mixing bowl.  Add the mushrooms, beans and onions to the dressing and let them steep while the bulgur cooks, stirring occasionally.  Add the bulgur to the dressing mixture while still warm and stir, then add the arugula and mix well.  You can serve this warm or chill and serve cool - it improves when it has a chance to sit for an hour or two and keeps well for several days.

Thursday, April 28, 2011

Decadent Sticky Buns


I started making these sticky buns planning to have them for Easter brunch, but they didn't get done and we ended up going out for brunch anyways, so I actually finished them a few days later.  I am not kidding when I say these are decadent... I am sure they are no worse for you than any other sticky bun, but you really realize it when you are making them yourself and see all the butter and sugar (and more butter, and more sugar) that goes into them.  They were totally over the top delicious and are a great treat for a special occasion, but I can't imagine eating these too often.  Plus, they are pretty labor-intensive so I can't imagine making them all the time either.  I would like to note that that is low fat greek yogurt in the photo above, not whipped cream, however!

I have been mainly making bread from the Artisan Bread in 5 minutes a day recipe lately, so my first thought was to adapt that basic dough to make sticky buns.  I actually didn't have a batch going at the time though, and I came across this recipe in Mollie Katzen's Sunlight Cafe (a delicious breakfast cookbook) and it sounded too good to pass up.  It was fun to really make, and knead, a regular yeasted bread for a change!  I didn't take any decent process photos unfortunately but hopefully you can get the idea from the recipe.  Also, I thought the amount of topping was really pretty excessive, so you could easily halve it (or more) and still have plenty of sticky deliciousness.

Sticky Buns
Adapted from Sunlight Cafe

For the dough:
  • 1/4 cup wrist-temperature water
  • 1 1/4 teaspoon yeast
  • 3 tablespoons sugar
  • 1 1/4 teaspoons salt
  • 1/2 cup plain yogurt
  • 1 large egg, beaten
  • 3 tablespoons melted butter
  • About 2 1/3 cups flour
  • nonstick spray
For the filling:
  • 1 tablespoon softened butter
  • 1 teaspoon cinnamon
  • 2 tablespoons sugar
For the sticky topping (see note above - I think a half recipe or less would be plenty):
  • 10 tablespoons butter
  • 1 cup packed brown sugar
  • 3/4 cup light corn syrup or real maple syrup (I used maple syrup)
  • 3/4 chopped walnuts or pecans

To make dough: place the water in a large mixing bowl, add the yeast and let stand for 5 minutes.  If your butter is hot from melting, mix it together with the yogurt to cool it down, then add the butter/yogurt, egg, sugar and salt to the yeast mixture and whisk to combine.  Add the first cup of flour and whisk to combine.  Add the second cup of flour and mix in with a wooden spoon.  Add about 1/3 cup more flour, kneading it in with your hands - you may need to add slightly more flour, but the dough should remain soft.  Knead until all the flour is incorporated.  Spray under the dough and on top of the dough with nonstick spray and cover with a clean dish towel and leave in a warm place to rise.  It should rise by half to three quarters, which should take an hour or longer.  You can refrigerate or freeze the dough (in a covered container or a ziploc bag) at this point if you want to finish making the sticky buns later.

To assemble the sticky buns: spray two 8" or 9" cake pans and a clean, dry countertop with non-stick spray.  Spray your fist with nonstick spray also and then punch down the dough and move it to the countertop and let it rest for 5-10 minutes.  While the dough is resting, melt the butter for the topping in a small saucepan over low heat, then add the sugar and stir until it melts.  Add the maple or corn syrup and stir until combined then remove from heat.  Pour the topping into the two prepared pans, dividing it equally, then sprinkle the chopped nuts in the pans as well.

Adding more nonstick spray to your hands if needed, stretch the dough into a rectangle measuring approximately 10" x 16".  Use a rubber spatula to spread the softened butter on the dough except for a 1/2" border at the edges.  Combine the sugar and cinnamon in a small bowl and then sprinkle the mixture evenly over the buttered surface.  Roll up the dough along the long edge to make a long log and pinch the dough together to seal where it overlaps.  Cut the rolled dough log into 16 equal slices (although I think I only got 13 or 14 out of mine, and it was fine), and stand them on end in the cake pans, on top of the topping and nuts.  If you had extra cinnamon sugar (I did), you can sprinkle it on the ends of the buns.  Cover the pans loosely with a clean dish towel and let stand in a warm place for an hour - the buns will rise by 1/2 to 3/4 in size.  15-20 minutes before the end of the rise, preheat the oven to 350.  Bake for 15-25 minutes, until the tops and edges are golden brown.  While the buns are baking spray a serving platter or a cookie sheet with nonstick spray to keep the finished buns from sticking.  When the buns come out of the oven carefully lift each one out of the pan with tongs and invert it onto the prepared tray/cookie sheet.  Spoon or pour the extra syrup over the tops of the buns (don't worry if it pools up under them).  Wait at least 20 minutes to serve.  These are super delicious if eaten within a few hours but will also keep fine if refrigerated for a few days or if frozen.

Enjoy!

Sunday, April 10, 2011

Tea Party and Lemon Squares


I had the tea party this weekend that I made invitations for earlier and it was lovely!  I didn't get any good photos of the setup for the party but since I kind of collect teapots (since I keep making them and don't give them all away), it worked out really well.  I wanted the party to feel like spring so I made more spring flower and animal themed sugar cookies (using my regular icing recipe this time), and we had blueberry muffins, fruit salad, cucumber tea sandwiches and hummus tea sandwiches, and lemon squares.


The lemon squares are, like the sugar cookies, from my family recipe, and they were really yummy as usual.  I actually cooked them a bit less than usual accidentally and they were less fully set but still light and delicious with a fresh lemon taste.


Lemon Squares

For shortbread crust:
  • 1 cup butter (2 sticks)
  • 1/2 cup confectioner's sugar
  • 2 cups flour
For lemon layer:
  • 4 eggs
  • 2 cups sugar
  • 5 tablespoons flour (1/4 cup + 1 tablespoon)
  • Juice of 2 lemons (5-6 tablespoons)
  • confectioner's sugar to sprinkle on top
Preheat oven to 350 and grease a 9x13 pan.  Mix together ingredients for shortbread crust until combined and dump mixture into the greased pan and pat into an even layer.  Bake 20 minutes.

Mix together ingredients for lemon layer and pour over crust.  Bake for another 25 minutes or slightly more, until edges are brown and top is beginning to slightly brown.  Remove from oven and lightly sprinkle confectioner's sugar on top (I use a sieve to evenly distribute it).  Let cool, cut into squares and serve.

Sunday, April 03, 2011

Pasta with Roasted Sweet Potatoes and Leeks


While I often say that black beans are my favorite food, sweet potatoes and winter squash are pretty high on the list too.  So I apologize to any of you that aren't fans, since I know that all three of these foods make very frequent appearances in the recipes here.  This was a quick dish that I made for dinner the other night that was pretty much inspired by the fact that I had peeled one too many sweet potatoes when making the Carribean sweet potato black bean gratin, and I needed to use it up before it went bad.  It turned out to be really delicious though so I wanted to share it here, both for your benefit and so that I can remember what I did the next time I want to make it.  The roasted sweet potato and leeks both give it a nice, sweet (but not cloying) taste, which is well balanced by the richness of the pepper and walnuts and the tartness of the goat cheese.  I think this would also be delicious, although in a different way, with winter squash.

Pasta with Roasted Sweet Potatoes and Leeks
  • 1 medium sweet potato
  • 1 leek
  • 1 clove garlic, minced
  • Aleppo peppers (more about them here) or regular crushed red peppers
  • Olive oil
  • 1/2 cup chopped walnuts
  • 1 lb pasta (or less)
  • 1-2 oz. goat cheese
  • salt to taste

Put on a large pot of salted water to boil on stovetop and set oven to 400.  Peel and chop sweet potato into ~1/2" cubes. Wash leek and finely chop white and light green parts.  Toss together sweet potato, garlic, red pepper flakes, and about 1 tablespoon oil and salt to taste in a roasting pan or on a baking sheet.  Put in oven to roast.

When water boils, put pasta in to cook. Toast walnuts until lightly browned.  Check roasting vegetables and stir after about 10 minutes.  When pasta is done cooking, drain and then check roasting vegetables - they should be about done after cooking for 15-20 minutes, which was about the time it took for my pasta water to boil and then my pasta to cook.  Put pasta in a bowl and top with walnuts, drizzle with another 1-2 tablespoons of olive oil (to taste), then add roasted veggies and salt to taste and stir to combine.  Crumble goat cheese on top and serve.

Tuesday, March 29, 2011

Carribean Sweet Potato Black Bean Gratin


I made this sweet potato gratin last week for the second time, and it again was really delicious.  It's from one of my favorite cookbooks, Moosewood Restaurant New Classics, which I find often has recipes that are interesting and delicious without being needlessly complicated - it's a good, solid everyday cookbook.  This dish actually took me a while to assemble but that also could be because I didn't have canned beans on hand so I cooked some in the pressure cooker, I had to pick the spinach and thyme from the garden, and I was just generally moving at a slow pace.  In any case, it is worth the effort.  I often make black bean and sweet potato dishes with southwestern flavor combinations, which I love, but the flavors in this dish are a welcome departure - sweet from the coconut and lime, but with an earthiness from the spinach and thyme - it really does taste carribean.  I couldn't quite think what to serve it with so we just had a salad but if you had time and wanted to make it more special I think fried plantains would be a great accompaniment!

Pottery note - the plate above is one that I made a few years ago, it has a simple carved design on the flange that I really like and a deep green glaze.  It doesn't match any of the other dishes we have which actually makes me like it even more.

Carribean Sweet Potato Black Bean Gratin
Adapted from Moosewood Restaurant New Classics
  • 1 garlic clove, minced or pressed
  • 1 1/2 teaspoons freshly grated lime zest (about 1 lime)
  • 2 tablespoons fresh lime juice (about 1 lime)
  • 2-3 tablespoons chopped fresh cilantro
  • 1/2 teaspoon dried or chopped fresh thyme
  • 1 1/2 teaspoons salt
  • 1/2 teaspoon ground black pepper
  • 2 1/2 cups light coconut milk (about 1 1/2 cans)
  • 4 cups peeled and thinly sliced sweet potatoes
  • 1 cup cooked brown rice
  • 1 1/2 cups cooked black beans (1 can, drained)
  • 1 1/2 cups fresh spinach, thinly chopped

For the topping:
  • 3/4 cup cornmeal
  • 1 tablespoon vegetable oil
  • 1/2 teaspoon dried or fresh chopped thyme
  • 1/4 teaspoon ground cumin
  • 1/4 teaspoon salt

Combine the garlic, lime zest and juice, herbs, salt and pepper and coconut milk in a measuring cup.  Pour a third of this mixture into a lightly oiled 9 x 13" baking pan.  Put half of the sweet potatoes in a layer on the bottom of the pan, followed by half of the rice, half of the beans, and half of the spinach.  Pour in another third of the coconut milk mixture and repeat the other layers.  Pour all the remaining coconut milk on top. 

Preheat oven to 350.  Mix together all the topping ingredients in a small bowl and distribute evenly over the top of the gratin.  Bake uncovered for about an hour, rotating the pan halfway through.  When topping begins to brown and the sweet potatoes are tender, remove and let cool for 3-5 minutes before serving.


Monday, March 21, 2011

Black Bean Hummus


I'm calling this black bean hummus because the ingredients and proportions were inspired by hummus, but it could just as easily be called "delicious black bean spread" or "semi-spicy black bean dip" so if those sound more appealing to you then feel free to call it one of them, or something else.  In my family we like to adapt ingredients to fit what is on hand so there is a story about the time when a dish was made where all the ingredients had been replaced with something similar... pears for apples, and so forth.  This is a bit like that - I used black beans in place of chick peas, toasted walnuts in place of tahini, lime juice in place of lemon, and added some aleppo pepper flakes for a bit of kick.  It still does have garlic, olive oil, and salt like the original, however.   I have made this before and I'm very glad I kept track of the proportions this time because it was delicious and I will definitely be making it again.


A note on the aleppo pepper: this is one of my favorite seasonings; it has a mild, slightly smoky, rich spiciness to it.  You can use them in place of red pepper flakes or ground chili peppers in cooking, so if you are tempted to get them, don't hesitate, you won't regret having them around.  However, if you don't see the need to add another spice to your cabinet or just want to make this right now without tracking down my favorite obscure spice, you can substitute most milder chili peppers or even chili powder.  If you have ground or canned chipotle peppers I am sure those would work very well too.

Black Bean Hummus
  • 1 can black beans, drained (or 2 cups cooked)
  • 1/2 cup chopped walnuts, toasted
  • 2-3 cloves of garlic, peeled
  • juice of 1 lime (~3-4 tablespoons)
  • 1 1/2 teaspoons aleppo pepper (or other chili pepper to taste)
  • 1 1/2 tablespoons olive oil
  • salt to taste (~1/2 - 1 teaspoon)
  • water
Blend ingredients through salt in food processor or blender.  Add water to get desired consistency.  Serve with crackers, chips, vegetables, or as a spread in sandwiches, or however else you wish!

PS - Don't forget to check out the raffle for handmade baby items to benefit Japan!

Thursday, March 17, 2011

Potato and Celeraic Puree


I jumped the gun a bit with my St. Patty's day post yesterday, so I thought I would put up a potato-related post for some more Irish cheer!

I bought a bunch of random vegetables at Whole Foods recently on a whim, which was great because then we had to find ways to eat them all up!  We had yummy steamed artichokes several nights in a row, braised leeks which are always a favorite... and then I kept forgetting about the celeraic (celery root) that I had bought and then rediscovering it in the fridge.  I thought about making a gratin and would love to do that another time, but decided to do something more basic and made a potato celeraic puree.  It looks like regular mashed potatoes but the celeraic gives it a lighter, more delicate taste.  I didn't take any pictures of the prep, which is really too bad since celeraic is so funny looking.

Potato and Celeraic Puree
Adapted from Chez Panisse Vegetables
  • 3-5 medium boiling potatoes (yukon gold or red potatoes are good)
  • 1 medium celery root (celeraic)
  • 3 tablespoons butter
  • 1 cup milk
  • salt and pepper
  • white wine vinegar (or you could try lemon - I bet that would be good too)
Peel the celeraic and chop into 3/4"-1" cubes.  Put celeraic and butter in a saucepan and add enough water to just cover.  Cook over medium heat with the lid on for about 25 minutes, until the celeraic is very tender.  You may need to add more water if it boils off and the celeraic is sticking to the pan.

Peel the potatoes and chop into approximately 1" or slightly larger cubes.  Put in a large pot and cover with plenty of water, add a dash of salt.  Bring water to a boil then reduce heat slightly and cook about 20 minutes until very tender, then drain.

Warm up the milk in a saucepan or the microwave (if microwaving, use 30 second or 1 minute increments and stir in between).  Puree the potatoes, celeraic and milk in food processor (the recipe suggests using a food mill or ricer, so you can also do that if you have one).  Add a splash of white vinegar and salt and pepper to taste and blend it all together.

Sunday, March 06, 2011

Braised Leeks with Vinagrette


Braised leeks are one of my favorite side dishes to make to go with a rich, creamy dinner.  They are pretty simple to prepare but have a delicate, clean flavor that is perfect when you are looking for a side dish that will complement a subtle main dish, not overpower it.  I think I first had this dish, or something similar, when I was an exchange student in France in high school (and a vegetarian at that time too), and it was one of the few things they made that I could eat.  I started making them myself a few years ago and loved rediscovering the delicious flavor.

I have mentioned this recipe a number of times, from when I made butternut squash lasagne to when I made handmade ravioli for valentines day, but I have never shared the recipe.  I figured it was time to amend that situation and finally took pictures when I made them tonight!d  I also made pasta with a mushroom cream sauce but it didn't turn out as well as I remember it from the last time I made it, so I am going to try that recipe again before it makes an appearance here.


Braised Leeks with Vinagrette
Adapted from Deborah Madison's Vegetarian Cooking for Everyone
  • several sprigs of fresh parsley
  • several sprigs of fresh thyme
  • 2-3 dried bay leaves
  • 2 carrots, cut into pieces lengthwise
  • 1 or 2 celery stalks, cut into pieces lengthwise
  • 2-3 quarts of water
  • salt to taste
  • 4-6 large leeks, white parts only, cut down the middle lengthwise and cleaned well
  • vinagrette of your choice - I use a red wine vinagrette made with the Country French Vinagrette Herb mix from Penzey's
Fill a large dutch oven or pan with the water, herbs and vegetables other than the leeks and bring to a simmer.  Slip the leeks into the water and simmer for 15-25 minutes, until tender (you can check by poking with a fork or tip of a sharp knife).  Remove the leeks - I like to lift each one out with tongs and let it drip over the pan - and place in a shallow serving dish.  Drizzle with vinagrette and serve warm or at room temperature. I also find that the carrots and celery can be quite delicious too, so feel free to serve them too if you like.  Also, the cooking water can be strained and saved as a mild but delicious vegetable stock (will store indefinitely in freezer).

Tuesday, January 04, 2011

Sauteed Mushroom and Leek Crepes


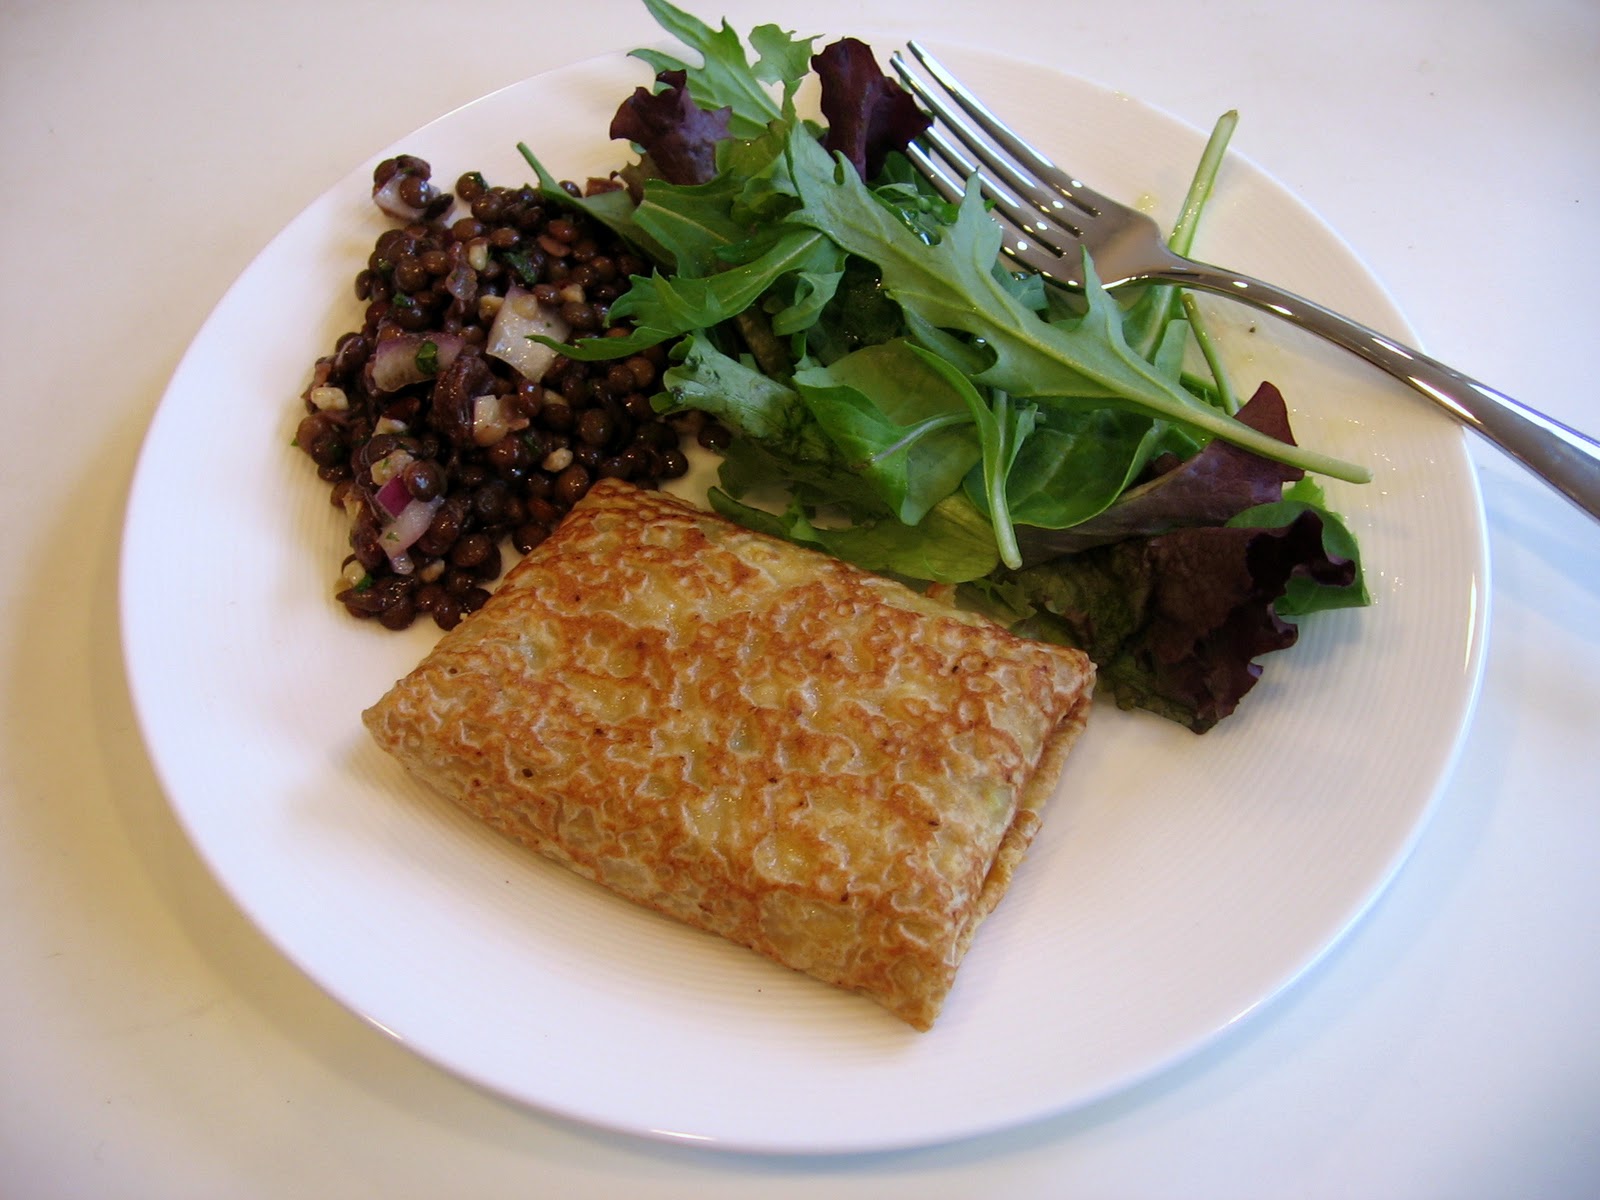
I made these crepes for dinner a few weeks ago, and wasn't totally thrilled with the seasonings, so I made them again and tweaked the recipe this past weekend, subbing other herbs for the terragon.  I liked them a lot better this way, but Lawson says he liked the original way better, so I am including both variations... I guess it depends if you are a terragon person or not.  These are from a crepe cookbook that a friend gave me a few years ago, and looking through these recipes made me want to make crepes more often!  I am looking forward to experimenting with different fillings and different ways of wrapping/putting together the crepes.  We served the crepes for brunch with an old favorite french lentil salad, green salad and mimosas.  We're starting the new year off right around here!

I made the crepes with King Arthur Flour's white whole wheat, and I found that they had a full, nutty flavor but weren't as heavy as regular whole wheat (and I didn't use any regular all purpose mixed in, they were 100% white whole wheat).  King Arthur says it is a different variety of wheat than regular whole wheat, but is still a whole grain, so that is good news for those of us trying to incorporate more whole grains into our diets.  This is the second time I have had this flour, the first time was actually an accident - I had asked Lawson to get unbleached white flour at the store and this is what came home - so I used it a bit and decided I liked it.  I am looking forward to doing some more experimenting with this flour.

Sauteed Mushroom and Leek Crepes
Adapted from Crepes, Sweet and Savory Recipes for the Home Cook

For the crepes:
  • 2 large eggs
  • 1 cup milk
  • 1/3 cup water
  • 1 cup flour - I used white whole wheat, if you don't have that, you could use 1/2 regular whole wheat and 1/2 white flour
  • 1/4 teaspoon salt
  • 2 tablespoons melted butter, plus some additional butter for coating the pan
Blend all the ingredients together in a blender or food processor for a few seconds, stopping and scraping down the sides if needed to make sure that everything gets well mixed together.  Cover and refrigerate 1-2 hours or longer (overnight is fine).  Stir the batter to mix it back up, then heat a crepe pan over medium heat until hot (if you don't have a crepe pan, you should be able to use a regular skillet, particularly if it is non-stick), coat the pan lightly with butter.  With the pan off the heat, pour 2-3 tablespoons of batter on one side and then rotate the pan to get the batter to spread over the whole surface.  Cook on the heat until the crepe is nearly dry on top and the edges start to brown - 1-2 minutes.  Use a metal spatula to lift the edge and flip the crepe, then cook the other side for 15-30 seconds, until lightly browned in spots.  Stack the crepes on a plate when they are done and repeat until you have used all the batter.  You can make the crepes in advance - they should keep in the fridge for a few days if covered with plastic wrap, or you can freeze them in zip-top bags.

For the filling:
  • 2 tablespoons olive oil
  • 5-6 leeks, washed and chopped (white and light green parts only)
  • 6-8 ounces cremini mushrooms or wild mushrooms (if available), chopped
  • 1 egg
  • 3/4 cup - 1 cup ricotta cheese
  • 1/2 cup shredded gruyere cheese
  • 2 garlic cloves, minced
  • 1/2 teaspoon dried thyme leaves and 1/4 teaspoon dried marjoram 
  • OR 1/2 teaspoon dried terragon instead of herbs above (depending on your preference)
  • salt
To make the filling, heat 1 tablespoon of the oil in a medium to large skillet, then saute the leeks over medium heat for about 15 minutes, until they are soft and starting to brown.  Add the mushrooms and the herbs and saute until the mushrooms release their juices, 4-5 minutes.  In a large bowl, mix together the remaining ingredients together with the mushrooms and leeks.


Preheat oven to 350 F and and grease a 9'x13' baking dish.  To assemble the crepes, put 1/3-1/2 cup of filling in the center of each crepe and fold the sides in, and then fold the top and bottom over as shown above.  Place the folded crepes with the open side down in the baking pan and then either brush the tops with more olive oil, or spray with olive oil spray (this is what I did and it worked fine) - or you could probably skip the brushing/spraying and it would be fine.  Bake in the oven for 15-20 minutes, until fully heated through.  Enjoy - they taste best warm but would also be fine at room temp, I think.

Related Posts Plugin for WordPress, Blogger...