Showing posts with label kids. Show all posts

Thursday, November 06, 2014

Uptown Girl Coat Pattern Review

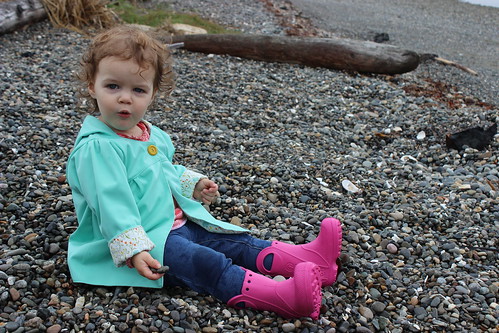
Uptown raincoat 1

Lately I have been making nearly all of Esther's clothes (except a few things, like jeans) - it's actually become a bit of a problem that I can't get myself to stop making her clothes and work on any of my other sewing projects! In any case, I thought it would be fun to sew her a raincoat. I bought the uptown girl coat pattern from Make it Perfect and sewed up the coat using aqua PUL (waterproof fabric often used in cloth diaper covers), lined in quilting cotton (one of the newly re-released far far away prints from Heather Ross), and using a vintage button from my stash.  This was my first coat-sewing experience and I think it turned out pretty cute!
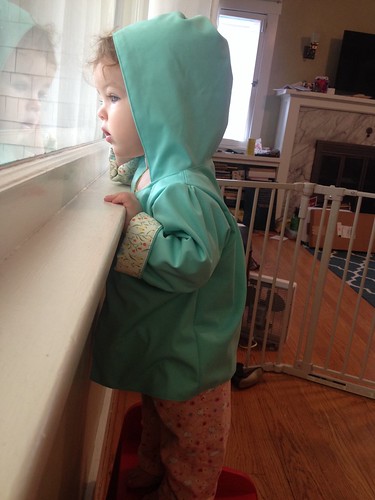
Uptown raincoat 2

The pattern was well written and the construction of the jacket was well-thought out - I liked how they had you turn it through a sleeve (although it might not work well if you used a more stiff and bulky outer fabric).  I read some other reviews online and made a size 1 for width and a size 2 for length, since Esther is on the long and lean side and I didn't want it to be too bulky, plus the fit is loose anyways.  My one gripe with the pattern is that the hood is really not deep enough and as a result it doesn't stay up on her head well - not great when we are out playing in the rain.
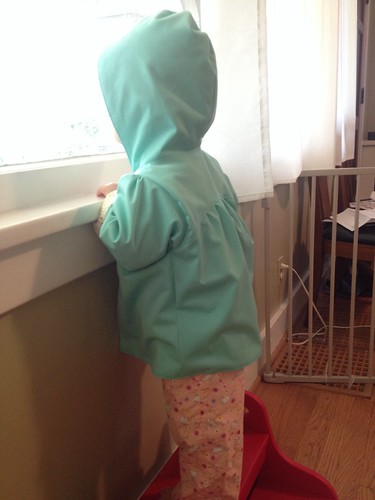
Uptown raincoat 3

I wasn't sure how the PUL would work with this pattern, especially with the gathers, but it worked pretty well, and the finished coat is soft and comfortable.  As cute as the lining is, in retrospect I wish that I had lined it with a lightweight fleece instead, since the cotton at the cuffs gets wet and dirty really easily.  Esther loves the coat though, and whenever she sees it she wants to put it on and then go outside and play!
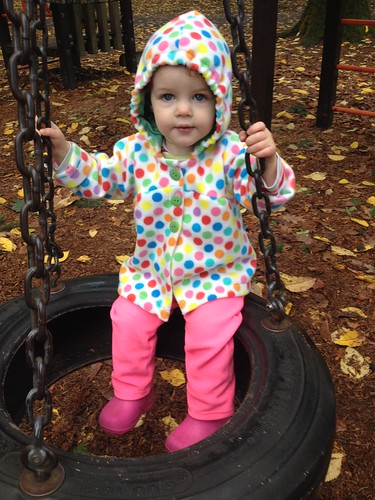
Uptown fleece 1

I wanted to give this pattern another try with a deeper hood, and Esther was needing a lightweight fleece jacket (for the occasional non-rainy day that we get), so I bought this cute polka dot fleece fabric from fabric.com.  I love how this coat turned out and she has already gotten a lot of use out of it!
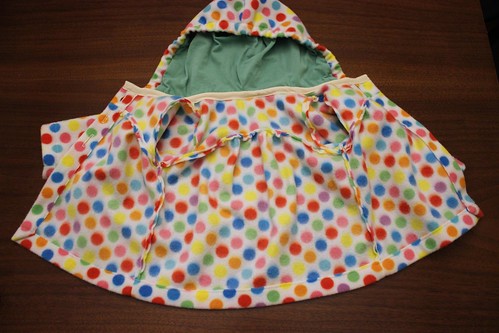
Uptown fleece inside

I decided to make the jacket unlined but to line the hood with a lightweight green jersey (from an upcycled t-shirt).  To convert the pattern to be unlined I added extra width at the jacket fronts to fold over and create a placket, and extra length at the bottom and the sleeves to make hems.  To make the hood deeper I added something like 2.5" to the outer hood edge and 1/2" to the lining hood edge, so that the overall hood would be 1.5" deeper, with the fleece wrapping around to the inside.  I also sewed the edge of the hood into a casing and put in an elastic to make sure the hood would stay up well.  Finally, I finished the neck edge of the jacket with a strip of off-white jersey.  I left the rest of the inside seams unfinished, since they aren't visible and the fleece doesn't fray.

I also altered the sleeve pattern to make the sleeves a bit less full and take out the gathers at the top of the sleeves, just as my personal preference.  For the closure I used three large green buttons from my button stash instead of the one button the pattern calls for and I think it looks really cute!
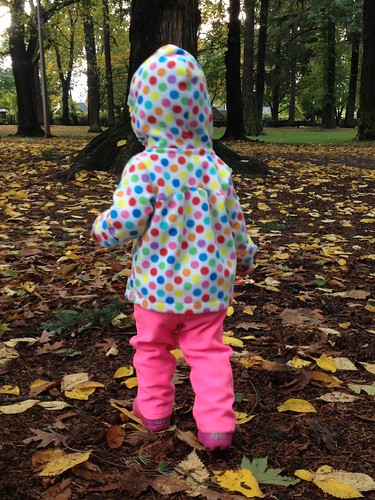
Uptown fleece 2

The hood fits great with the extra depth and really stays up, I like the effect of adding the elastic.  The gathers in the pattern are really cute in the fleece and it was quick to sew up since I had already made it once and I skipped the lining this time.

After making these two coats I decided to try another coat pattern and make Esther another rain coat with laminated cotton so I'll be back to share that soon!  In the meantime, wish me luck peeling myself away from sewing yet more toddler clothes to actually work on other projects - like maybe some clothes for me for once?  Not to mention that it is now NOVEMBER and I should really get cracking on some holiday sewing!

Saturday, November 01, 2014

Halloween Monkey Costume

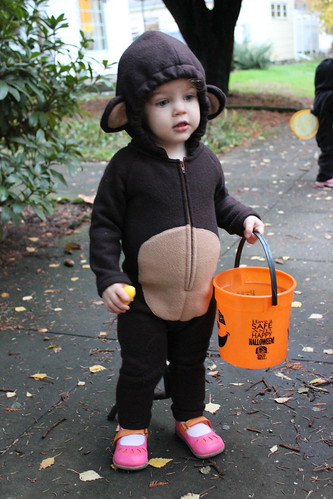
IMG_3116

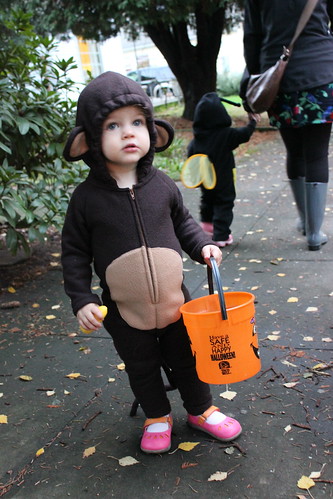
This year was Esther's first time trick or treating so I was really excited to sew her costume.  We decided she should be a monkey since the "ee ee" monkey noise is one of the animal noises she likes to make, but it is also very appropriate since she is a big climber and explorer, always keeping us on our toes.

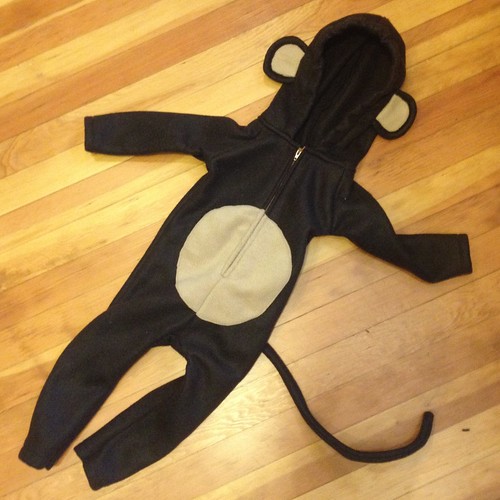
15501728558_7a144f4e72_o

I traced some pajamas to draft a pattern and then added a hood, ears and a tail.  I probably could have added a bit more ease, it was a little snug but the fleece had enough stretch that it worked out.  I put pipecleaners in the tail so it could be bent into shape.  I possibly should have put the tummy patch a bit higher (and made the ears a bit smaller) but all in all I am really happy with how it turned out!

I came up with a pretty easy way to make the ears so I took some photos as I was working to show you how:

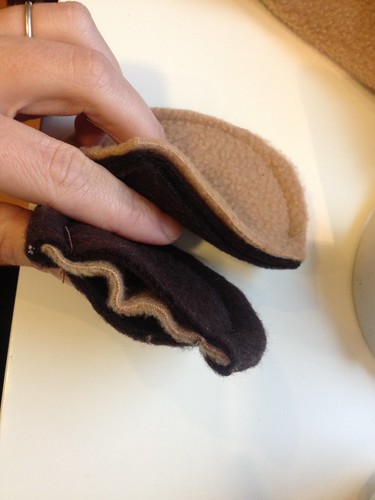
15501722608_4c133e6e5d_o

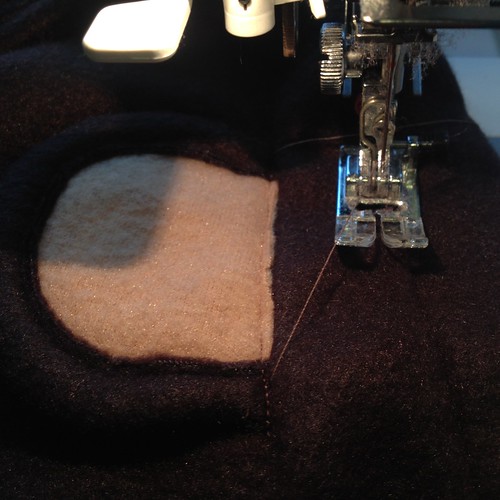
I layered two pieces of brown felt with one piece of beige felt on top, and sewed an ear shape with one side open, then trimmed it close to the seam.  Then I turned it inside out so that the beige felt was sandwiched between the two pieces of brown felt, and sewed around about 3/8" from the seam to create the ear lobe.

15687112245_fbb6bf3df5_o

Then I trimmed out the inner part of the brown fleece on one side of each ear, close to the seam.

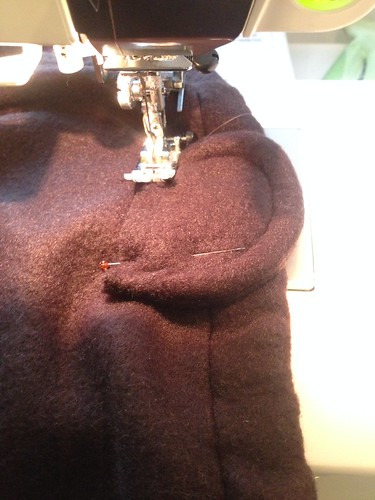
15687112685_a62ed6d676_o

To attach the ears to the hood, after deciding where to place them, I first sewed them down face down (facing forward).

15685198671_28bdf4da88_o

Then I flipped the ears back and sewed a seam just barely catching the front edge of the ear, which made them stick out nicely.

IMG_3113

Happy halloween from my monkey to you!

Wednesday, October 08, 2014

Dr. Seuss Outfit

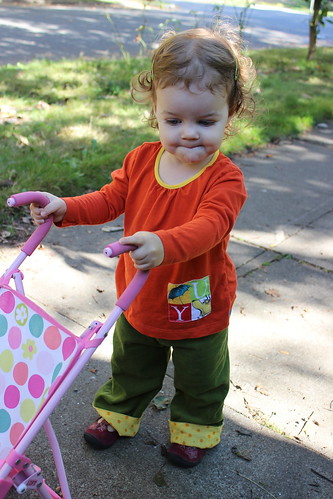
I am very excited to be participating in the Fat Quarter Shop Dream Big with Dr. Seuss blogger challenge, using their Dr. Seuss ABC's Fat Quarter bundleDr. Seuss's ABC's is a favorite book in our house, so I was very excited about these fabrics, and I kept having phrases from the book pop in my head as I was working with them (it's catchy!).  Fat Quarter Shop put together a video tutorial showing how to make a cute baby quilt with the bundle; I went in a different direction and made a cute toddler outfit.

seuss outfit

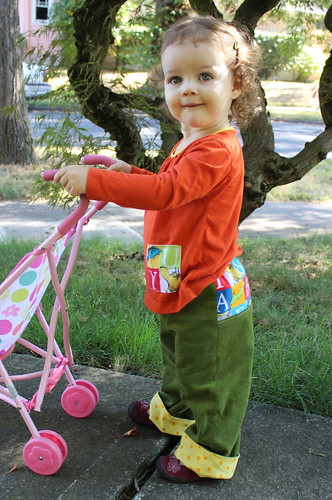
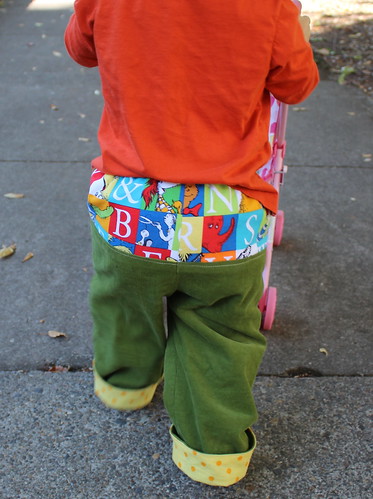
Esther has nearly outgrown her last set of quick change pants, so I made her some 24 month sized ones to last through the winter. The main fabric for these pants is a lightweight green corduroy that I had on hand, and I used the ABC patchwork print for the bum panel and a patch on the shirt.  Rather than making the pants reversible, they are mostly lined in upcycled flannel (from a sheet) with the yellow polka dot print just on the bottom inside to make a cute cuff.

back of pants

The alphabet bum is so cute and colorful!  In making the pants, I made the same basic modifications as my last pairs - I narrowed the outside leg seams (making the waist/legs wider) but them added more curve to the inseam to make the legs a bit narrower again.  That way they aren't too much of a squeeze to get on over her diaper bum but have a bit less of a boxy look.

seuss pants front

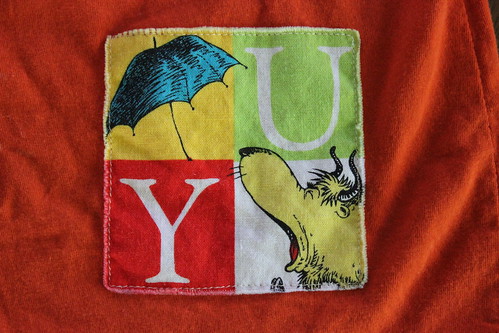
Not that I shy away from unisex clothes, but I thought with the boy-ish style and colors of the pants, it would be good to have a shirt that was more clearly a girls style.  I upcycled a orange shirt to make a long sleeved top with a gathered neckline (my own pattern), with yellow fold-over elastic for the neckband giving a nice contrast color.  I wanted the shirt to tie in with the pants so I put a patch on from the same patchwork ABC fabric.

umbrella yak patch

Originally I cut a patch out of the big alphabet panel to use on this shirt (with the E elephant for Esther) but it was a bigger patch and it was too stiff to work well with the gathers in the neckline.  So I picked it out and made this smaller, lower patch and am saving the E for another shirt!  I am planning to save the rest of the panel to use for applique patches for other kids items in the future - I foresee lots of cute initial T-shirt gifts.

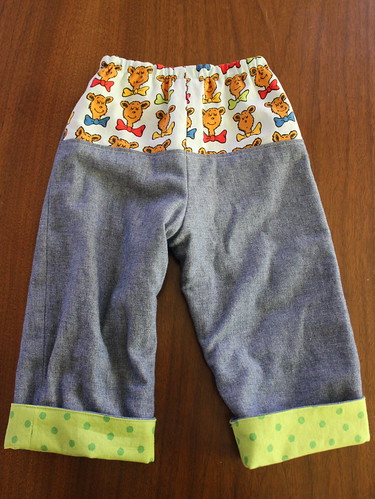
I also made a second pair of pants which turned out even more boy-ish so I think I am going to save them for a future baby gift.

bear pants

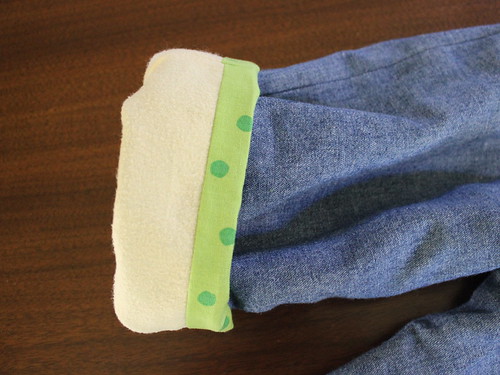
I used the bear fabric for the bum panel on these and the green dot for the contrast cuff lining.  The main fabric for these is upcycled from a chambray shirt of Lawson's, and I actually used the reverse side which was a bit lighter.  I lined these pants in upcycled flannel as well, so both pairs of pants should be nice and warm for the winter.

flannel lining

I usually think of sewing kids clothes with fabric yardage so this was a fun challenge to realize how much I could do with a few fat quarters!

Disclosure: Fat Quarter Shop provided me with the fat quarter bundle of fabric for this challenge, but all opinions expressed are my own.

Saturday, March 01, 2014

Guest Post on Sew Mama Sew


I am super excited to be sharing a tutorial for an Offset Raglan Top for Kids over on Sew Mama Sew. Hop on over and check it out (and see the photos of my adorable model wearing it)!

Thursday, February 06, 2014

Winter 2014 Kids Clothes Week

leggings skirt

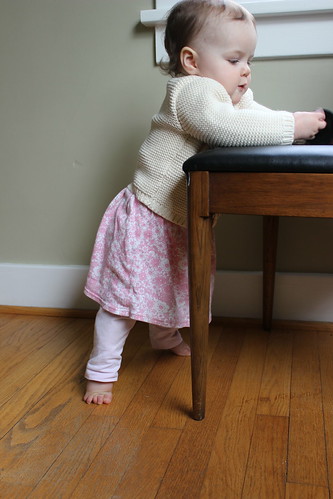
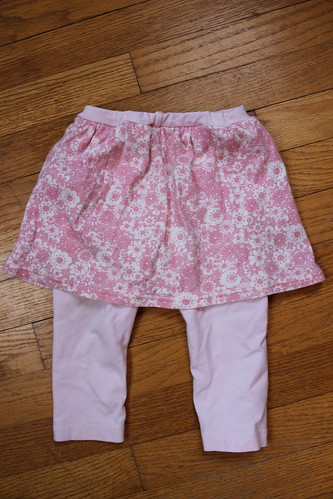
Last week was the winter 2014 Kids Clothes Week challenge, and I was able to nearly meet the challenge to sew kids clothes for an hour each day all week... I missed one day because Esther was teething and was having trouble sleeping and I've been having problems with waking her up by sewing if she is sleeping too lightly, so I didn't want to push it by trying to sew.  Really hoping she outgrows this problem soon or I may have to rethink having my sewing area upstairs near her bedroom.  In any case, I was happy that I got to sew so much and I made some cute (and useful) new clothes for Esther!  I had had the idea to make a skirt attached to leggings after seeing a pair of leggings with a shorter ruffle attached on a friend's baby.

leggings skirt 2

I made both the leggings and the skirt from upcycled knit shirts, reusing the original hems.  It turned out really cute although for the next iteration I will probably make the skirt a bit shorter!  Having the skirt attached to the leggings makes it a bit less likely to get in the way when she's crawling and also just makes it easier dressing and undressing her (which it feels like I do a thousand times a day with diaper changes etc).

knit pants

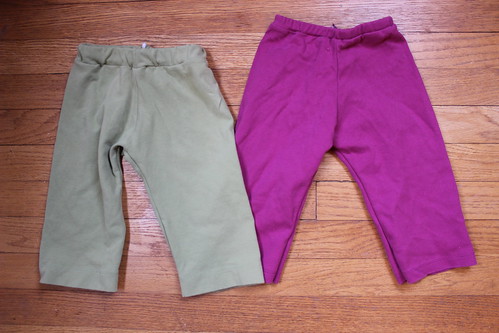
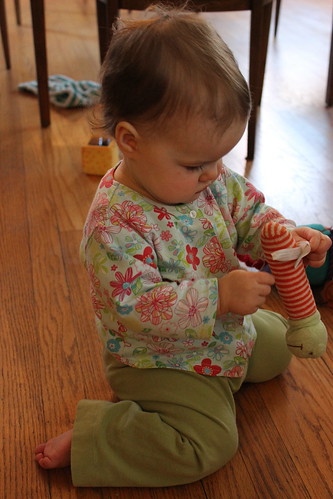
I also made several pairs of upcycled pants/leggings - these two were made from heavy interlock turtlenecks which turn out to make the perfect weight for cold weather baby pants.  I didn't get a picture of another pair of leggings I made out of a cute pink fabric with tiny white hearts on it - unfortunately the fabric stretched out quite a bit when she wore them so that's a bummer, but she'll still probably get some good use out of them for the next few weeks around valentine's day.  You can see the green pants are super comfy:

green pants

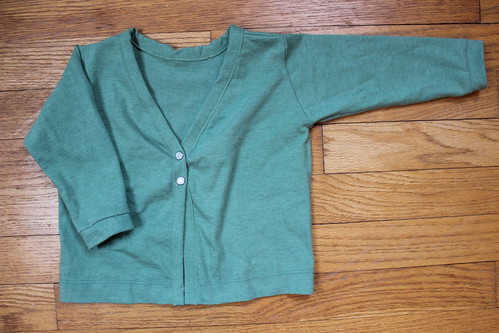
I also made a couple upcycled knit cardigans similar to the ones I made for the last KCW (here and here) but in a big larger size.  As you may be able to tell from the photos in this post, getting Esther to stay still long enough to get a good photo of her wearing the clothes I make continues to be a challenge, she is really always on the go (or trying to grab the camera), not to mention that she doesn't love having her clothes changed - so I didn't get shots of all the clothes on her.  You can still get a pretty good idea of this shirt, though, I think - I improvised the v-neck and am really happy with how the binding I put on around the neck/placket turned out.

green v-neck cardigan

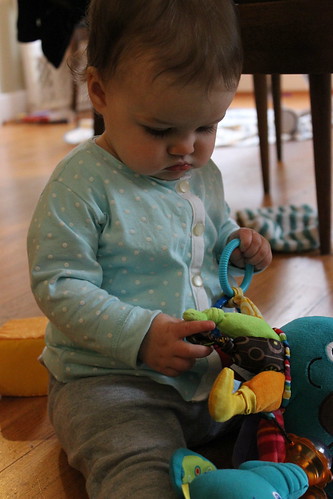
My favorite project from this KCW is definitely this aqua cardigan, which should fit her for quite a while - the sleeves are rolled up about 2-3" here.

aqua cardigan

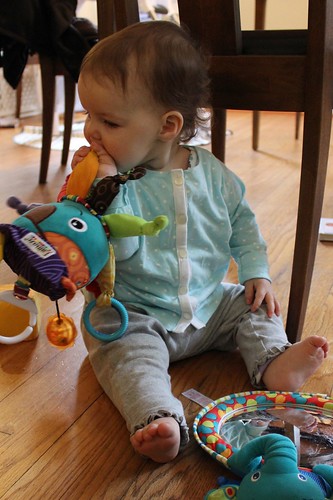
I love how the white binding on the button placket gives this a sophisticated look and the white buttons echo the polka dots.  She has gotten a ton of use out of the cardigans I made her for the last KCW so I may just keep making them in successively larger sizes as she grows!

aqua cardigan 2

Tuesday, July 12, 2011

Decorated Kids' T-shirts

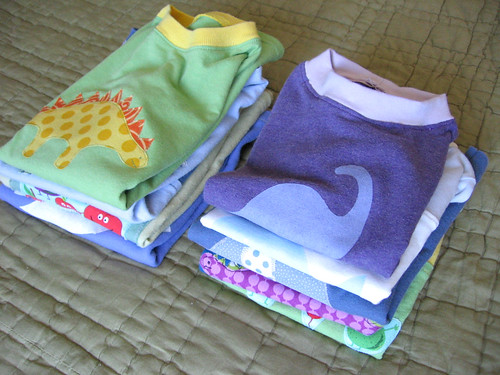
Stacked t-shirts

Since Wednesday, when I showed off a few t-shirts that I had sewed, I have made several more t-shirts and then decorated them all.  I was having so much fun making them that I went to the thrift store and bought some more t-shirts and jersey pillowcases to repurpose so that I could make more of them!  I ended up making 5 small (18 month size) t-shirts for my nephew (who is about to turn 1 - but I think he is on the big side and I wasn't sure how the sizing would work so I erred on the side of larger), and 4 larger (4 year old size) t-shirts for project first day.  It's a good thing I didn't get more supplies at the thrift store or I would still be making these, they are so fun to make and to decorate!

freezer paper stenciled t-shirts

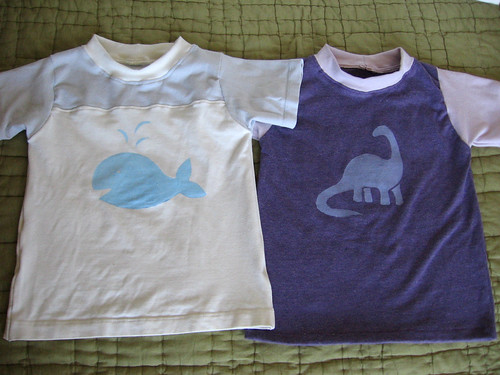
My original plan had been to do freezer paper stencils on all of them, similar to the onesies we decorated as a baby shower activity.  I did do a few this way and am really happy with how they turned out - I especially love the purple dino on the right above.  These two are both in the little size...

freezer paper stencil whale t-shirt

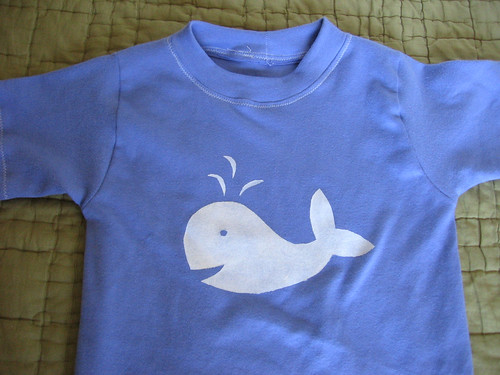
And I also decorated this bigger sized one with a whale.  I was a little concerned that the blue might look too lavender colored to be for a boy, so hopefully the whale helps keep it boy-appropriate.

veggie and dino t-shirts

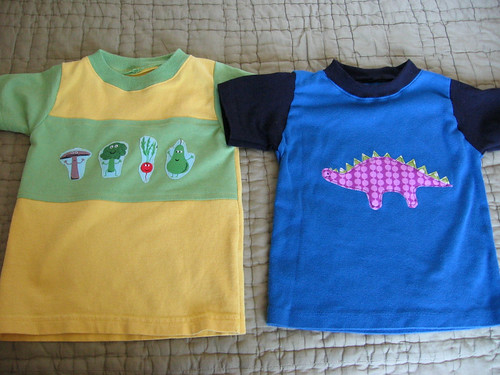
I ended up decorating most of them with fabric appliques, though, which I think turned out really cute!  These are both the little size.  I colorblocked the green and yellow t-shirt (and a number of others you will see), mostly because the fabric wasn't big enough otherwise.  The pattern (charlie tee from Fishsticks Designs) has pattern piece options for colorblocking but I just winged it, sewing the fabrics together first and then cutting the pattern piece out of the colorblocked piece.

veggie detail

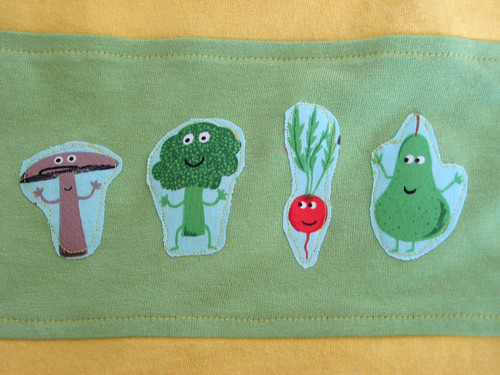
I used some of my leftover edgy veggie fabric from backing the rainbow rail quilt to applique a few cute veggie guys on the front band of this shirt.  I used the stretch stitch (that looks like a lightning bolt) to do all the seaming on these t-shirts, usually with my walking foot, and as you can see it looks mostly like a straight stitch and works fine even for top-stitching.

back detail

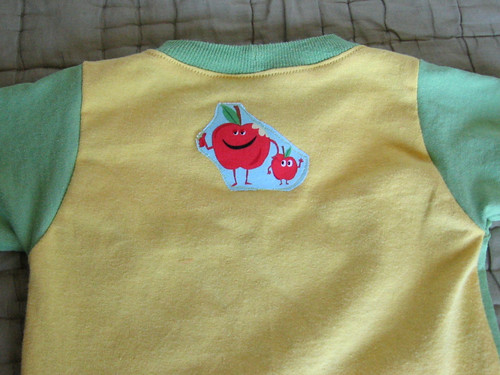
And I put a cute pair of apples on the back, too.

dino and elephant applique tees

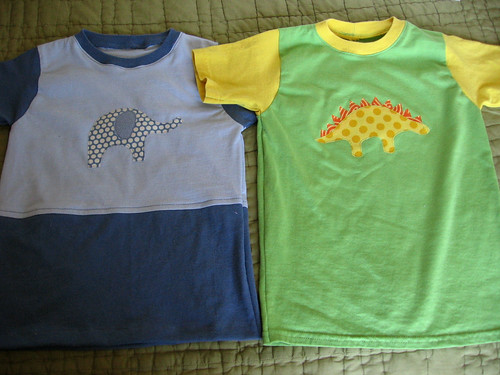
These two are the bigger size.  On a lot of these tees I was able to reuse the existing hem from the t-shirt and on the sleeves (adjusting the pattern to remove the hem allowance), and on both of these (and a few others) I was able to reuse the neck ribbing too - it was kind of a pain to rip out of the original t-shirt, but the necklines definitely turned out the best for these so I'm glad I did it!  You may also be noticing that I really liked the look of using one color for the body of the tee and another for the sleeves and neckline - it works out well because you can basically combine two existing tees to make two new ones.

dino detail 2

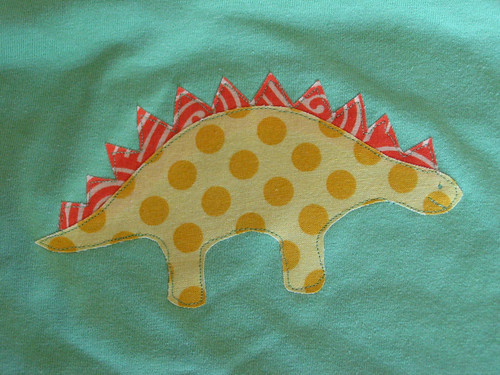
I love the cute dinos on this t-shirt and on the blue t-shirt!  I especially like the little face I was able to make since I did free-motion applique to sew it down.

elephant applique 2

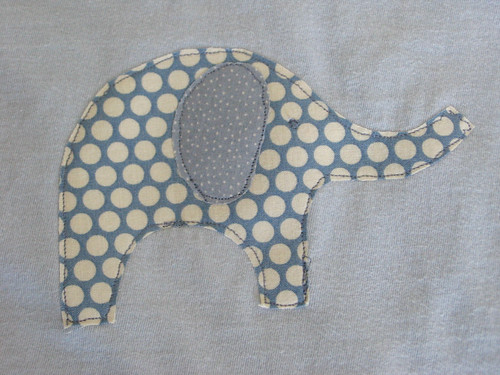
I love the elephant too.

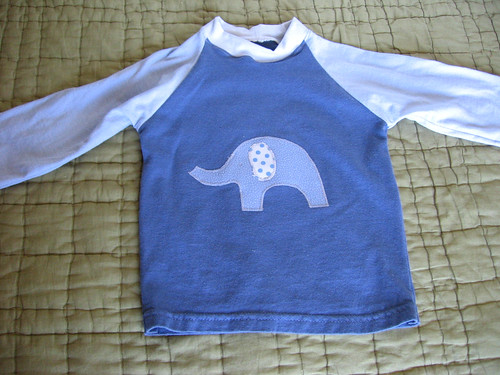
long sleeve elephant raglan tee

I also made a long-sleeve raglan t-shirt in the little size with an elephant on it.

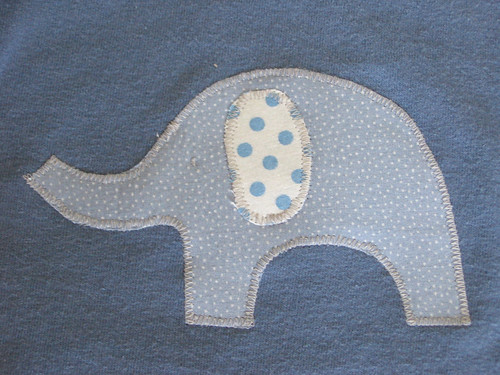
elephant applique 1

This was the first applique that I did of the set and I sewed it down with a zigzag, which I think looks cute too.   I ended up doing the rest with free-motion applique because I found it a bit easier and I like the loose drawing-like quality of the line.

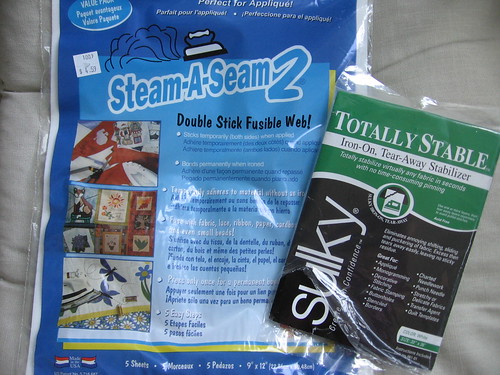
fusible web and stabilizer

At first I used both fusible web and iron-on tear-away stabilizer when I was doing the appliques, but towards the end I realized that the fusible web alone really stabilized it enough and I skipped using the stabilizer.  For most of the t-shirts, I did the applique after I cut out the pattern pieces but before I assembled the t-shirt, so that the fabric was easy to keep nice and flat.  I did sew the purple dino on the blue shirt after it was already assembled, though, and it worked fine too - I just had to go slow and adjust it a few times.

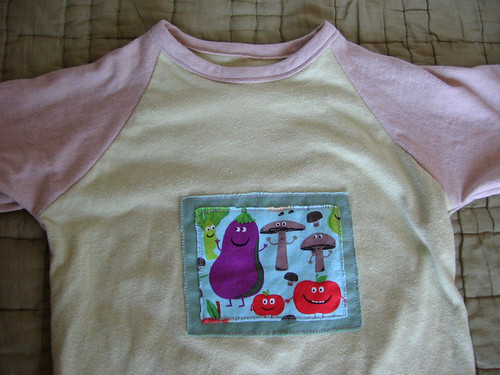
veggie patch applique t-shirt

Finally, I also made a raglan tee in the bigger size (using the fishsticks Rockin Raglan pattern) with an edgy veggie fabric patch on front.  For this patch, I wanted to edges to be frayed so I didn't use the fusible web and so I did need to use the stabilizer.  I used a few dabs of glue to keep the two layered fabric patches in place sewed both down with a straight stitch, going around twice to make sure they were well-secured since they weren't fused in place.  Then I used my fingernail to loosen the stray threads and fray the edges a bit.

I also did a different neck on this t-shirt because I didn't have any matching ribbing, interlock, or extra-stretchy jersey.  I just used regular jersey and sewed it on in a single layer, than folded it around to the back and top-stitched it down - it makes a cute, thinner neckline.  I know those directions probably don't explain it well enough, I am hoping to do another project soon that uses this and I'll be sure to take pictures to explain it better if I do.

Sorry for the super long post, I just had so much fun making these that I wanted to show them all to you!
Related Posts Plugin for WordPress, Blogger...