Showing posts with label crafts. Show all posts

Monday, January 09, 2012

Happy New Year!

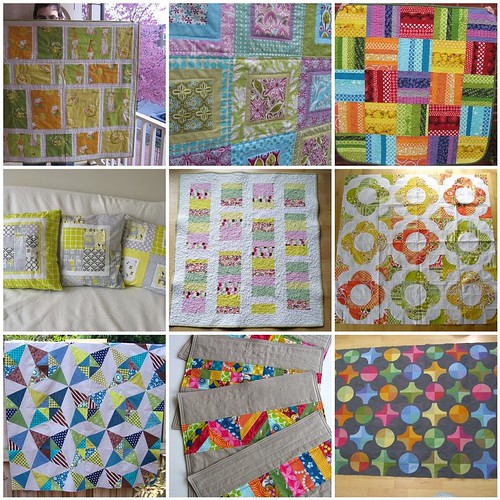
OK, I know that it's more than a week into the new year... but I figured it wasn't too late to share some of my 2011 craft highlights with you all.  Despite my telling myself that I am not a multiple works-in-progress kind of person, I have managed to stack up 3 unquilted quilt tops, so this mosaic includes both quilt tops and finished quilts (as well as a few other patchwork items):

patchwork mosaic

1. Far far away quilt 2, 2. Central Park Quilt - Detail, 3. Rainbow Rail Quilt Finished, 4. All three yellow and grey nesting chairs pillows, 5. stacked coins quilt, 6. Drunkards Path Quilt Top, 7. Kaleidoscope Quilt Top, 8. SUTK Placemats, 9. Drunkard's Path Quilt Top


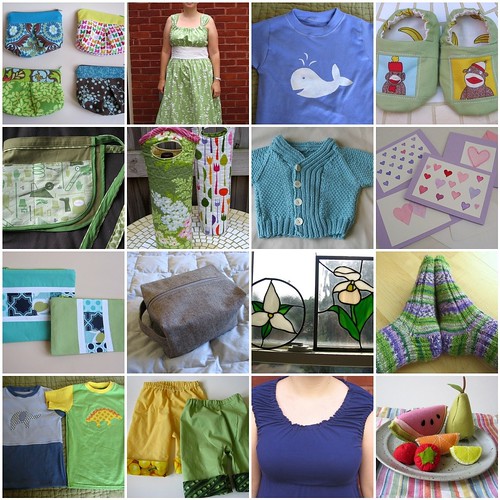
It was fun looking back through my Flickr stream at my various other crafty projects for the year - this is kind of a random potpourri of sewing and other crafts:

crafts mosaic

1. pleated pouches, 2. Jamie Dress, 3. freezer paper stencil whale t-shirt, 4. Monkey baby shoes, 5. Garden Apron Tool Belt 2, 6. Quilted Wine Tote, 7. L'illo baby sweater, 8. Watercolor valentines, 9. aqua and green patchwork clutches, 10. Box Bag 3, 11. Trillium and Ladyslipper Stained Glass, 12. purple and green socks, 13. dino and elephant applique tees, 14. Vegetable Big Butt Baby Pants, 15. Blue Peasant Dress Bodice, 16. Felt Fruit


Here's to another great year of crafting and blogging!

Friday, July 08, 2011

Big Little Felt Universe Book Review

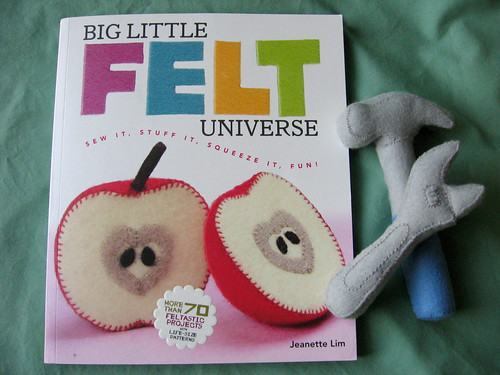
Big Little Felt Universe

After I mentioned in my post about making felt food that my carrot was based on the design in Big Little Felt Universe but I didn't actually own the book, the publisher Lark Crafts contacted me to ask if I would like a copy to review.  Having had a chance to look through the book briefly, I knew how great it was and didn't hesitate to say yes!  This book really goes above and beyond in the quality and detail of instructions and, with over 70 patterns, is a great value if you have ever wanted to make felt food or other felt softies.  All the patterns in this book are handsewn, and there are a projects with a range of difficulty from simpler vegetables to an intricate cake with individual icing swirls and berries on top.

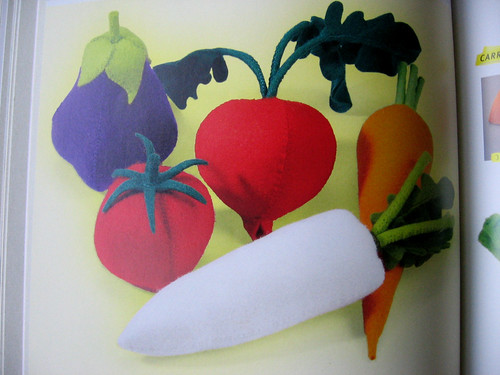
Veggies

I tend to think of food first when thinking of softies to make from felt, and this book has some really great ones.  They have a really nice set of veggie patterns - I love the way they have you make a little tube for the stems, making them more sturdy and realistic.

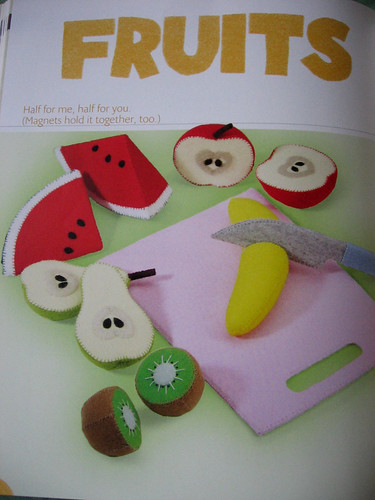
Fruits Page

The fruit patterns are amazing and are all designed with either velcro or internal magnets to hold together two halves that can then be "cut" apart with a play knife.  I think this is a great idea that would definitely make them more interactive for a kiddo to play with, but if you wanted you could easily modify the pattern and just make one half without worrying about the velcro part, or combine the two pattern pieces to make a whole fruit that doesn't separate.

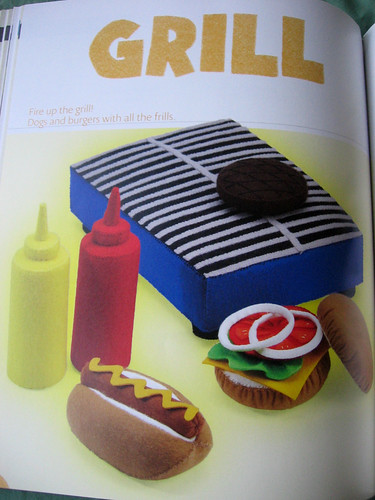
Grill Page

I also loved the hamburger (or, in our household, black bean burger) with veggie toppings - I can definitely see myself making one of these in the future.

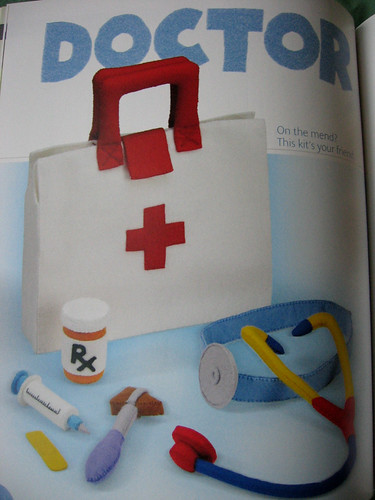
Doctor Page

While I immediately gravitated toward the food patterns, the book also has lots of other imaginative pattern ideas, from the doctor set above, to an office set (complete with laptop, calculator, and stapler), to a little girls purse with a cellphone and makeup.  It took some serious self restraint not to include photos of every chapter intro page here, they are all so cute!

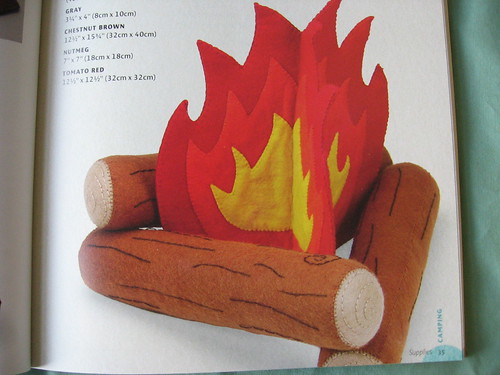
Campfire

There's also a whole camping set including this adorable campfire - another one I can definitely see myself making in the future.

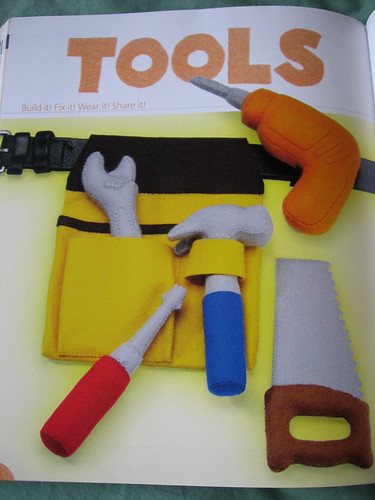
Tools Page

I wanted to try out a pattern to be able to do more than just gush about the cute pictures in this review, and while I was tempted by all the fun fruits and veggies, I decided to branch out since I just made a whole slew of felt food.  While my adorable nephew is a bit young to play with felt softies, I decided it wouldn't hurt to start making some for him that his parents can give him when he is old enough to play with them.  Since my brother is a contractor and works with tools all the time, I thought some of these cute play tools would be a surefire hit!

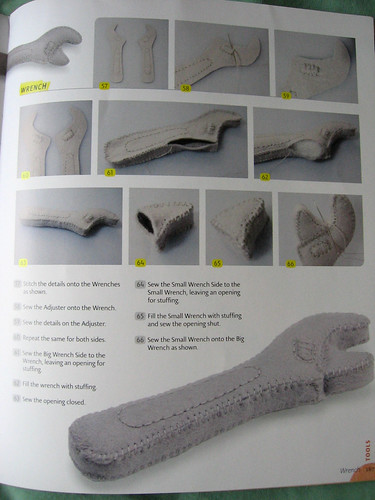
Wrench step by step

In addition to the large number of projects, something that makes this book stand out among other craft books is the fact that it includes full-size patterns for each project and super detailed instructions with step-by-step photos showing how to assemble the item.  I love that when the urge to make something strikes, you can trace the pattern with paper at home rather than having to run out to the copy shop to enlarge a pattern.  The patterns are well-designed and with the step-by-step instructions you aren't left wondering how they got it to turn out that way or scratching your head at cryptic written instructions.
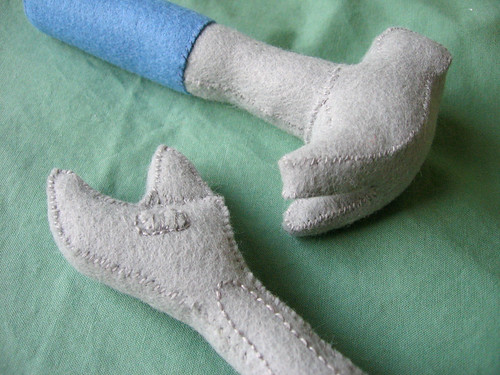
Felt Tools

I made the hammer and wrench and may well make more items from the set in the future.  I loved how these both had great details - the little screw adjustor on the wrench and the claw on the hammer in particular.  I was hanging out with my mom and a bit distracted when I started making the hammer and I messed up the head a bit, but it turned out great on my second try (I did tweak the order of construction a bit and found that the hammer head came together better when I slightly modified one of the pattern pieces - but I am the kind of person who always finds a way to make the pattern my own way).

There are a lot of free patterns for felt softies and especially felt food on the internet, so I imagine some folks don't feel like they need a book.  This book really takes it to the next level, though, with creative, detailed ideas - and includes a lot of complicated items like the wrench and hammer above where not only would I not have thought of the idea myself, but I would have been hard-pressed to just make up my own pattern if I was trying to wing it.  I really appreciate the fact that this book includes these types of more complicated projects - it seems like often craft books are aimed only at the beginner/intermediate level market, while this is a book that I think a crafter of any level of experience could enjoy and find a project to challenge them.

Thanks again to Lark Crafts for the chance to review this excellent book!

Tuesday, July 05, 2011

The Process of Making Stained Glass

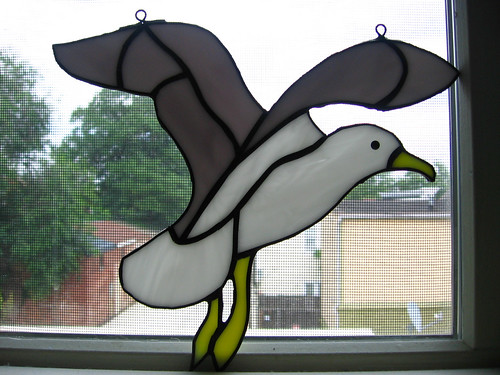
Stained Glass Seagull

I made this sea gull stained glass suncatcher a few weeks ago, after having made a number of other stained glass items recently (see here, here, and here).  Since I have posted quite a few of my finished pieces stained glass, I thought it would be fun to show a bit more about the process of making it.  While this isn't really intended to be a full tutorial (making stained glass is pretty complicated), it can give you a flavor of what is involved... maybe you will want to learn more and try it yourself!
This shows the process of making copper foil stained glass - the other major technique is lead came stained glass, which I have also done (for instance, my recent prairie style window, or my earlier window that I designed).

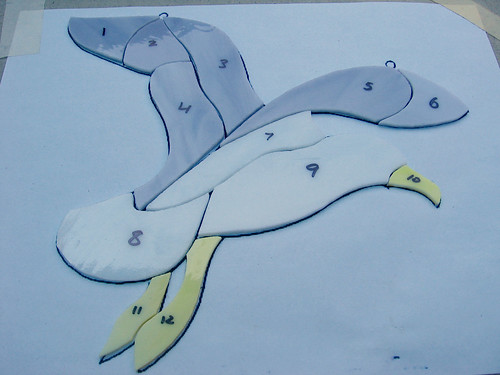
stained glass process 1

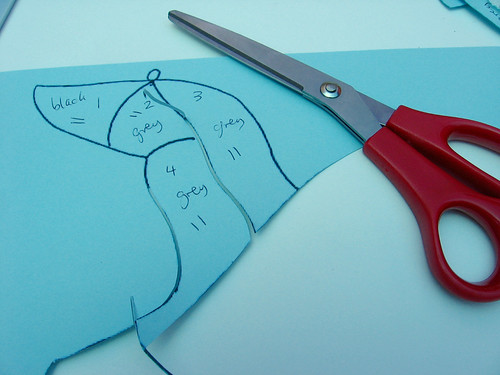
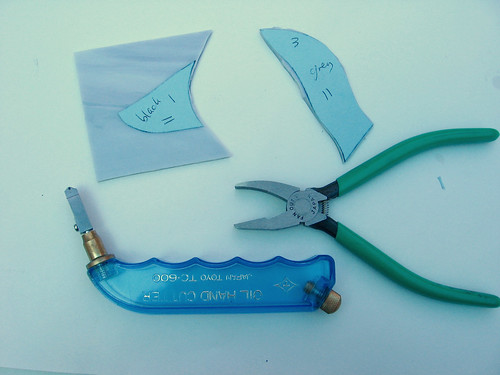
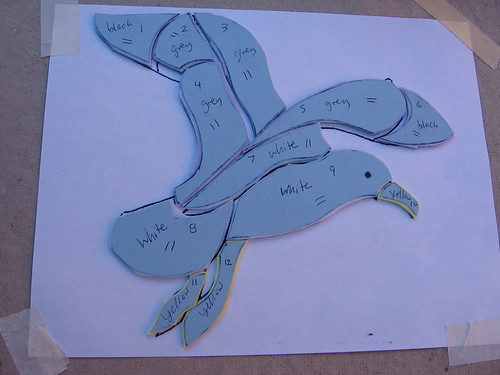
For both techniques of making stained glass, the way I learned to do it is to start with a paper pattern (here is the sea gull pattern I used for this piece).  Then you cut apart the pieces of the pattern using a special kind of scissors that removes a thin strip of paper to make room for the lead or copper that will ultimately go between the pieces (a thinner strip for copper than for lead).  Before you cut it apart you number the pieces and label them with which color glass they will be, and directional markings if needed.

stained glass process 2

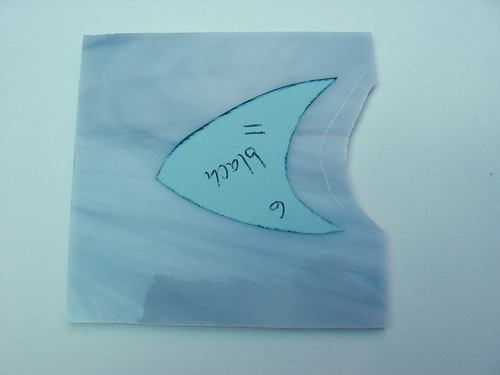
After cutting out the paper pieces, you glue each piece to the corresponding piece of glass (being careful to orient it as desired along the pattern/grain of glass).  You need to leave a fair amount of glass around the shape so that you will be able to cut it out as accurately as possible using a scoring wheel and grozing pliers.

stained glass process 3

For each cut, you basically score a straight or curved line and then snap off the excess glass with the pliers - for steep curves, you can't do it in a single cut but rather must make a series of nested cuts one at a time.

stained glass process 4

I am still working on refining my cutting skills - I am getting better but still definitely find that there is extra glass that sticks out past the paper edge (I think it is pretty hard to avoid this).  The goal is to get the pieces to fit together perfectly with just that small gap in between to leave room for the copper foil.

stained glass process 5

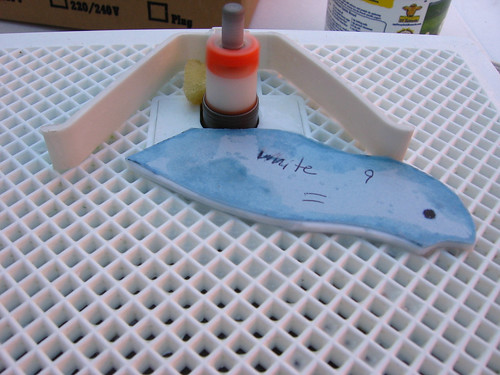
To get the pieces down to that size, you can use a glass grinder, which uses a diamond blade to grind off the extra glass.  After the pieces are ground down to the right size, you remove the paper by soaking the piece in water.

stained glass process 6

I tend to overgrind my pieces (so they are too small) so I was happy that I did a pretty good job on this one getting all the pieces to fit together well!  You can see that after I took off the paper I relabeled each piece with permanent marker right on the glass to be sure to keep track of which piece went where and which side was up.

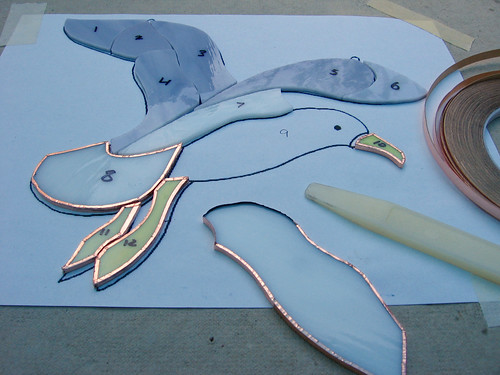
stained glass process 7

Since I was using the copper foil technique, I then wrapped each piece of glass in an adhesive backed copper foil tape, adhering the tape to the glass by pressing/rubbing it with a plastic tool called a fid.

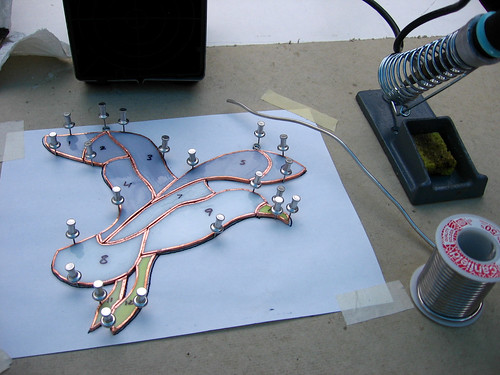
stained glass process 8

Then I fit all the pieces together again and held them in place using special metal pushpins - see how they copper foil fills in pretty much all the gaps?

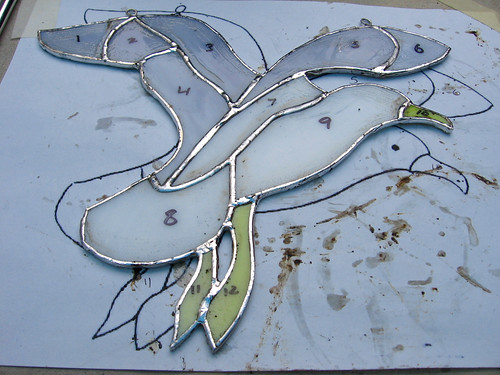
Stained glass process 9

Then I painted a flux on the copper foil and soldered all the pieces together, and coated the edges in solder too.  For larger pieces you would be fitting them into a zinc or lead frame, but since this is a small suncatcher it should be fine with just the copper foil edges.  You can see I also soldered in copper wire loops for hanging the piece.

Finally, I used a special soap to clean off the flux and then I applied a chemical patina to turn the metal black, and the piece was finished!

I hope you enjoyed this quick overview of the stained glass making process... This will probably be the last stained glass I make for a while since I work outside and it is now ridiculously hot out in DC, plus we are getting ready to pack up for our big move to Oregon soon!

Friday, June 10, 2011

Napkin Tutorial Roundup

Metro Cafe Napkins

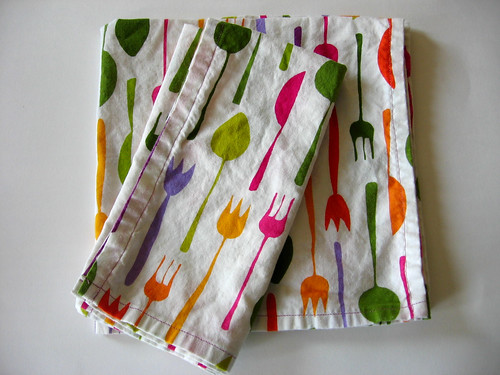
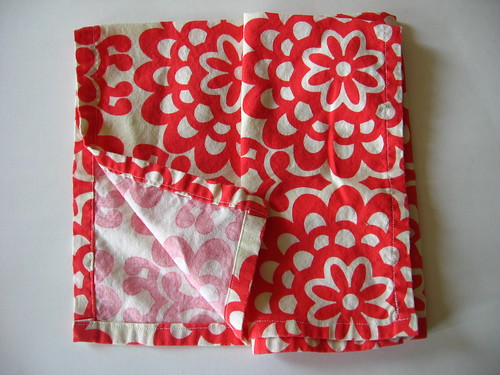
To get your creative juices flowing for the Bloggers' Dinner Party, I wanted to share a roundup of napkin tutorials and inspiration!  Napkins are a great project - quick and easy, they are a fun way to show off a favorite fabric, try out an embellishment technique, or just keep it simple with a beautiful solid.  We pretty much always use cloth napkins at our house, and in addition to a number of store-bought sets, I have a few fun sets that I made myself which we mainly use on our patio (with our bright red melamine target plates).

Lotus Napkin - Inside Edge

Both of these sets of napkins are made with a very basic technique, just starting with a square of fabric and then folding and ironing the edge over 1/4 - 1/2" twice and then stitching the edge in place - pretty much using the second technique in this skip to my lou post.  I started with fabric squares about 21-22" square, which is basically the largest you can cut them and fit two across the width of fabric - so with 1 and 1/4 yard of fabric, you can get 4 napkins.  In addition to your choice of fabric, you can spice these up a little by using a fun contrasting thread color.

I think these look great and are definitely fine for our everyday use, but if you want to take it up a notch, you can miter the corners for a more finished look.  There are lots of tutorials out there for mitered corner napkins - in addition to the first part of the skip to my lou post above, here are a few more:

For really quick everyday napkins, if you have a serger you could make napkins with a serged rolled hem, as shown in this video tutorial on Sew Mama Sew.

      Photo from Purl Bee
      Photo from Purl Bee
      Photo from Purl Bee

      If you want to make slightly more complicated napkins, the Purl Bee has a bunch of really great napkin tutorials:


      Photo from Sew Take a Hike

      Sew Take A Hike has a fun tutorial for colorful linen napkins with a wider contrasting edge with mitered corners - which she accents with embroidery stitches, too.  I think this would look great either with or without the embroidery!


      Photo from Sew4Home

      Sew4Home has some really cute napkin tutorials too, including the Italiano Kitchen Bistro napkins with a fun fabric band (above), and their Citrus Holiday Easy Napkins which have a fabric border at one end.

      There are a wealth of options if you wanted to embellish plain cloth napkins (either handmade or storebought) - here are just a few ideas that come to mind:
      • Applique a patchwork band on the napkin (similar to the Sew4Home tutorial above, but using a pieced strip instead)
      • Raw edge or traditional applique - geometric shapes or other fun designs
      • Embroidery - in a band or a border around the edge, or with a motif on the main part of the napkin
      • Fabric stamping - with either store-bought or hand-carved stamps and a permanent ink pad or fabric paint
      • Freezer paper stenciling or screenprinting
      • Bleach Pen decoration
      How about you - have you made napkins before?  What is your favorite napkin technique or tutorial?

      I hope you are feeling as inspired as I am now to whip up some fun cloth napkins!  Don't forget to link up with this month's Bloggers' Dinner Party for a chance to win a great fat quarter bundle from Sew Fresh Fabrics!

      Thursday, June 09, 2011

      Trillium Stained Glass Suncatcher

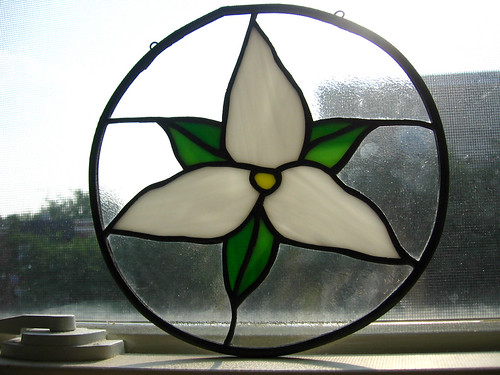
      Trillium Stained Glass Window


      Since taking the class to learn the copper foil technique for making stained glass, and making my ladyslipper window, I was excited to try this technique on my own and make another window.   Since this technique allows for a more detailed and realistic representation than the other technique I have used before (lead came), I thought it would be fun to make another flower to go with the ladyslipper - plus, I have a total soft spot for wildflowers and loved the idea of having a pair of wildflower windows.  After making the ladyslipper, I immediately thought that a trillium would be a good subject for a second window, since they grow in similar habitats (eastern forests) and both flower in the spring.   I drew the pattern myself, with inspiration from several sources, including this beautiful window, and these patterns.

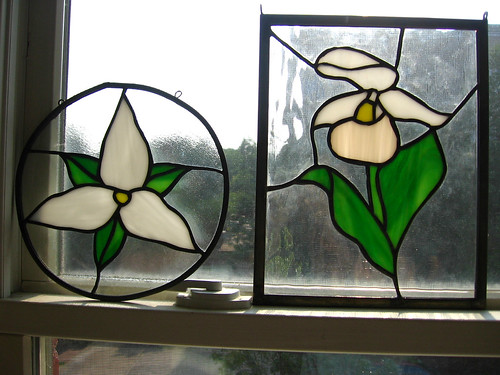
      Trillium and Ladyslipper Stained Glass


      I love having this pair of cheerful wildflowers in the window in our study/my sewing room to look at while I work on my projects!  I am excited to make more windows - I would love to make a quilt-block inspired one, and possibly more wildflowers.  Plus I have a number of gift ideas.  I'm hoping the weather cools down next week as predicted since I do my stained glass outside and it was ridiculously hot when I was working on this earlier this week (and has since gotten hotter)!

      Tuesday, June 07, 2011

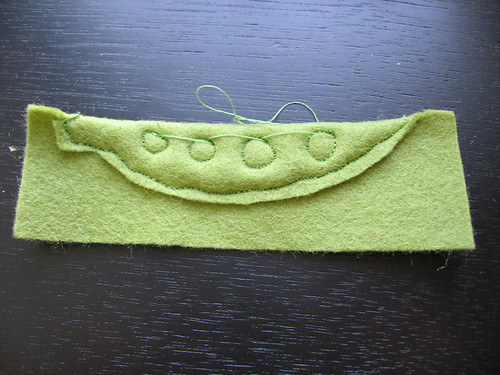
      Felt Peapod Tutorial

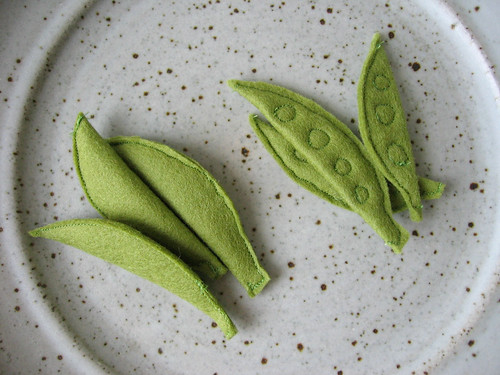
      Felt Peapod Tutorial


      As I mentioned in my last post about making felt food, in addition to all the fun patterns I tried that I had found on the internet, I also made up a pattern for felt peapods - I think they look most like snap peas/snow peas.  Wouldn't it be cute to make up some of these and make a felt stir fry with pepper slices and tofu cubes?

      I saw some other patterns online that use felt balls for the peas in the peapod, but I wanted to take a simpler approach.  As shown above, you can either make these pods plain, or you can add stitched "peas" as a fun detail.  They are really quick to make!  If you make some, I would love to see how they turn out, you can share them in the Needle and Spatula Flickr Pool.

      TERMS OF USE:  As with my other tutorials, this pattern is for personal, non-commercial use only.  If you are interested in making these peapods for small-scale commercial sales (eg craft fairs, etsy), please contact me and we can discuss a licensing agreement.

      Materials:
      • Green Felt (I prefer wool felt but you can use whatever felt you like)
      • Scraps of quilt batting (or if you don't have batting, you could use felt instead)
      • Green thread
      • Peapod pattern - DOWNLOAD HERE
      I made these with a sewing machine, but if you don't have a sewing machine or prefer to work by hand, that would work too!  On the sewing machine, you can sew them either with a regular foot or with a free motion foot (useful if you are sewing the peas detail).

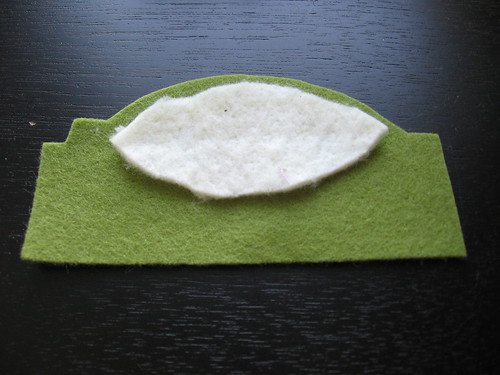
      Felt Peapod Tutorial Step 1

      First, cut out your felt and batting and lay the batting on top of the felt as shown.

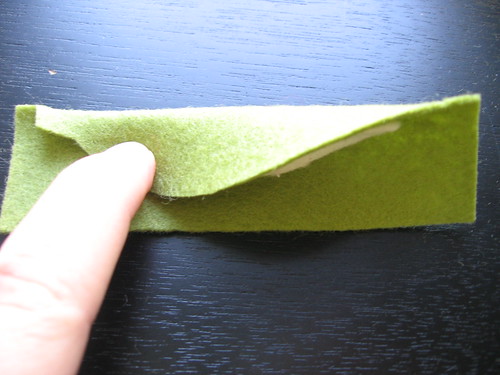
      Felt Peapod Tutorial Step 2

      Fold both the batting and the felt in half (along the dotted lines shown in the pattern).  The felt should fully cover the batting.

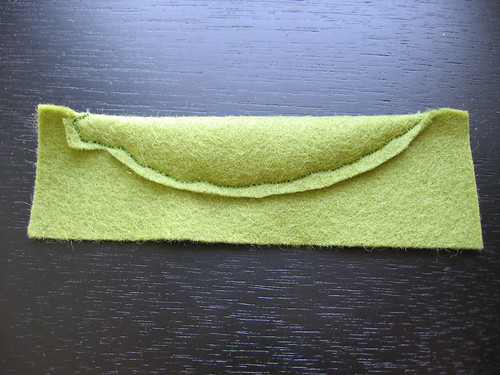
      Felt Peapod Tutorial Step 3

      Sew along the edge of the pea pattern, making sure the batting is fully enclosed.  I used my free motion foot for this step because I didn't want to change the foot to sew the peas, but it would have been more even if I had used my regular foot!

      Felt Peapod Tutorial Step 4

      If desired, sew small circles inside the peapod to look like peas.  I used my free motion foot for this, but you could also sew this with a regular foot and turning the piece as you sew a small circle.

      To finish, clip all the threads and cut out the second side of the felt to match the peapod shape.

      If you want to hand sew, cut out both sides of the felt in the peapod shape initially, then whipstitch or buttonhole stitch around the open edges, and sew the pea detail (if desired) using a running stitch.

      Thanks and happy sewing!

      Tuesday, May 31, 2011

      Needle Felting

      I was super excited when I won the Felt Week giveaway on Stumbles and Stitches a few weeks ago, since the prize from A Child's Dream Come True included a large bundle of beautiful sheets of wool felt, and a needle-felting kit.  I knew I would get lots of good use out of the sheets of felt but I was possibly even more excited about the kit, since I have been wanting to learn how to needle felt (especially after reading more about it in the posts during Felt Week!).

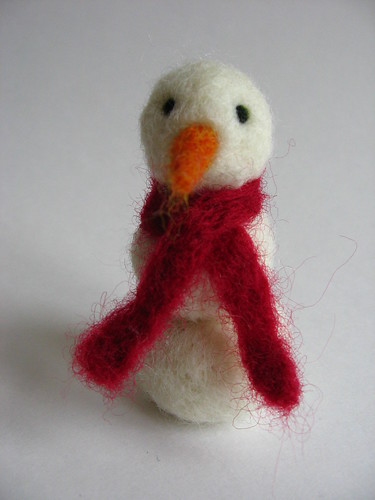
      needle felted snowman

      I was really impressed with how fast their shipping was - the needle felting kit came just a few days after I found out I won the giveaway!  I was so excited that I started playing with it right away, and found it easier and more intuitive than I expected.  After making a few basic shapes, I jumped in and made the snowman above.  I figured I may not have much use for needle-felted items in my everyday decor, but they would make great holiday decorations - I'm not sure if this guy will be left as is or turned into a tree ornament (although I do plan to make several more buddies for him).

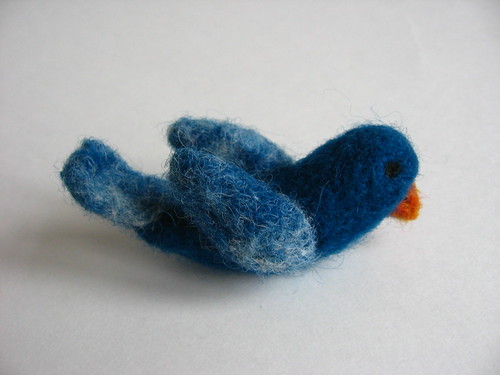
      blue needle felted bird

      I am thinking this bird will be a Christmas tree ornament too, especially since we have a bit of a bird theme in our ornaments (especially after I made several last year out of wool felt).

      The other thing I immediately thought to make was little toys for some of the kiddos in my life.  I always love the way the tiny knitted or crocheted amigurimi monsters and animals look, but I don't have the patience to make something so small and deal with all the shaping on tiny needles.  So I figured needle felting would be a good way to make some similar little monster guys.

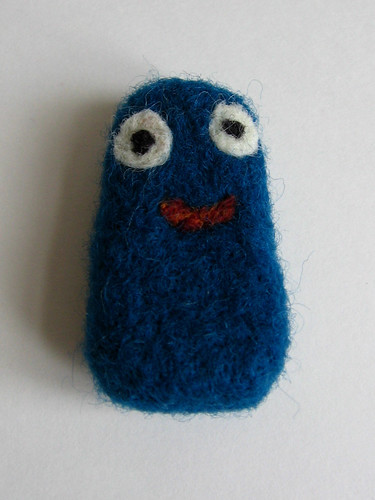
      blue needle felted monster


      I wanted to start out simple so I made this blue monster guy... he is a bit funny looking and kind of shaped like a chicken nugget, but still pretty cute I think.

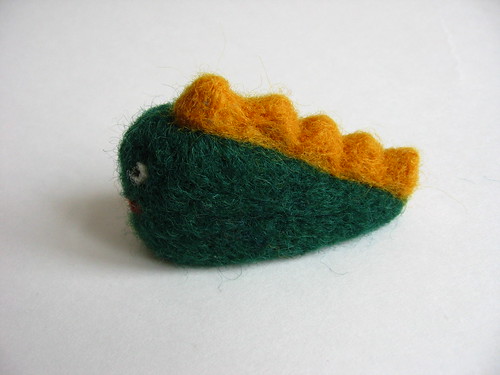
      needle felted dinosaur toy

      I also made this little dino guy although he maybe could be confused for a fish. 

      I found that getting basic shapes was pretty easy but making smaller parts was a bit trickier for me - I should probably actually read some tutorials online to get more tips on how to make more complicated items.  Have you ever tried needle felting and do you have any tips to share?

      Saturday, May 21, 2011

      Stamped Greeting Cards and a Baby Blanket

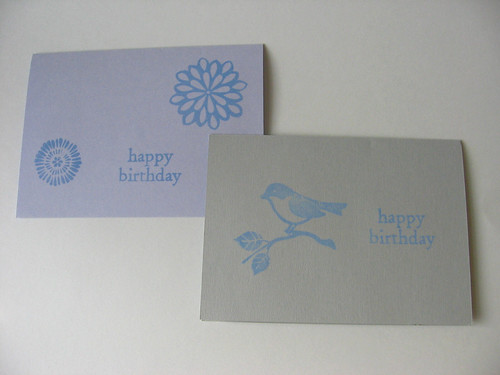
      Birthday stamped cards

      A while ago I made up a few stamped birthday cards, and I had really enjoyed using them and was almost out so I got out my stamping supplies and made some more.  I have really been loving the clear stamps that you use with the acrylic stamp mounts - it is so fun to be able to get a variety of stamps without breaking the bank, plus they are easier to store.

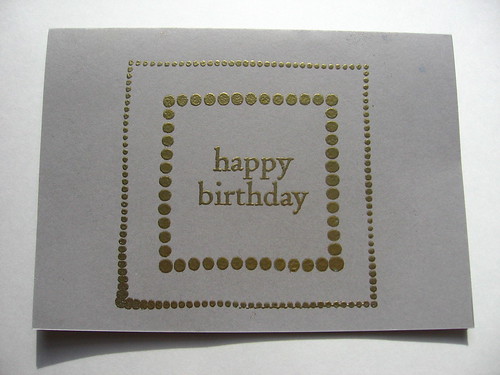
      Gold Embossed Stamped Birthday Card


      I embossed a few of the cards which I think makes them look classy, especially for this gold - it looks way better than just gold stamp ink would.

      In addition to restocking my birthday card supply, I decided to make some congratulations/baby cards to go with all the baby gifts I have been making for my rapidly reproducing friends.

      Train stamped card

      I have always wanted a cute little set of alphabet stamps and I lucked out the last time I was at Michaels, they had some tiny ones that were only a dollar or two for the whole set!  I also found these cute trains either at Michaels or Joann's in the $1 mini acrylic mount stamp bin.  I love how this card turned out!

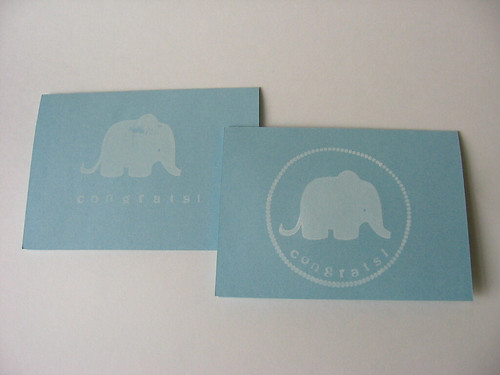
      Elephant stamped cards

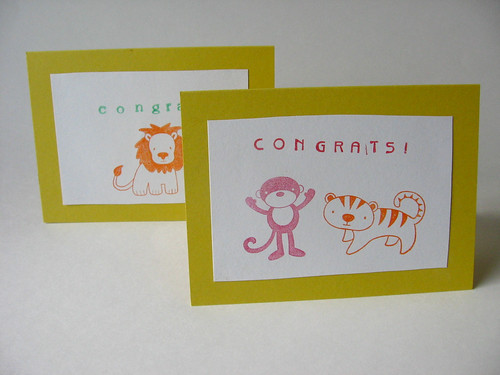
      Love all these animal stamps.

      Animal Stamped Cards

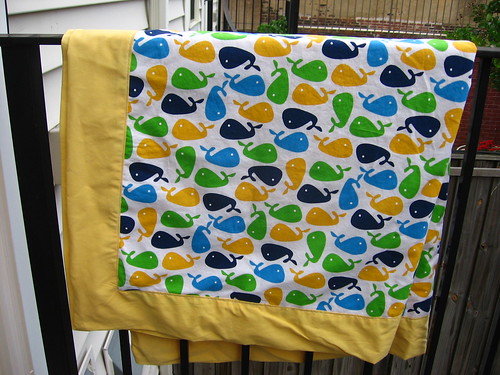
      I have already used a few of the cards sending off baby gifts, including this whale blanket that I made using Anne Kelle Urban Zoologie for a friend who just had a baby boy.  It is backed with a thrifted sheet so it is nice and lightweight for summer.  I made the mitered corners similarly to how I made the blue and white striped blanket here.

      Whale Baby Blanket

      Do you like to make stamped cards or other projects?

      Sunday, May 15, 2011

      Prairie Style Stained Glass


      I made this prairie-style stained glass window for Lawson as a first wedding anniversary present.  The pattern is from a book called Prairie Style Panels, and I adapted the design to add a repeat.  Although I just learned how to make stained glass windows using the copper foil technique, I went back to the lead came technique for this one, both because I already have all the supplies and because it is better suited to this kind of geometric straight line design.  I hope to do more copper foil panels soon too, though (once I get the supplies), especially since I can really only do stained glass outside and this is the perfect time of year for it.


      With this technique you cut out all the glass pieces, leaving a gap in between for the lead, and then you build up the panel by cutting the lead to the right sizes and shapes and fitting it all in place (the nails hold everything in place as you work).  As you can kind of see from the extra pieces of lead at the bottom of the photo, there is a channel in the lead that the glass fits into.


      Once you have the whole panel fitted together, you solder the joints and then you finish the panel with putty to hold the pieces of glass in place and then apply patina to color the metal black.  The putty process is kind of a pain so one thing I am really looking forward to about making more copper foil panels is that you don't have to putty them!


      Even though I have now made probably half a dozen windows using this method, since it is often a year or more in between I pretty much have to relearn the process each time.  There are definitely things about this window that I am not super happy with how they turned out, partly because I was using old lead, and partly because I could have been more accurate with cutting the glass... just like in quilting, relatively small cutting errors add up across the piece and can make a big difference.


      I was feeling somewhat frustrated as I finished the window and sad to be giving something to my sweetie that wasn't perfect, but in the end the mistakes aren't all that noticeable (especially if you don't make stained glass yourself), and he loves it.  He loves that I made it, and that I made it for him, in a design he had previously said he liked... and while he believes me that it isn't perfect he is happy to overlook the flaws.  This is actually a great encapsulation of all the things I love about him and what makes our relationship great, so it turns out that giving him a not-quite-perfect gift may be just the right thing after all.
      Related Posts Plugin for WordPress, Blogger...