Tuesday, August 31, 2010

A sampling of pouch tutorials


Earlier this summer I went on a sewing bonanza, part of which was making a bunch of different kinds of little zippered pouches.   I had been bookmarking different patterns so I basically tried out all the different ones I had been meaning to try and then made up a variation of my own after that.  If you are wondering what I am going to do with all these pouches, they will largely be christmas gifts (any of my family that is reading this, sorry for the spoiler but I guess you can still be surprised by which you get).

The first ones I made were from this tutorial on Skip to My Lou.  I had fun picking out different fabrics that coordinated both for the two outside fabrics and for the inside.  I followed the tutorial except that I made the pleats fold half way to each side (if that makes sense) rather than flat to one side or the other; I liked how it looked better this way.


Next I made a few really cute small clutch purses using this tutorial from Noodlehead.  I followed the simpler variation of the tutorial and just included one interior pocket in each, rather than a divider etc.   I would like to make a few more of these and also may try to use this technique to make a slightly larger clutch or just a purse... will have to see what works out when I try.


Finally, I slightly modified this tutorial to make a small bag with one pleat and squared off bottom corners.  Then, I combined elements of the first pouch and this one to come up with the bottom pouch shown below, which I really like.  I will write up a pattern/tutorial at some point and post, but I will need to go back and make another pouch to actually keep track of what I did, take pictures etc.  Anyone else have any good pouch tutorials to recommend?  If I have time to do more sewing at some point I am planning to make a few purses...


Sunday, August 29, 2010

Black bean peach salad and tabbouleh


Tonight's dinner was a bit eclectic - based largely on what I had in the fridge and what I felt like making, these two salads went together better than I expected.  The black bean salad has a bit of spice which is nicely balanced by the sweetness of the peaches.  In a continuation of my what-to-do-with-all-these-cucumbers situation, the tabbouleh served well to use up several cukes, the tomatoes I had on hand (one from the garden, one from the market), and some leftover bulgur.   I served the salads with a side of honeydew melon which was also delicious!  Also in the photo above you can see the placemats which I made a few years ago with some Amy Butler fabric, without even thinking about the fact that it would perfectly match my orange (spodumene glaze) plates.

Black Bean and Peach Salad
  • 4-6 cups cooked black beans (2-3 cans), rinsed
  • 2 fresh peaches, pitted and chopped
  • 1/2 -1 cup chopped peppers (1-2 large peppers or multiple small)
  • 3-4 scallions, chopped (or red onion would be good too)
  • 1-2 tablespoons chopped cilantro
  • 1 1/2 teaspoons ground cumin
  • 1 teaspoon crumbled aleppo peppers (or crushed red pepper generally if you don't have aleppos)
  • 2 tablespoons olive oil
  • 3 tablespoons lime juice
  • salt to taste
Mix all ingredients in a bowl and serve.


Garden Tabbouleh
  • 1 cup uncooked bulgur wheat
  • 1-2 cups chopped cucumber
  • 1-2 cups chopped tomatoes
  • 1/2 - 1 cup chopped parsley
  • 2 tablespoons olive oil
  • 2 tablespoons lemon juice
  • salt to taste (I salted generously)
Put bulgur in a heatproof bowl and cook by pouring boiling water to cover by 1", then cover and let sit for 15-20 minutes.  Drain if necessary then combine with remaining ingredients in a bowl.

Monday, August 23, 2010

Green Cabled Baby Hat


I did finally get to a yarn store and write down the next part of the pattern for the sweater I am working on, but I made one more baby hat out of the yarn I had brought with me on our trip before then.  This green yarn was really intended just to be pumpkin stems (and other fruit/veggie stems in the future) but I needed a project and there was more than enough yarn to make a hat and several more stems.  I thought it would be fun to make a cabled baby hat and came up with this design.  It staggers the cables which I think gives it a nice all-over cabled look.  It's pretty small so it is probably best as a preemie or newborn size (although I am not an expert in baby head sizes).  Also, ever since I saw this tutorial I have been cabling without a cable needle - if you haven't tried it yet I highly recommend it!

I love seeing the hats that have been made with this pattern on Ravelry; if you are on Flickr you can also share a photo in the Needle and Spatula Flickr group.

Staggered Cable Baby Hat
Swish DK yarn
Size 5 long circular needles or DPNs and a row counter

CO 80 stitches and join in the round using magic loop technique, being careful not to twist. Use tail to mark beginning of round.  Work K1 P1 rib for 3/4" - 1", then work in rounds as follows (repeating round 1 twice on the first repeat):
Rounds 1,2,4,5: *K6, P2, repeat from *
Round 3: *cable 6 forward (C6F) (or back, just be consistent), P2, K6, P2, repeat from *
Round 6: *K6, P2, C6F, P2, repeat from *
repeat rounds 1-6 two times
repeat rounds 1-2
Decrease round 1: *C6F, P2, K2tog K2 ssk, P2, repeat from *
2 rounds of: *K6, P2, K4, P2, rep from *
Decrease round 2: *K2tog K2 ssk, P2, cable 4 forward (C4F), P2, rep from *
1 round of: *K4, P2, rep from *
Decrease round 3: * C4F, P2tog, K4, P2tog, rep from *
1 round of: *K4, P1, rep from *
Decrease round 4: *K2tog ssk, P1, C4F, P1, rep from *
1 round of: *K2, P1, K4, P1, rep from *
Decrease round 5: *K2, P1, K2tog ssk, P1, rep from *
1 round of: *K2, P1, rep from *
Decrease round 6: *K2tog, P1, rep from *
1 round of *K1 P1, rep from *
Decrease round 7: K2tog, repeat for all stitches (10 st remain)
Decrease round 8: K2tog, repeat for all stitches (5 st remain)
Thread yarn through remain stitches and pull tight, then weave in ends.

NOTE ON SIZING: (added 10/18)
Since this pattern as written probably makes more of a preemie/newborn size hat, I wanted to provide some additional options to make it more helpful for larger babies.  To make a slightly larger hat, you can repeat the initial rounds 1-6 three or four times, rather than 2.  I think this would be more like an infant - 3 month size.  For larger sizes, try making the hat using worsted weight yarn and larger needles (and probably 3-4 or more repeats of the initial pattern).  I hope no one has made this hat and had it turn out too small...

Sunday, August 22, 2010

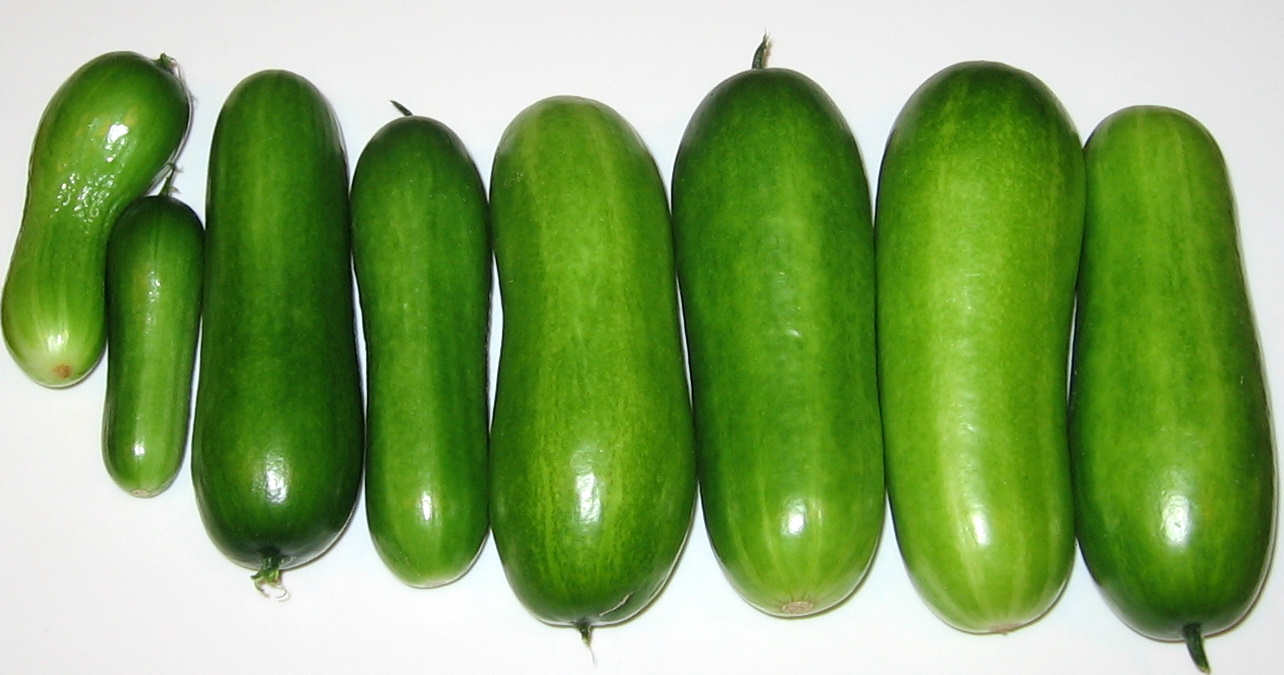
What to do with 8 million cucumbers... and also a bulgur lentil salad


We are back home, and this is what my garden had to say to me after a week away.  I was lucky that it rained a lot while we were gone, otherwise the plants would have been much less happy.  The tomatoes are still recovering from their earlier overabundance but it looks like we'll have a few in the coming weeks which will be nice.  The first answer to what to do with 8 million cucumbers is obvious... pickles!  However, I already made these from this recipe just before we left (with all the cucumbers that I harvested before we left) and they were ready to eat when we got back.  I am normally not a pickle person but I liked them.


So, I didn't want to make more pickles tonight.  I looked in Chez Panisse Vegetables and came up with a simple recipe for sauteed cucumbers.  I wasn't sure how it was going to turn out, but with nothing better to do with all my cukes I thought I would give it a try.  I also made up a lentil bulgur salad with roasted purple peppers (addressing my other vegetable problem)... The cucumbers were pretty good although a little bland.  The lentil salad was a variant on ones I have made before and was again very yummy!


Sauteed Cucumbers
Adapted from Chez Panisse Vegetables

Peel, seed and chop several cucumbers.  Saute in butter until slightly tender but still firm.  Salt to taste and garnish with chopped chives.


Lentil Bulgur Salad with Roasted Peppers
  • 1 cup dried bulgur
  • 3/4 cup dried lentils (I used regular brown lentils but french lentils would be good too)
  • 1-2 large or several small green, purple or red peppers
  • 1-2 teaspoons chopped parsley
  • 1-2 teaspoons chopped mint
  • 1 teaspoon lemon juice
  • 1 1/2 teaspoons olive oil
  • salt to taste
Bring about 2-3 cups of water to boil in a small saucepan, add lentils and lightly boil/simmer over medium heat until tender (about 20-30 minutes).  Put the bulgur in a heat-proof container with a lid and cover with boiling water by about an inch, let sit.  Very lightly coat the peppers with oil (I used olive oil spray) and roast - I roasted by broiling in the toaster oven until they looked done, turning midway - I think it was about 5-10 minutes.  Take them out of the oven and either put in a paper bag or cover the pan with a plate or other lid, let cool and then remove skins (as much as you can - don't worry if you can't get them all off), then finely chop.  In a large bowl or container, mix together all ingredients.  This would also be good with the addition of toasted walnuts or feta cheese.

Related Posts Plugin for WordPress, Blogger...