Friday, June 17, 2011
Another Knit Skirt - with Pockets!
I had so much fun when I made my first knit skirt and dress, I knew I wanted to try more sewing with knits. I have been pretty busy with other projects, but really wanted to make a skirt for Crafterhours' Skirt Week (and play along with the Summer of No Pants, too). Since both of these fun events are ending today, I finally found time to make another skirt last night.
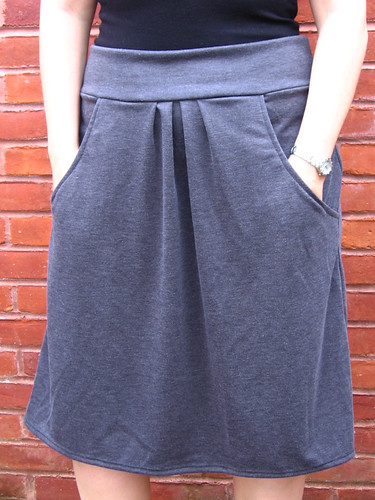
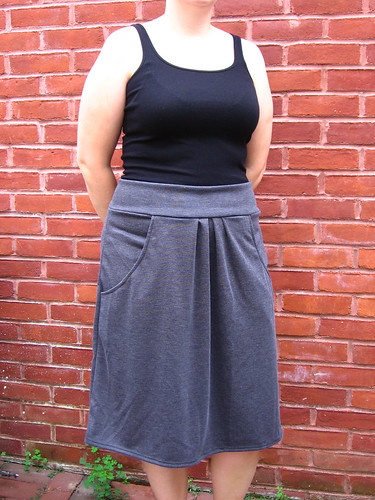
I used a grey interlock knit that I had bought from the bargain bin at my local fabric store for $3/yard - interlock is a bit sturdier and less flowy than jersey knit, and it looks the same on both sides. Since I bought this from the bargain bin, I don't know the fiber content but it does have a bit of stretch. The design was inspired by skirts that I have seen women wearing this spring (isn't people watching a great source of inspiration?), and I made up the pattern myself again. I love that it has pockets! So great for toodling around the house when I always seem to be putting my phone or something else down and then having to go back and get it. It hits at a slightly below knee length, which I think is cute, although I may make another one that is a few inches shorter (and/or I may make a dress version!).
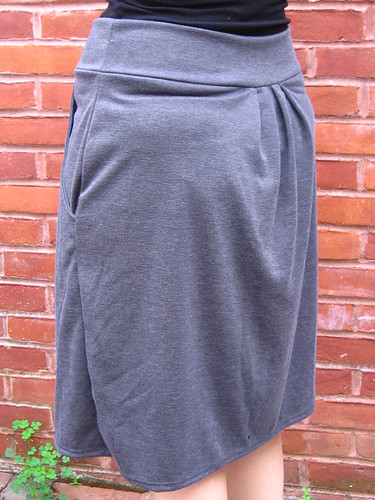
This is not the best photo of the back, but I wanted to show that I put some pleats in the back too. It is a pretty straight cut for the skirt but the front and back pleats mean that it isn't too fitting or tight - which is good, since it gets way to hot and sticky here in DC in the summer to be wearing a fitted skirt.
I am still playing around and figuring out the best stitches to use when sewing knits - I used my double needle to sew the hem on this skirt and am very happy with how it turned out!
Linking up with:
Wednesday, June 15, 2011
Drunkard's Path Quilt Progress - WIP Wednesday
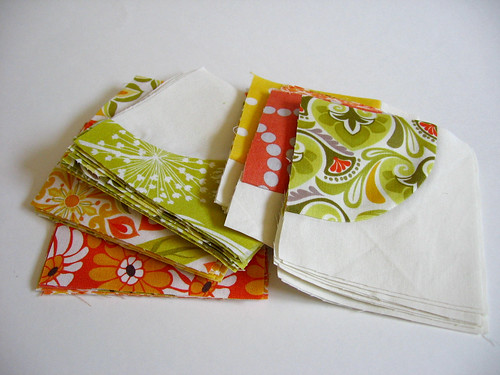
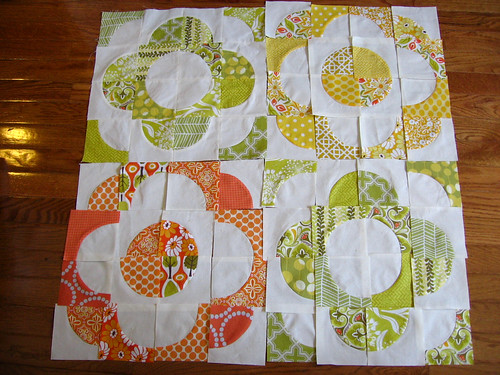
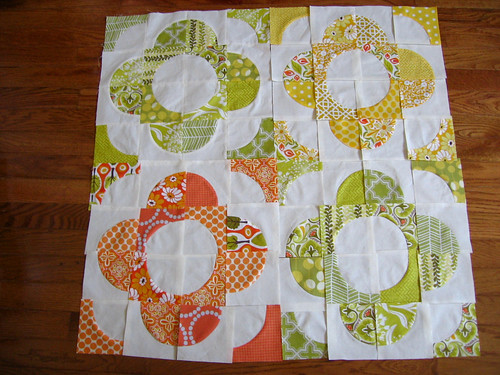
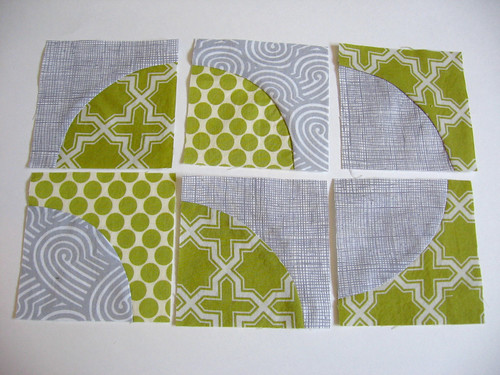
I didn't have much time to do sewing this past week since we were out of town for a long weekend, but last night I did sew up the quarter-circles for three more drunkard's path blocks. I decided to wait to sew them up into blocks until I have made some more of these sub-blocks, because it is fun to play around with potential block arrangements and see how they look.
I particularly wanted to test out the two block variations that I am most seriously considering for this quilt. While I had been leaning towards the option above, where the blocks alternate positive and negative space, after seeing them laid out I think I actually prefer the simpler version below.
I haven't made any progress on my Spicing Up the Kitchen placemats (which I also want to get done to share for the Bloggers' Dinner Party!), but I am hoping to start sewing those later this week. I am also planning to make a skirt or two this week to share as part of Summer of No Pants and Skirt Week... It's funny, these challenges/link-ups really do help me motivate to get to projects on my to do list.
I realized I forgot to post these quarter circle blocks that I made last week as I was refining my drunkard's path block pattern. I made them in a similar color scheme to my mug rugs, and am planning to make them into coasters at some point - I have a set of coasters that I made, but they are bright colors that look funny to me when I use them together with the mug rugs, so it will be nice to have something more matching.
www.flickr.com
|
Also yesterday I decided to start a Quilt Sketches Flickr Group - I had so much fun drawing up all my drunkard's path block variations, and I always enjoy seeing others' quilt sketches and ideas, so I thought it would be fun to have a place to share them! If you have any quilt sketches/drawings that you have done, feel free to add them to the pool!
I'm linking up again to WIP Wednesday over at Freshly Pieced - head over to see everyone's fun projects!
Tuesday, June 14, 2011
Getting my Knitting Mojo Back
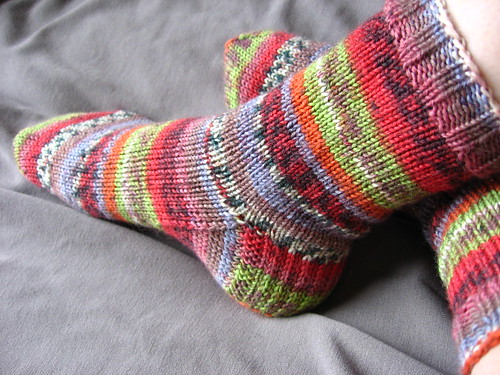
You may have noticed a lack of knitting posts around here. Last week, I finally came to terms with the fact that I just wasn't feeling excited about my two current WIPs - last seen here in a post from early March. I have made really minimal progress since them, which tells you just how unexcited I was about them. I felt weird not having a knitting project to take with me on the subway and on car trips, and that I felt like working on at random moments, so I finally admitted that despite all my claims of disliking having too many WIPs, it was time to start another project. I cast on these socks some time early last week and must have had a lot of pent up knitting energy, because I finished them yesterday! (OK, so it may have also helped that we flew across the country for a short but lovely visit with friends in California for a long weekend, so I had lots of knitting time on the plane).
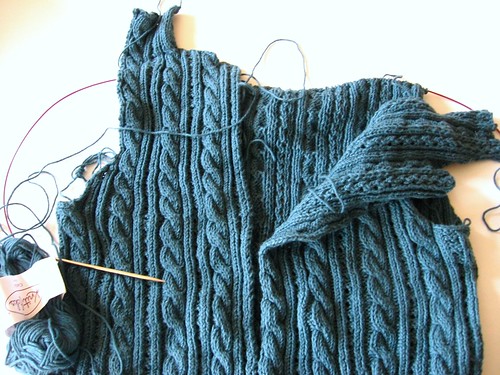
I do really still want to finish this sweater - clearly it will not be done by our one year anniversary as I had hoped/declared (since that date has come and gone), and but I hope to finish it up in the next month or two. I think I stalled out on this one partly because I just have trouble staying interested in sweaters and actually finishing them up, and partly because I starting having doubts about the fit, and whether I may have made the armholes too big, which definitely made me less motivated to finish it. After having given it a good solid break though, I tried it on again the other day and feel much better about it. Plus, I am nearly done with the body and then I just have to knit the two sleeves, which will be much more portable to carry around with me. This is definitely the most complicated (and smallest gauge) sweater I have ever knitted and I think I should take the difficulty down a notch for my next sweater or two to try to minimize my sweater-finishing problem. I really want to be a sweater-knitter!
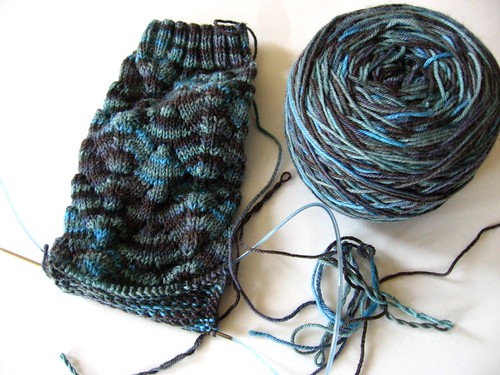
These dragonfly socks were actually supposed to be my fun distraction from not feeling like knitting the sweater, but I was feeling less and less excited about them too. Partly because they pale in comparison to the original, lost dragonfly socks, partly because I think there is just too much going on here with the yarn and the lace pattern, and then finally because they seem a bit too small when I've tried them on... I haven't decided yet whether I will finish these up or just frog the yarn and put it back in the stash for a more appropriate pattern.
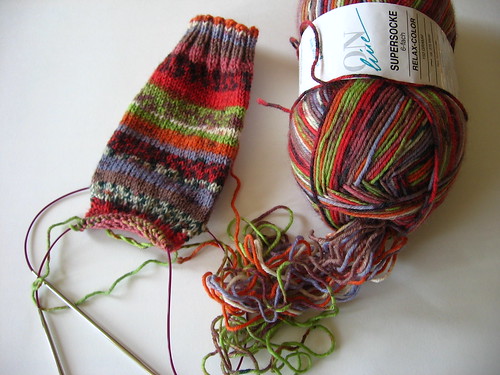
In the end, the stripey socks were a much better distraction from sweater-knitting woes. Knitted with a fun self-striping sport weight yarn that my mom had given me for Christmas a few years ago, they were quick and entertaining to knit. I had even more trouble than usual finding the center-pull string and had to deal with a lot of "yarn barf" (Lawson loves this term) at the beginning - it was much worse than the remainder you see above - but I finally got it figured out and it was smooth sailing from there.
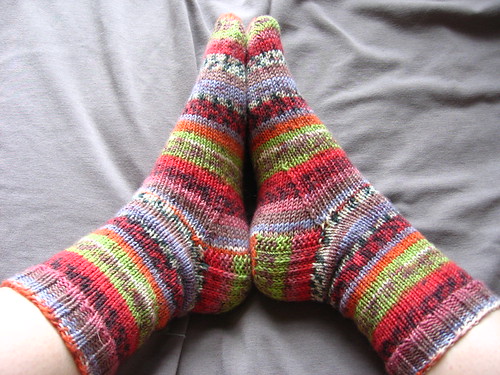
I even got the pattern repeats to match up on the two socks! Miraculously, my first sock was nearly exactly 2 pattern repeats long, so I just tried to pay attention to keeping them lined up as I knit the second sock. I don't mind socks that don't match, but it does bug me when they almost match but are just a tiny bit off, so I figured I should do my best to sync them up. Now that these are done I actually cast on a baby hat with the remaining yarn, and am determined to get back to work on my sweater soon!
Friday, June 10, 2011
Napkin Tutorial Roundup
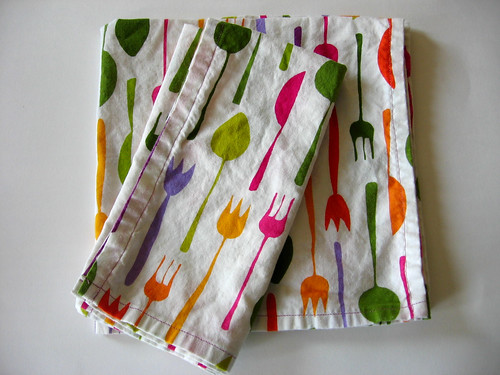
To get your creative juices flowing for the Bloggers' Dinner Party, I wanted to share a roundup of napkin tutorials and inspiration! Napkins are a great project - quick and easy, they are a fun way to show off a favorite fabric, try out an embellishment technique, or just keep it simple with a beautiful solid. We pretty much always use cloth napkins at our house, and in addition to a number of store-bought sets, I have a few fun sets that I made myself which we mainly use on our patio (with our bright red melamine target plates).
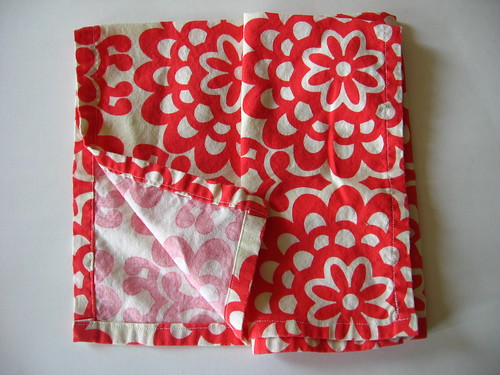
Both of these sets of napkins are made with a very basic technique, just starting with a square of fabric and then folding and ironing the edge over 1/4 - 1/2" twice and then stitching the edge in place - pretty much using the second technique in this skip to my lou post. I started with fabric squares about 21-22" square, which is basically the largest you can cut them and fit two across the width of fabric - so with 1 and 1/4 yard of fabric, you can get 4 napkins. In addition to your choice of fabric, you can spice these up a little by using a fun contrasting thread color.
I think these look great and are definitely fine for our everyday use, but if you want to take it up a notch, you can miter the corners for a more finished look. There are lots of tutorials out there for mitered corner napkins - in addition to the first part of the skip to my lou post above, here are a few more:
- Sew4Home's 1/4" Double Turn Clean Finished Corner
- Deborah Moebe's Napkin with Mitered Corners from her book Stitch by Stitch
For really quick everyday napkins, if you have a serger you could make napkins with a serged rolled hem, as shown in this video tutorial on Sew Mama Sew.
![]() |
| Photo from Purl Bee |
![]() |
| Photo from Purl Bee |
![]() |
| Photo from Purl Bee |
If you want to make slightly more complicated napkins, the Purl Bee has a bunch of really great napkin tutorials:
- Molly's Handmade Napkins - (left) with a contrasting binding tape on the edges rather than just hemming
- Handstitched Napkins - (center) with a decorating hand-sewn running stitch in place of the machine stitches in a standard napkin pattern
- Spring Napkins - (right) double-sided with a fun ric-rac decoration at the edge
- Linen Thanksgiving Napkins - with colored solids on one side and a neutral linen on the other side
- Fringed Thanksgiving Napkins - with a raw-edge fringe
![]() |
| Photo from Sew Take a Hike |
Sew Take A Hike has a fun tutorial for colorful linen napkins with a wider contrasting edge with mitered corners - which she accents with embroidery stitches, too. I think this would look great either with or without the embroidery!
![]() |
| Photo from Sew4Home |
Sew4Home has some really cute napkin tutorials too, including the Italiano Kitchen Bistro napkins with a fun fabric band (above), and their Citrus Holiday Easy Napkins which have a fabric border at one end.
There are a wealth of options if you wanted to embellish plain cloth napkins (either handmade or storebought) - here are just a few ideas that come to mind:
- Applique a patchwork band on the napkin (similar to the Sew4Home tutorial above, but using a pieced strip instead)
- Raw edge or traditional applique - geometric shapes or other fun designs
- Embroidery - in a band or a border around the edge, or with a motif on the main part of the napkin
- Fabric stamping - with either store-bought or hand-carved stamps and a permanent ink pad or fabric paint
- Freezer paper stenciling or screenprinting
- Bleach Pen decoration
I hope you are feeling as inspired as I am now to whip up some fun cloth napkins! Don't forget to link up with this month's Bloggers' Dinner Party for a chance to win a great fat quarter bundle from Sew Fresh Fabrics!
Subscribe to:
Posts (Atom)