Wednesday, July 06, 2011

Work in Progress Wednesday

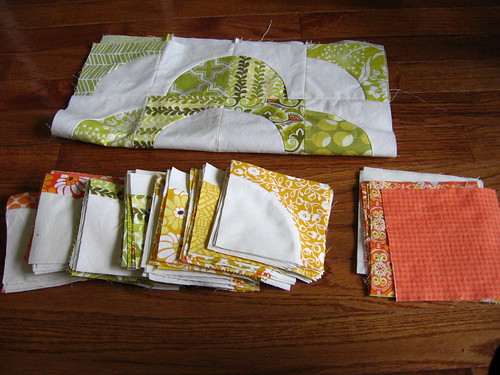
Drunkard's path progress

Unlike last week, I actually did make a bit of progress on my Drunkard's Path Quilt (last seen here), although not as much as I had hoped.  I finished making the curved sub-block square pieces (is there a better term for them?) for all but one of the 9 quilt blocks.  I am hoping to finish piecing this quilt top in the next day or two so that I can get started on my Kaleidoscope QAL quilt already!
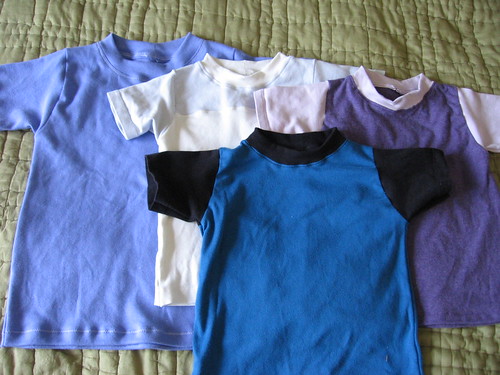
T-shirts

One reason that I didn't make as much progress as I had hoped on the quilting front is that I got totally distracted by making little kid t-shirts.  The too-small tank tops that I was planning to reuse turned out to be too small to even make a toddler t-shirt (makes me feel better that they didn't fit me, they really were pretty small!), but I had some interlock in my stash that worked to make a size 4 t-shirt for Project First Day using the free pattern from fishsticks design

I had so much fun making this that I went back and purchased the Charlie Tee pattern in the smaller kid sizes, and also the Rockin' Raglan pattern in smaller sizes (although I haven't made any of that one yet), and made up a number of 18 month sized tees for my nephew, mostly out of repurposed/upcycled materials.  The patterns are great, very well explained and quick, especially once you have assembled, traced and cut out the pattern pieces.  The pattern suggests using interlock or stretch ribbing for the neckband rather than jersey, but I found that the stretch jersey from my old tank tops was definitely stretchy enough to use for this, so that was good.  I am planning to do freezer paper stencil designs on all of these, and hopefully make a few more for Project First Day too (I have to find some more knit fabrics to work with first - I'm planning to take a trip to the thrift store and see if I find anything good to repurpose).
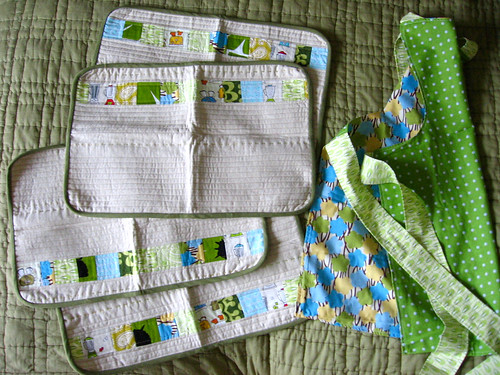
SUTK received!

I was super excited to receive my swap items from the Spicing Up the Kitchen swap yesterday, from Holly at Binkwaffle (she's on Flickr here).  I felt a lot better about sending off the placemats that I had made because my partner, Alison at Little Island Quilting, really likes them and it was so lovely to get this nice package of placemats AND an apron myself.  They are super in line with the things I put in my inspiration mosaic - lots of greens (my favorite!) and blues, and some cute kitchen toasters and blenders tossed in too.  Thanks so much Holly!

The Sewing Summit

I am also thrilled that now that we know we are moving to Oregon in August/September I was able to register for the Sewing Summit!  I can not tell you how excited I am to get to meet lots of my online blog friends in person and learn about great sewing stuff - I had such a hard time picking which classes I was most interested in when I registered, they all looked so great!  OK, these last two items really weren't WIPs but I was too excited not to share :)

I'm linking up again to WIP Wednesday over at Freshly Pieced:

WIP Wednesday at Freshly Pieced

Tuesday, July 05, 2011

The Process of Making Stained Glass

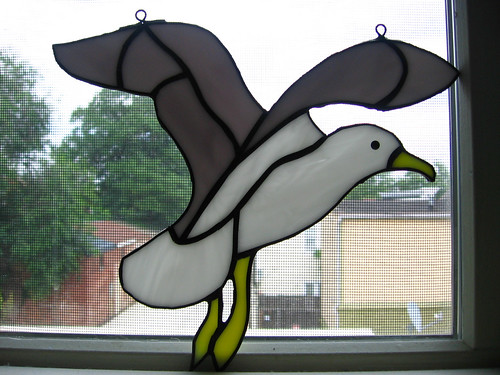
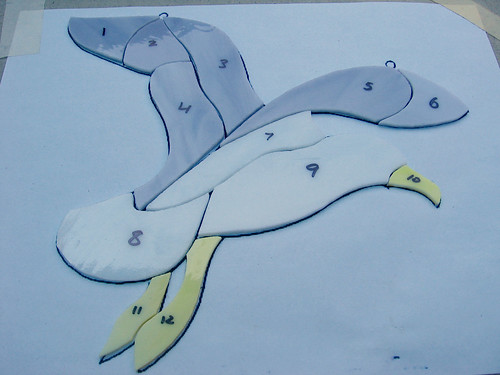
Stained Glass Seagull

I made this sea gull stained glass suncatcher a few weeks ago, after having made a number of other stained glass items recently (see here, here, and here).  Since I have posted quite a few of my finished pieces stained glass, I thought it would be fun to show a bit more about the process of making it.  While this isn't really intended to be a full tutorial (making stained glass is pretty complicated), it can give you a flavor of what is involved... maybe you will want to learn more and try it yourself!

This shows the process of making copper foil stained glass - the other major technique is lead came stained glass, which I have also done (for instance, my recent prairie style window, or my earlier window that I designed).

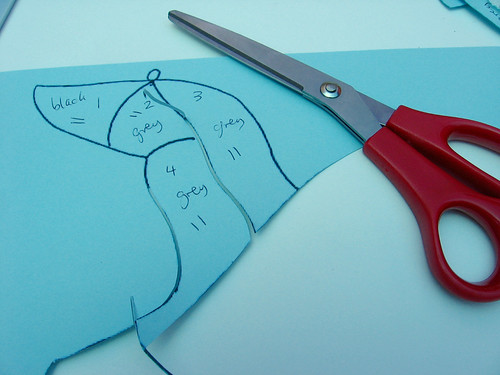
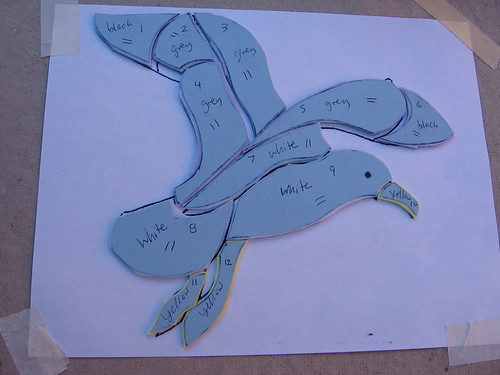
stained glass process 1

For both techniques of making stained glass, the way I learned to do it is to start with a paper pattern (here is the sea gull pattern I used for this piece).  Then you cut apart the pieces of the pattern using a special kind of scissors that removes a thin strip of paper to make room for the lead or copper that will ultimately go between the pieces (a thinner strip for copper than for lead).  Before you cut it apart you number the pieces and label them with which color glass they will be, and directional markings if needed.

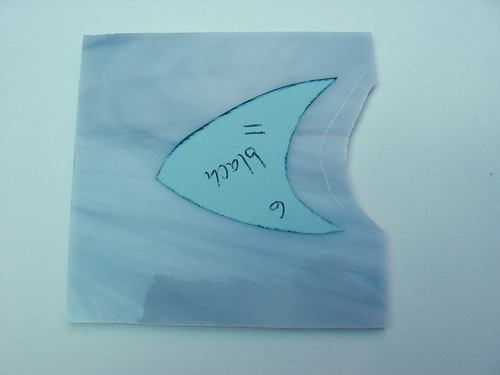
stained glass process 2

After cutting out the paper pieces, you glue each piece to the corresponding piece of glass (being careful to orient it as desired along the pattern/grain of glass).  You need to leave a fair amount of glass around the shape so that you will be able to cut it out as accurately as possible using a scoring wheel and grozing pliers.

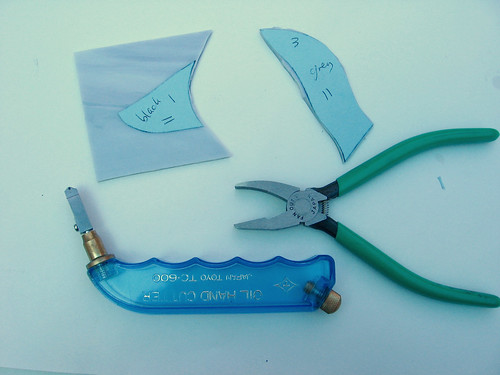
stained glass process 3

For each cut, you basically score a straight or curved line and then snap off the excess glass with the pliers - for steep curves, you can't do it in a single cut but rather must make a series of nested cuts one at a time.

stained glass process 4

I am still working on refining my cutting skills - I am getting better but still definitely find that there is extra glass that sticks out past the paper edge (I think it is pretty hard to avoid this).  The goal is to get the pieces to fit together perfectly with just that small gap in between to leave room for the copper foil.

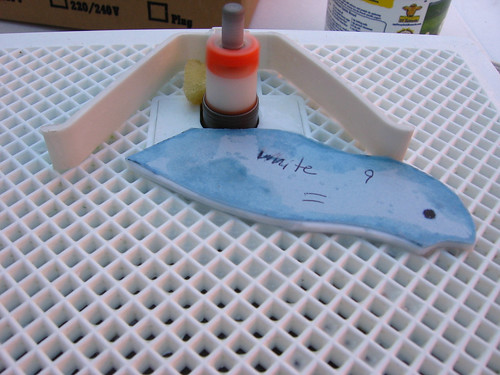
stained glass process 5

To get the pieces down to that size, you can use a glass grinder, which uses a diamond blade to grind off the extra glass.  After the pieces are ground down to the right size, you remove the paper by soaking the piece in water.

stained glass process 6

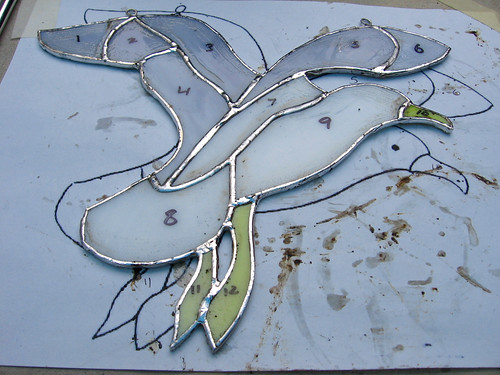
I tend to overgrind my pieces (so they are too small) so I was happy that I did a pretty good job on this one getting all the pieces to fit together well!  You can see that after I took off the paper I relabeled each piece with permanent marker right on the glass to be sure to keep track of which piece went where and which side was up.

stained glass process 7

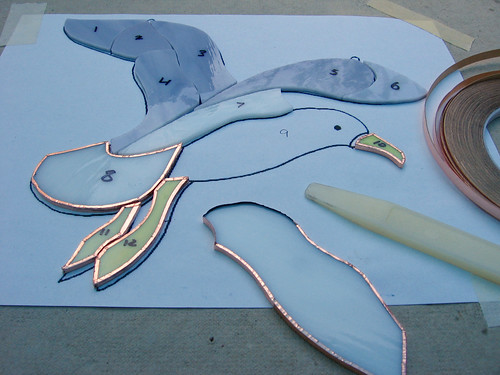
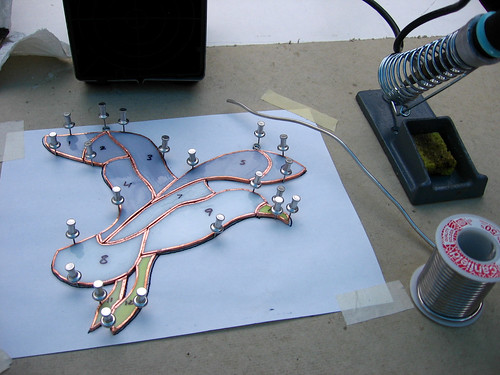
Since I was using the copper foil technique, I then wrapped each piece of glass in an adhesive backed copper foil tape, adhering the tape to the glass by pressing/rubbing it with a plastic tool called a fid.

stained glass process 8

Then I fit all the pieces together again and held them in place using special metal pushpins - see how they copper foil fills in pretty much all the gaps?

Stained glass process 9

Then I painted a flux on the copper foil and soldered all the pieces together, and coated the edges in solder too.  For larger pieces you would be fitting them into a zinc or lead frame, but since this is a small suncatcher it should be fine with just the copper foil edges.  You can see I also soldered in copper wire loops for hanging the piece.

Finally, I used a special soap to clean off the flux and then I applied a chemical patina to turn the metal black, and the piece was finished!

I hope you enjoyed this quick overview of the stained glass making process... This will probably be the last stained glass I make for a while since I work outside and it is now ridiculously hot out in DC, plus we are getting ready to pack up for our big move to Oregon soon!

Friday, July 01, 2011

July Bloggers' Dinner Party and Moving News


Thanks again to everyone who joined in the Bloggers' Dinner Party in June! I know there were a number of folks who wanted to join in but didn't have time last month, I can't wait to see all your beautiful dinner items this month. I was also thinking I would broaden the party to include not just handmade items for serving dinner (placemats, tablerunners, napkins etc) as I said originally, but also include items related to making dinner - aprons, potholders, dishtowels and the like. How does that sound to you guys?

In personal news, Lawson and I have been looking to make a move from DC to the Pacific NW for a while now, and things are falling into place for us to hopefully move to Portland in the August/September timeframe! We are really excited about the move but it may mean a bit of a blogging slowdown for the next few months, especially August. I am weighing options for what to do for the dinner party and considering either suspending it for a month or two, or possibly doing a combined August/September party - let me know if you have suggestions for what you'd like to have happen!

In light of our impending move, I thought it would be good to give away a prize from my stash this month to help me start to make (a little) progress to reduce the amount of fabric and craft supplies I need to move.

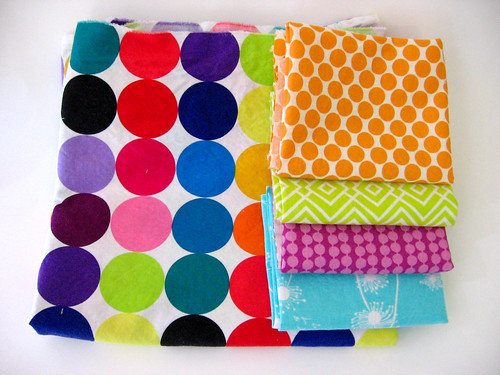
July Dinner Party Fabrics


The prize will include 4 fat quarters of fabric (handcut by me, so they may not be perfectly exact) - I will update later with a list of what these specific fabrics are - and a 1/2 yard wide by about 2 1/2 yard long piece of Michael Miller Disco Dot fabric.

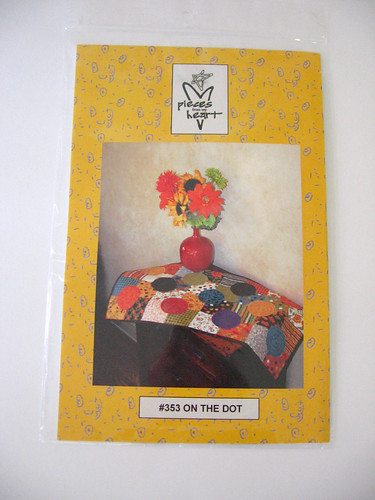
Table Runner Pattern


I'm also giving away this table runner pattern - I won it in a giveaway myself and while it is really cute I don't know that I will make it, so I wanted to pass it on in case someone else could use it.  It calls for a charm pack of fabric, so the fabric above is not intended to be enough to make this pattern, but you could certainly use the fabric prize and add some from your stash to make it.

So head on over to the Bloggers' Dinner Party Page for the linkup, details on how to enter, and the badge/button for your blog!  And remember, you can enter any item you have made in the past year, as long as you put up a new post - so feel free to show off something you already made if you don't have time to whip up something new.

Thursday, June 30, 2011

June Bloggers' Dinner Party Wrap-up


Thanks so much to everyone who joined in the first month of the Bloggers' Dinner Party!  It was so fun to see all of your creations and a few of your even shared recipes too (yum!).  Here were a few of my favorites...

Awesome flower placemats from Sara of Sew Sweetness

Sweet Crop Circles Tablerunner from Skooks Playground

Rainbow Quilt-As-You-Go Tablerunner from Michelle at City House Studios

You can see all the June entries at the Bloggers' Dinner Party page!

The winner of this month's lovely fabric prize is:


Skook's Playground!  Congrats Skooks, I will get in touch to get your mailing info so you can look forward to receiving this...


A huge thanks again to Peg and Becca at Sew Fresh Fabrics for donating this great prize!


Stay tuned, I will be back in another day or two to open the linky for July :)
Related Posts Plugin for WordPress, Blogger...