Saturday, October 13, 2007

Monkey!


I just finished this baby quilt for my friends Sarah and Amanda who are having a baby next month. They haven't seen it yet so I hope they like it!! I saw the monkey fabric in a store in NH and loved it and decided it would be perfect for a baby quilt.

Here's a detail of the monkey block design:


And here is the fun monkey pattern on the back:

baby hats

Two more baby hats...

These are both with yarn from knit picks, shine sport and using a technique I learned from their website, the magic loop method for circular knitting (highly recommended for those who dislike dpns!). I have started buying some yarn from this website and am generally pleased with the quality - and affordability is definitely a big selling point. I used less than one skein for each of these hats so that was great!

Patterns (based on my memory of what I did, I was making it up as I went along)


Yellow Hat


Using size 4 circular needles (long enough to do magic loop - I used 36" I think), CO 80 st, join in the round. Knit in seed stitch for 5-6 rounds (not sure how many I did). Cont knitting in stockinette st until hat reaches ~4.5 inches. Place markers every 10 stitches. Dec round: k2tog before each marker. After first dec round, knit two rounds. Then alternate dec rounds and knitting rounds until you have 8 st remaining. For the last round, k2tog 4 times, then run tail through remaining stitches, tighten and weave in end. This makes about a 15" circumference hat which should be good for a newborn/very young baby.


Pink Hat


Using size 4 circular needles (again, long enough to do the magic loop), co 84 st, join in the round. Knit in st st until hat reaches ~4.5 inches (with brim rolled, ~5 inches if you unroll it). Place markers every 14 st (a total of 6 markers). Dec round: k2tog before ea marker, ssk after ea marker. After first dec round, knit two rounds. Then alternate dec rounds and knitting rounds until you have 12 st remaining. k2tog 6 times, leaving 6 stitches remaining. Work 6 stitches as i-cord until you have a cord long enough to tie in a knot at the top of the hat. This makes a ~16" circumference hat which would be good for an newborn/young baby but is stretchy enough that they probably won't outgrow it too fast.

Sunday, September 30, 2007

One more post


Whew, at the rate I'm posting here you'd think I had readers ;)

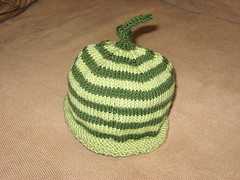
Anyways, just wanted to post one quick craft project that I recently completed: A baby hat for my coworker Suzanne who is due tomorrow! (although she thinks she'll be at least a week late).

So many people that I know are having babies this fall, so I am working on a number of baby-related craft projects. More on that thought later!

Talk about homemade

So, I have been exploring local eating this year and enjoying making lots of food from scratch. Usually it doesn't get quite as homemade as it did with this pizza, though.

Thanks to a great gift from family friends, I have been learning how to make cheese! Quite exciting, delicious and also a great conversation starter (people can't seem to believe this is possible). The first time I did it, the cheese turned out really quite well, but I am still refining my technique. It's not too hard. You add citric acid to milk (can't be ultrapasteurized - for the batch here, I used farm fresh milk that a friend procured for me), heat it up, then add the enzyme rennet, stir and let curds form [NOTE: this was from the first time I made cheese - the curds are actually supposed to be less chunky and more solid/smooth than this as I have discovered in later iterations].
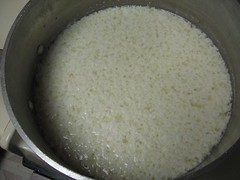

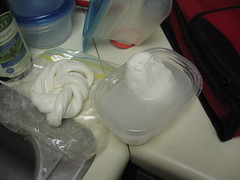
Once you have curds, you drain the whey (liquid) off the curds (this is the part that I find tricky) and then heat the curds and knead them for repeated cycles, until you get... cheese!! I made mozzarella but using a similar procedure you can make other soft cheeses. I think hard cheeses are trickier.

Other than making the cheese from scratch, this pizza is fully ridiculous because I also made the crust (although I did not grow or mill the flour), grew the peppers and also grew the basil that I then made into pesto. And then I ate it off a plate that I made just to round out the picture. If you're wondering whether it tasted better with all those homemade inputs, I think it did! (but maybe all the work just made me more hungry).


I have gotten multiple compliments on this crust, so if you'd like to try it out, the recipe is from Barbara Kingsolver's Animal Vegetable Miracle - a great book!

Garden!

Well, I am still learning how to use my blog. I tried to upload pictures directly from my computer but that didn't work, but I was able to do it by using a link from a photo in flickr.

Anyways, this is a picture of my garden... finally going in full swing! In this photo: basil (huge, in back); lettuce, chard, carrots; mint, pepper, lettuce, parsley and cilantro, thyme. Tonight with dinner I ate home grown chard in my burrito, yum.

I think that I'll load the photos I wanted to comment on into flickr and then do another post. Apologies to any readers (?do I have any?) for my learning curve here :)

Saturday, June 02, 2007

First Post

Hi world! I've been meaning to start a blog for a while and am finally just doing it. I probably won't start posting on a regular basis for about a month, but now its up. While my blog is called PotteryKate for now I may rename it later... I haven't been doing too much pottery lately but hopefully that will change soon!
Related Posts Plugin for WordPress, Blogger...