I am very excited to be participating in the Fat Quarter Shop Dream Big with Dr. Seuss blogger challenge, using their Dr. Seuss ABC's Fat Quarter bundle! Dr. Seuss's ABC's is a favorite book in our house, so I was very excited about these fabrics, and I kept having phrases from the book pop in my head as I was working with them (it's catchy!). Fat Quarter Shop put together a video tutorial showing how to make a cute baby quilt with the bundle; I went in a different direction and made a cute toddler outfit.
Esther has nearly outgrown her last set of quick change pants, so I made her some 24 month sized ones to last through the winter. The main fabric for these pants is a lightweight green corduroy that I had on hand, and I used the ABC patchwork print for the bum panel and a patch on the shirt. Rather than making the pants reversible, they are mostly lined in upcycled flannel (from a sheet) with the yellow polka dot print just on the bottom inside to make a cute cuff.
The alphabet bum is so cute and colorful! In making the pants, I made the same basic modifications as my last pairs - I narrowed the outside leg seams (making the waist/legs wider) but them added more curve to the inseam to make the legs a bit narrower again. That way they aren't too much of a squeeze to get on over her diaper bum but have a bit less of a boxy look.
Not that I shy away from unisex clothes, but I thought with the boy-ish style and colors of the pants, it would be good to have a shirt that was more clearly a girls style. I upcycled a orange shirt to make a long sleeved top with a gathered neckline (my own pattern), with yellow fold-over elastic for the neckband giving a nice contrast color. I wanted the shirt to tie in with the pants so I put a patch on from the same patchwork ABC fabric.
Originally I cut a patch out of the big alphabet panel to use on this shirt (with the E elephant for Esther) but it was a bigger patch and it was too stiff to work well with the gathers in the neckline. So I picked it out and made this smaller, lower patch and am saving the E for another shirt! I am planning to save the rest of the panel to use for applique patches for other kids items in the future - I foresee lots of cute initial T-shirt gifts.
I also made a second pair of pants which turned out even more boy-ish so I think I am going to save them for a future baby gift.
I used the bear fabric for the bum panel on these and the green dot for the contrast cuff lining. The main fabric for these is upcycled from a chambray shirt of Lawson's, and I actually used the reverse side which was a bit lighter. I lined these pants in upcycled flannel as well, so both pairs of pants should be nice and warm for the winter.
I usually think of sewing kids clothes with fabric yardage so this was a fun challenge to realize how much I could do with a few fat quarters!
Disclosure: Fat Quarter Shop provided me with the fat quarter bundle of fabric for this challenge, but all opinions expressed are my own.
Showing posts with label clothing. Show all posts
Wednesday, October 08, 2014
Tuesday, May 20, 2014
More Quick Change Baby Pants
Esther got a ton of use out of the first batch of quick change baby pants that I made her, I couldn't resist making her a slew more when she outgrew them. (Pattern from Anna Maria Horner's Handmade Beginnings book (affiliate link)). Most of these I kept the print selection simpler and just used two prints, with one for the main pants and the other for the butt panel, then the opposite for the other side. That way the butt panel and the cuff match for both sides. I love love love this Heather Ross Briar Rose Strawberry print and it looks so cute on these pants. I can't resist dressing her in these whenever they are clean!
I also love how these bunny pants turned out, I had been saving this Aneela Hoey fabric (from her Posy line) for a special project and decided these pants would be it! These I actually lined with a lavender fabric because I figured the bunnies would be too cute to ever be reversed. The only downside to these pants is that they get dirty really easily so they aren't great for digging in the mud at the park, but they are cute enough to make up for it.
I actually made these elephant pants before Esther was born, when we knew we were having a girl but I still really wanted to make her gender neutral clothes. (The elephant fabric is from Cloud 9's Ed Emberley fabric line). Which obviously is not as high a priority for me now, haha. Not that I don't dress her in plenty of gender neutral things, I just have loosened up and realized that part of the fun of having a little girl is dressing her in adorable strawberry and bunny outfits. I had nearly finished the pants but I went back and took them apart and resewed them with narrower side seams to make them wider in the waist/butt, since the first pair I had made originally were so tight. I love the elephants on these pants and while the other side (with elephants as the main pants print) is super cute she more often wears them on this side since they don't get dirty quite so easily.
Finally, I made her a pair of simpler green leafy pants. She actually was wearing these on St. Patrick's day very fittingly, and totally accidentally - I was at a kids event where all the other children were purposefully dressed in green and I hadn't been thinking about it at all. One time when wearing lots of green paid off! I also modified the pattern a bit more for this pair of pants (and the others, except the elephant pants that I had sewn earlier) - since I was letting out the side seam to make more room in the bum, I also narrowed the leg by adding more of a curve to the inseam, making the legs narrower at the bottom. This changes the shape of the pants a bit but I think it looks better than the extra-wide leg that resulted from the other adjustment I made and it also looks a bit more feminine. I did have to be careful to make the bottom of the leg still straight so that they cuff well.
I have to say, it took some willpower not to make more of these pants - these were all 12 month size and I am trying to hold off on making more until the fall when I see what size she is in then... I'm figuring that as she gets taller this summer she may be able to wear this current set as capri pants for a while too.
Thursday, February 06, 2014
Winter 2014 Kids Clothes Week
Last week was the winter 2014 Kids Clothes Week challenge, and I was able to nearly meet the challenge to sew kids clothes for an hour each day all week... I missed one day because Esther was teething and was having trouble sleeping and I've been having problems with waking her up by sewing if she is sleeping too lightly, so I didn't want to push it by trying to sew. Really hoping she outgrows this problem soon or I may have to rethink having my sewing area upstairs near her bedroom. In any case, I was happy that I got to sew so much and I made some cute (and useful) new clothes for Esther! I had had the idea to make a skirt attached to leggings after seeing a pair of leggings with a shorter ruffle attached on a friend's baby.
I made both the leggings and the skirt from upcycled knit shirts, reusing the original hems. It turned out really cute although for the next iteration I will probably make the skirt a bit shorter! Having the skirt attached to the leggings makes it a bit less likely to get in the way when she's crawling and also just makes it easier dressing and undressing her (which it feels like I do a thousand times a day with diaper changes etc).
I also made several pairs of upcycled pants/leggings - these two were made from heavy interlock turtlenecks which turn out to make the perfect weight for cold weather baby pants. I didn't get a picture of another pair of leggings I made out of a cute pink fabric with tiny white hearts on it - unfortunately the fabric stretched out quite a bit when she wore them so that's a bummer, but she'll still probably get some good use out of them for the next few weeks around valentine's day. You can see the green pants are super comfy:
I also made a couple upcycled knit cardigans similar to the ones I made for the last KCW (here and here) but in a big larger size. As you may be able to tell from the photos in this post, getting Esther to stay still long enough to get a good photo of her wearing the clothes I make continues to be a challenge, she is really always on the go (or trying to grab the camera), not to mention that she doesn't love having her clothes changed - so I didn't get shots of all the clothes on her. You can still get a pretty good idea of this shirt, though, I think - I improvised the v-neck and am really happy with how the binding I put on around the neck/placket turned out.
My favorite project from this KCW is definitely this aqua cardigan, which should fit her for quite a while - the sleeves are rolled up about 2-3" here.
I love how the white binding on the button placket gives this a sophisticated look and the white buttons echo the polka dots. She has gotten a ton of use out of the cardigans I made her for the last KCW so I may just keep making them in successively larger sizes as she grows!
Tuesday, November 26, 2013
Appliqued Onesies
I'm going to keep right on sharing some of the clothes that I have made for Esther, keeping going with the momentum from my Kids Clothes Week posts. Although technically I didn't make these onesies for her, I embellished them. You know how if you get a pack of four or five onesies, three or four are cute and one or two say "I'm a princess" or "just perfect"? No offense intended if you are into those types of sayings, but they are not really my thing. Plus I love getting to give her things a more handmade touch, so I have been having a great time appliqueing designs on onesies (similar to the appliqued t-shirts I made several years ago). This time I tried using steam-a-seam lite instead of regular and found that was great for keeping the shirts from getting stiff and it was easier to stitch through.
It's a fun challenge picking the right applique for each onesie to cover up the saying or icon that was originally there. The first batch of these that I made (with the flower, watermelon, and umbrella) I did the applique on my machine, using the free motion foot. With the big designs, especially the umbrella, it was trickier than I expected to keep the rest of the shirt out of the way and keep the design flat as I worked on it, so the stitching is a little wonky but I don't really mind. I was curious to see how they would turn out with hand stitching so for the second batch (with the star and the strawberries) I hand-sewed the appliques with a simple running stitch and a single strand of embroidery floss. That obviously took more time but was easier to control and turned out more neatly. I enjoyed both techniques and think that which one is better to do really just depends what you feel like at the time. I didn't do it on either of these but I think it would be fun to add some more embroidered details when doing the handstitching, so maybe I'll try that on my next ones!
I think I had just made the strawberry one in this picture, whereas you can see that the umbrella one has gotten lots of good use - I like the fuzzy frayed edges!
I don't think that I had seen the thimble blossoms umbrella quilt when I designed this onesie, or at least I wasn't thinking of it consciously but it is a pretty similar idea! I figured an umbrella quilt would be good for a Portland baby.
Really, this picture is just here because it's cute. I'm having such a fun time with this cutie. Although photo shoots are continuing to get more and more difficult - I am still ending up with a lot of shots like this (she is increasingly mobile and wants to eat the camera):
Also, I never shared the photos of her wearing the grey striped cardigan from KCW, so here are a few:
She has been getting a ton of use out of this shirt (and really, all the shirts I made her, but this is especially a favorite). I'm so glad I picked the green buttons, I love how they look!
Tuesday, November 19, 2013
Quick Change Baby Pants
To follow up on my kids clothing week sewing posts (here and here), I wanted to share a few more of the clothes that I have sewed for Esther. I love the Quick Change baby pants pattern from Anna Maria Horner's Handmade Beginnings book, it is such a cute way to showcase favorite quilting cotton prints. While the instructions say that it require 3/4 yard of each of the main prints for most of the sizes, I found that I could eke it out with 1/2 yard, particularly for prints where the orientation of the fabric didn't matter. I love that the pants are reversible, so it's like getting two pairs of pants in one! Plus with the cuff that you can fold down as they grow, they should fit a bit longer than most baby clothes.
This first pair that I sewed for Esther was pretty snug, which could have been because I made them at the height of her deliciously chubby stage, so for the next two pairs that I sewed, I cut out the same size (9 months) but made a smaller seam allowance for the two outer seams (eg the ones at her hips, not the inseam).
That worked great and the next two pairs fit her much better - although they are still a bit of a wiggle to get on and off. These pants in muted sage green and coral are my absolute fave!
I also made a super fun bright pair of pants for her also in green and pink. I was tempted to sew tons more but I should probably make them in a larger size! She is growing so fast, it's already about time to fold down those cuffs...
Wednesday, October 23, 2013
More Baby Shirts for Kids Clothes Week!
After all the sewing that I got done on Monday (as I described in yesterday's post), I didn't get as much time to sew yesterday, and I only managed to cut out the pieces for another long sleeve top for the baby. Today I got a bit more time to sew so I was able to sew together that top, and cut and sew another button-front top for her as well. It's so fun really making time to sew and getting so many cute things made for her!
I love how this pink top turned out; it was inspired by a similar styled shirt that she has which she has almost outgrown - as you can see, this one has a bit of room to grow. I adapted the self-drafted pattern I used for the first set of shirts again, removing the button placket/front opening, adding a shoulder button, and here cutting a yoke just below the armholes and then adding a gathered bottom to the yoke. The sleeves of the shirt this was made from were gathered, so I just cut out sleeves and reused that hem with the gathers, giving this shirt cute gathered cuffs with no extra work for me!
The pants that she is wearing above are not ones I sewed but I like the a lot! I have been feeling a bit torn about whether to embellish these shirts a bit more -- I have lots of ideas of ways that I could do that, but at least for these ones, I am really enjoying just having some good solid color basic shirts for her. She has a lot of shirts with designs on them, and then a lot of (non-matching) pants with designs on them too, so it's nice to have some basics that are really versatile and will go with a lot of her more interesting pants.
I finished it after she had gone to bed so I'll have to take a photo of her wearing it later, but here is the second shirt that I made today - a fun grey and white striped cardigan style shirt. I almost put pink buttons on it but I couldn't resist the green. This shirt is very similar to the coral red shirt that I shared yesterday, but without the added length. Also, for this shirt, I decided to use twill tape to stabilize the button placket rather than just folding over the knit - this fabric (again, from an upcycled plus size shirt) seemed particularly stretchy and like it would benefit from that added structure, and I'm really happy with how that turned out. Although for some reason, not sure if it was related to the reinforced placket or not, I had a heck of a time getting the buttonholes to sew correctly and had to rip out and restart a couple of them when they got messed up. Luckily that worked and I was able to get them all made and looking decent in the end. And I am kind of amazed that ALL the stripes match up! Not only in the front but on both side seams and the sleeve seams too - I wasn't going to stress about it but it worked out amazingly well without too much effort.
I'll be honest, I feel a little embarrassed about how excited I am about these new shirts and that I have fun planning my baby's outfits. But it's just so fun to have a kiddo of my own to sew for and I'm thrilled with how these tops are turning out - not only do I think they're really cute but I also know they will a ton of use. After sewing for other people's kids for a long time but not really knowing what size or type of clothing they needed most or what would really get used, it's so great to feel like I know just what I want and can make it for myself. And I love getting to experiment with how many different ways I can adapt a pattern - as I mentioned yesterday, I probably have more ideas for these little shirts than would actually be practical to make (um, in fact, I sketched out a bunch just to get the ideas down and had 8 or 10 more variations that I'd love to try). But I should maybe cut myself off soon and save the rest of those ideas for later, to sew in a larger size! Not to mention that my sewing time the rest of this week will be scarce, so this may be it in any case for now. I may not technically end up meeting the challenge of KCW to sew for an hour a day all week but I am more than satisfied with how much I got sewn already this week, so I'm calling it a success!
Tuesday, October 22, 2013
Kids Clothing Week!
Have you seen that it's Kids Clothes Week this week? It is such perfect timing for me, I wasn't paying attention that it was this week but I had just sewn several things for Esther on Sunday and was excited to do more sewing on Monday when I found out it was that time again! I have enjoyed reading about KCW in the past and following along as others sewed, but this is my first time sewing along myself, now that Esther is 7 months old (I think there was at least one other KCW since she's been born but I wasn't up for it at that time).
I sewed her a few clothes when she was smaller but mostly tried to hold off - she has been growing so fast (already wearing mostly 12 month clothes and some 18 month!) and so it seemed silly to sew things that she would outgrow right away. I am hoping that she is going to slow down her rate of growth a bit now, though, and I also find that clothes don't always fit her right because she has a very long torso but not so long arms and legs, so it seemed like a prime chance to sew her better fitting clothes.
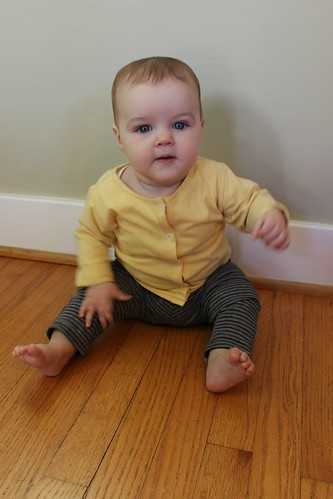
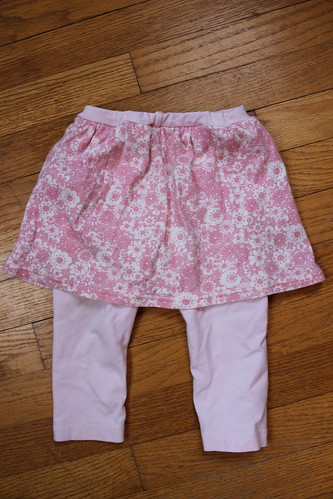
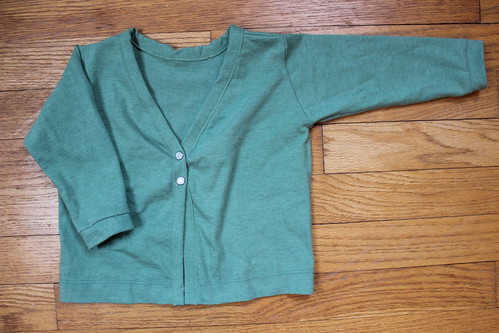
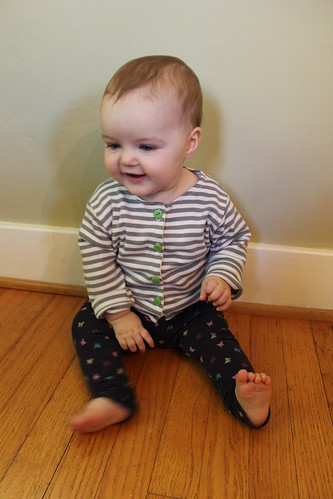
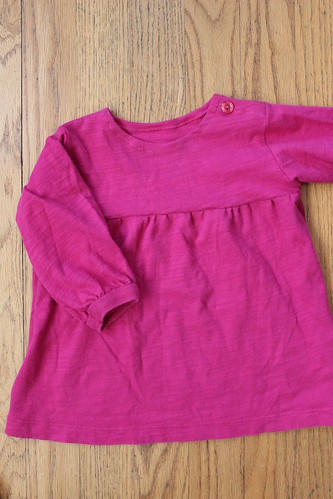
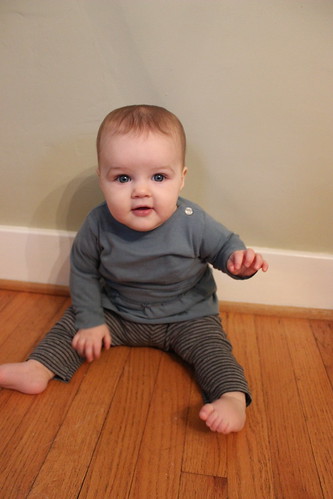
I had sewn her a number of pairs of leggings when she was smaller (I think I have some cute pics of her in them so I will try to find those and post them later), and I had been meaning to sew more, so I sewed up two pairs over the weekend and another pair on Monday. The pattern is self-drafted, just tracing a pair of leggings that fit her well. These grey striped leggings were a favorite shirt of mine that had gotten a hole in the front near the hem (this happens to me all the time, I think its because my pants button rubs them? I'm not sure but it's super annoying). They are kind of lightweight but so cute on her! I also decided to try sewing her a little shirt... I traced a cute long-sleeved t-shirt that she has and used it to make the pattern, but added snaps to the front instead of buttons. The snaps were a bit of a fail because I didn't reinforce the fabric enough and now I don't think you could unsnap it easily without ripping the fabric. Luckily it still fits over her head without unsnapping so I'm just calling them decorative and going with it.
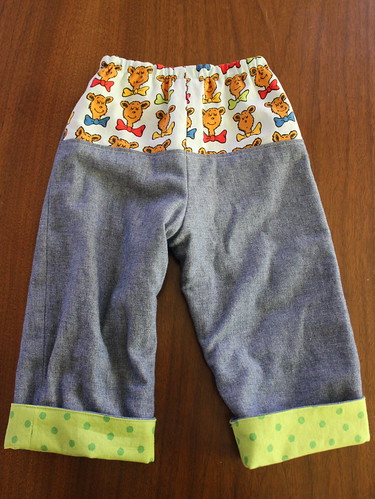
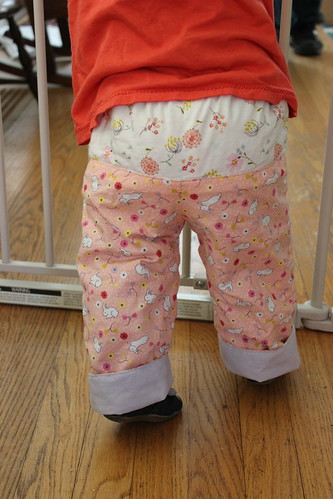
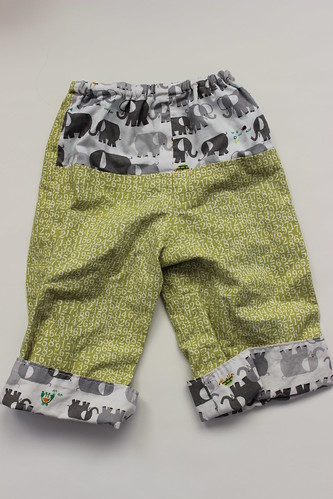
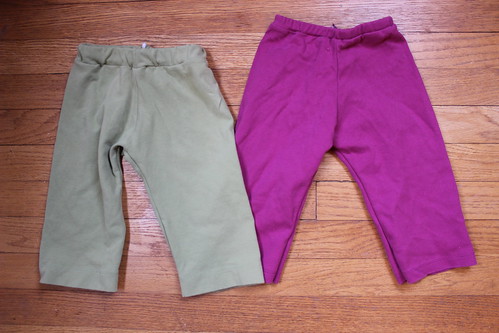
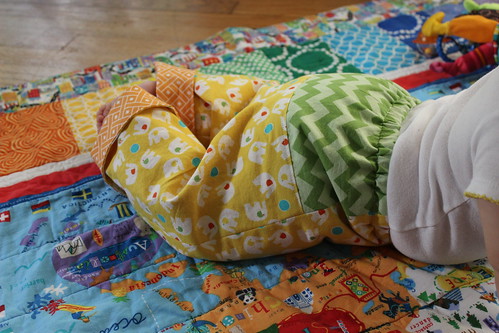
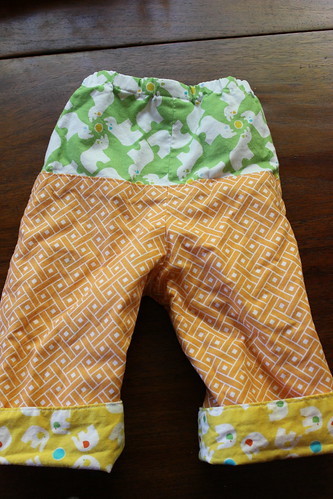
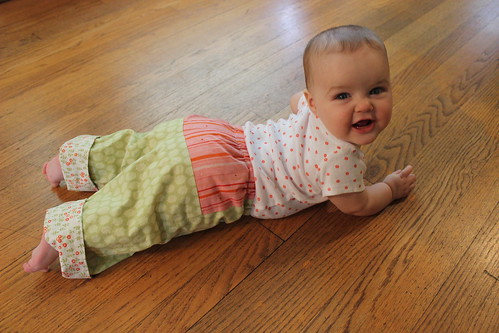
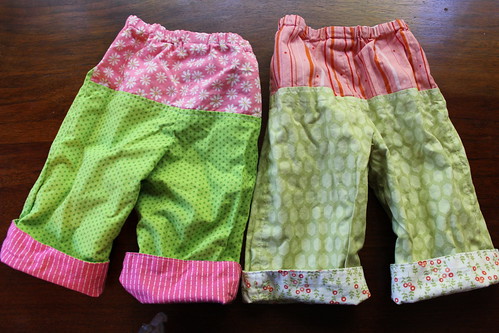
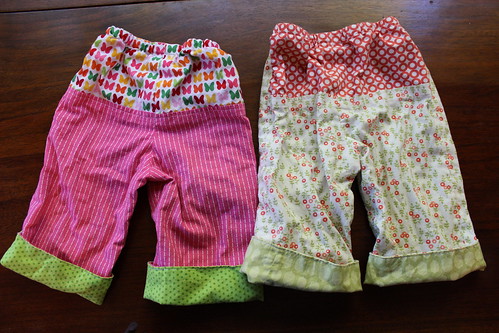
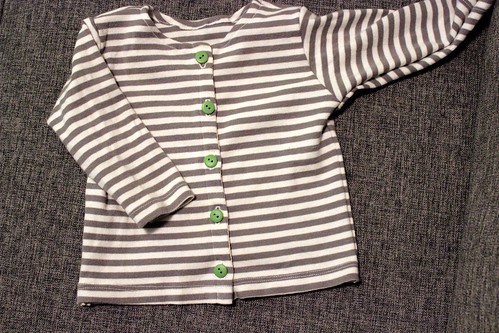
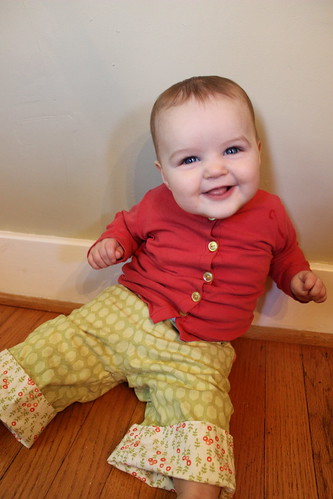
I really liked the way that shirt fit so I used the same self-drafted pattern to sew another very similar one on Monday, but this time with buttons, and I added a bit of length for our extra-long baby. I should mention that for all the leggings and these two shirts, I have been upcycling t-shirts (most bought at the goodwill outlet bins here in Portland for super cheap!) and I try to reuse the hems as much as possible - saves time and frustration hemming knits and gives them a more professional look. These pants are Anna Maria Horner's Quick Change Pants from her book, I made a number of pairs of them earlier and will have to share more about them later too! I love the green and coral in these pants and so it's so great to have a shirt that goes so well with them - I think both of these shirts will get a ton of use, which is great!
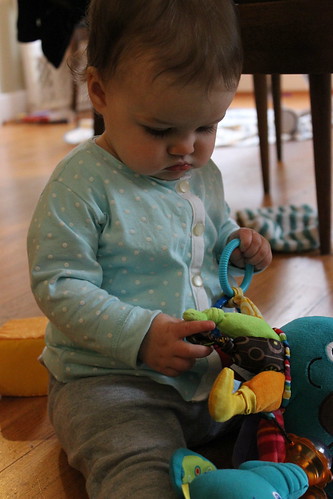
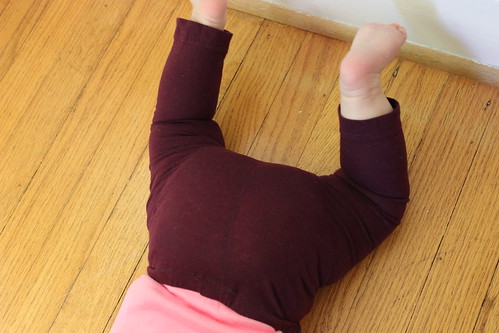
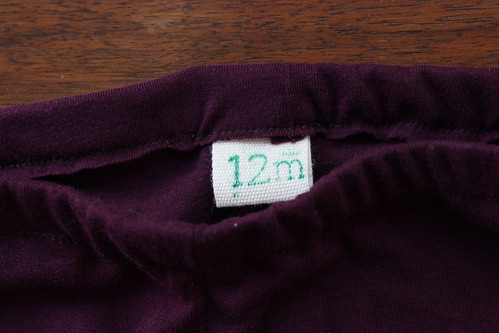
I also sewed her another quick pair of leggings yesterday, and added this stamped tag in the back which should help tell the front from the back.
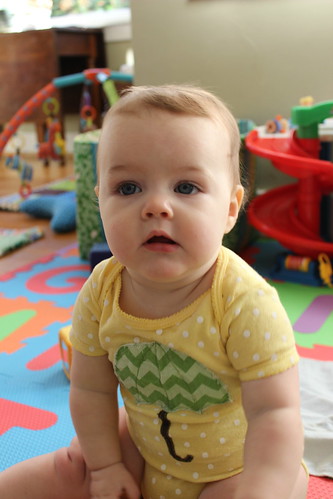
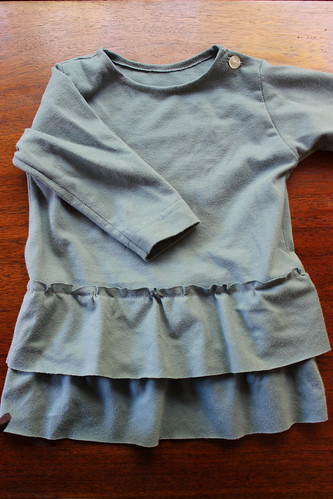
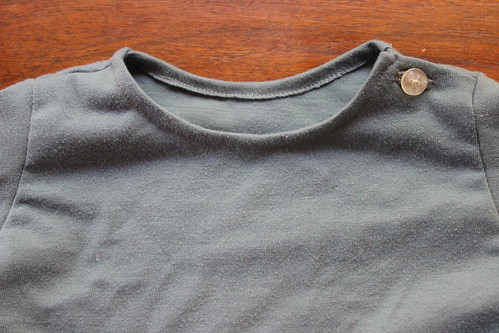
Finally, the project that I made yesterday that I am most excited about is this ruffle peplum tunic!
I started with the same self-drafted long sleeve t-shirt pattern, but cut the front piece on the fold (eliminating the buttonhole placket fabric), and put a buttonhole on the left shoulder instead of the seam. This fabric is from a weird pair of lounge pants, believe it or not, so there wasn't enough hemmed fabric to recycle for the body of the shirt, so I left it unhemmed under the ruffles, which are also unhemmed (and cut on the bias mostly to maximize their length - still would have preferred it if they were a bit longer, but these were the longest pieces I could get diagonally across the bottom of the pants). The shirt was cut to the same length as the regular t-shirt pattern and the ruffles are each 3" wide - one is sewn on about 1/4" about the bottom hem, and the other is sewn 2" above that.
I love the little flower button I found in my collection to use here - I think it helps it look a bit more fancy and special.
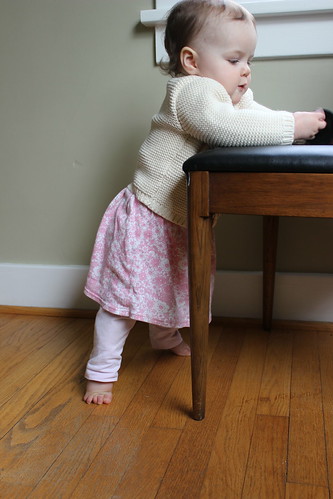
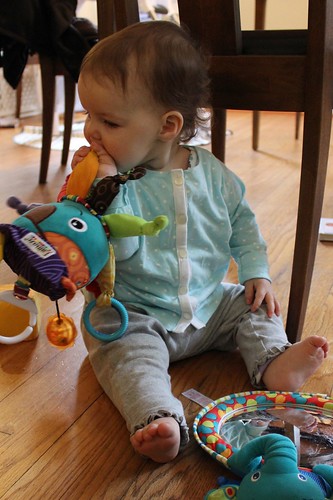
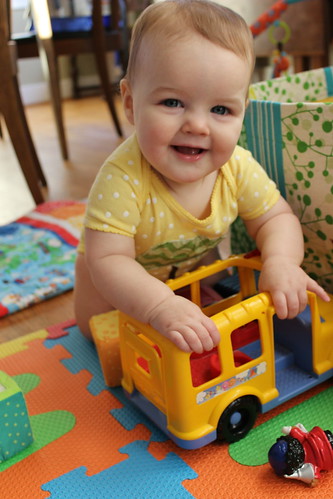
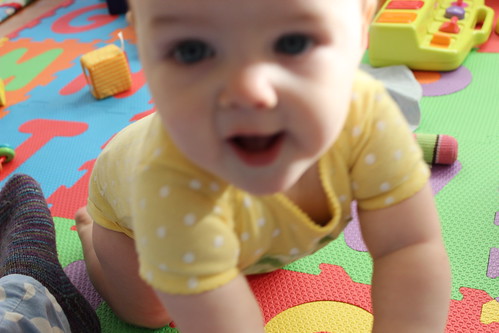
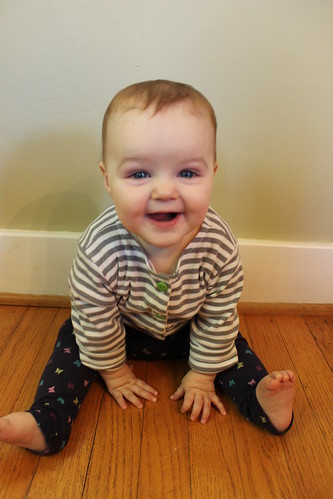
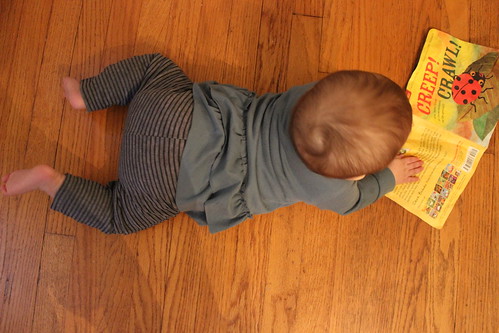
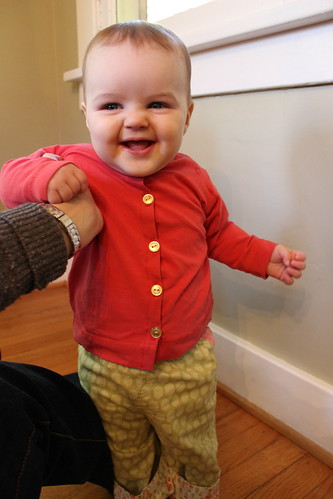
The tunic length is great on Esther since she is so long - I don't have to worry about her shirt riding up immediately when she scoots around. But speaking of how much she is scooting it does make it tough to get good photos of her in the outfits, particularly an outfit like this that is hard to see when she's sitting down.
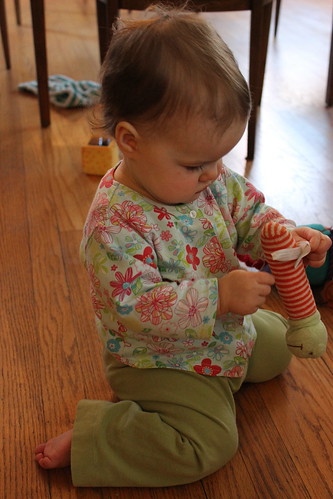
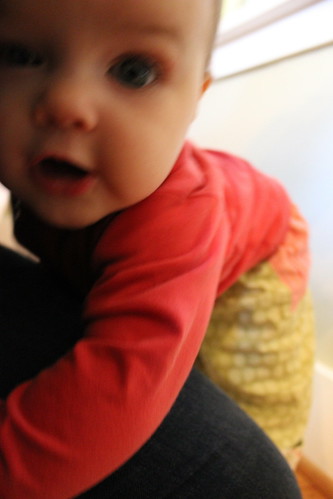
Not to mention that she is always on the move and tends to immediately crawl over and try to grab the camera so there are a lot of shots like this:
I kind of can't believe that I sewed two tops and a pair of leggings yesterday, I really had a fire under me! (And the baby cooperated by napping well and going to bed on time). Today I didn't dedicate all my free time to sewing like yesterday but I did cut out and start sewing another tunic length top/dress for Esther that I am really excited about! I hope to finish it tomorrow and maybe start another top for her. I am kind of tempted to keep using this basic top pattern to sew tops until I run out of ideas but I should maybe stop myself after I make a few more or I'll have more tops than she'll ever wear. Not to mention that I have more ideas of other things I want to sew!
Thursday, March 14, 2013
Sewing Maternity Tops
Being pregnant has been a great excuse to try my hand at sewing myself more knit tops - something that I have wanted to do but hadn't prioritized. Having more of a deadline to get things done for them to be useful while I was pregnant helped me get in gear! I have been lucky to also get some nice maternity clothes as hand-me-downs and bought a few things, but I was having a lot of fun sewing these up too. I was tempted to make more but realized it would be kind of ridiculous - but hopefully I can keep that energy going to make more clothes for myself and the kiddo in the future!
I made a few out of upcycled tops that I had found at thrift stores - I found that starting with a top that was a 2X size or larger was good to make sure that there was plenty of fabric to use and particularly that it would be long enough to cover my growing belly. For the aqua colored top above, I reused the original neckline and the sleeve and bottom hems. I traced a maternity tee that I owned for the basic tee pattern (sleeve/armhole/sides), and added the gathering below the bust before I cut out the pieces. (To add the gathering, I just sewed a piece of elastic on the wrong side of the shirt, stretching it as much as I could as I sewed). I sewed everything together just using my regular sewing machine, using the knit stitch which is kind of a slight zigzag (the symbol looks like a lightning bolt on my machine) and am very happy with how it turned out!
This v-neck tee is even more basic, but was put together basically the same way (minus the gathering at the bust) - I used the original neckline and hems again. I really like the color of this one, it has been a nice basic to wear.
I also made some tops just starting with knit fabric that I had on hand. I honestly haven't worn this one too much both because the fit is a little off and it's not really my color... but it was fun practice at least. I had remembered seeing Anna from Noodlehead's t-shirt tutorial where you make a t-shirt with kind of dolman-style sleeves where they are just part of the front and back pattern pieces rather than inset at the shoulder. I didn't actually look back at the tutorial before I sewed, which probably would have helped - I think a looser fit in the bust/shoulders is definitely more flattering for this type of tee and it's not what I did. It's not horrible but like I said, it's not my favorite. Definitely piques my interest to try this style tee again though!
See how there's just a seam down the top of the shoulder? Definitely easy construction.
The last two things that I sewed were based on one of my favorite styles of tops/dresses, where you have a gathered cross front. I made a top as practice (and because I wanted a top) and then I made a dress with the same basic style and pattern. I was pretty proud that I was able to figure out how to make the gathered cross front based on modifying a regular t-shirt pattern and that it turned out so nicely!
I didn't have the energy to take photos and write up a tutorial when I was making these, but this style shirt would also be great for non-maternity so if I make another I may write up a tutorial. I'm hoping that both this top and the dress still work for non-maternity wear (and it certainly would be easy to make a non-maternity style using less fabric/gathers for the lower part). When I made them, I intentionally designed them to be fairly low cut and intended to wear with a tank underneath - I figure that after baby is born, I can wear them with a nursing tank and they'll work great for that too!
(Ahem, pardon the jeans under the dress. We took all these photos one day and I didn't feel like changing out of my jeans when we got to taking the photos of the dress.)
The back for the shirt was also similar to the back of the dress, with some gathers/pleats but not as many as the front.
As you can tell from these photos, I'm definitely in the home stretch of this pregnancy! We actually took these a few weeks ago so I think I look even more pregnant now. Our baby is due next week so she could come anytime in the next few weeks! I have already started my maternity leave from work and am taking advantage of the time to rest and also do some more crafts, so hopefully I'll find time to come back and put up another post or two before baby arrives (unless she comes sooner rather than later).
Subscribe to:
Posts (Atom)