Wednesday, December 05, 2012
Bee blocks and exciting news!
As a start, here are the bee blocks that I have made since July (!) for my do.good stitches bee circle, the love circle. I have really enjoyed participating in this bee for the past year and a half, and have been so inspired by the block choices each month, and by seeing the work of my other bee members, but I decided that it made sense for me to step down to focus on getting ready for baby. So these are my last bee blocks for now - although I hope to have time to participate in a bee again in the future as it has been such a great experience!
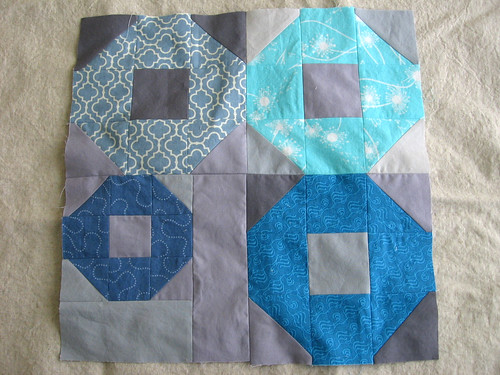
I love the design that these converging corners blocks make when all put together (and I love the nautical colors that Deb chose!) - see the finished quilt over on Deb's blog.
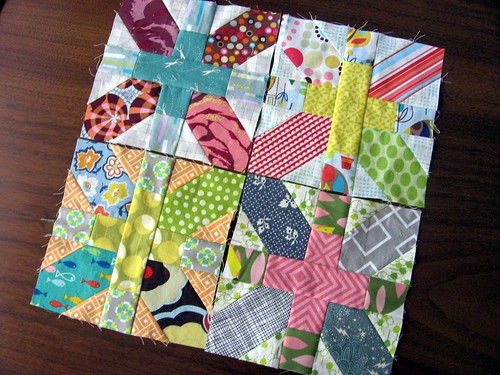
These + and x blocks for Ara Jane were so fun to put together - I definitely spent as much time picking out which scraps to use as I did actually sewing them. And the finished quilt is a stunner!
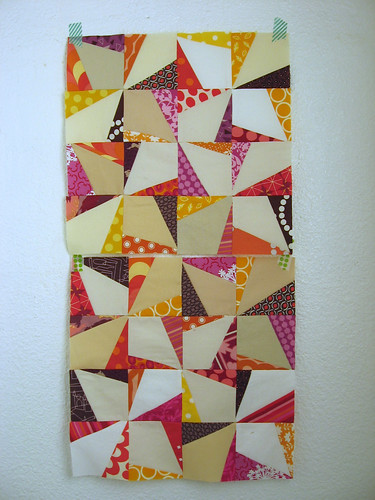
I love Natalie's tutorial for wonky pinwheels - the blocks are quick to make and the pattern they make is so fun! I always love the color palettes Natalie picks out and this one was no exception - check out the assembled quilt top, doesn't it just feel like fall?
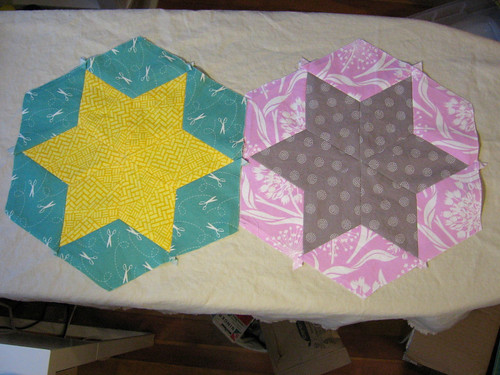
I had been meaning to try English Paper Piecing so it was fun to make these 6-pointed star blocks for Rachel. I love the color palette she choose and can't wait to see the assembled quilt top!
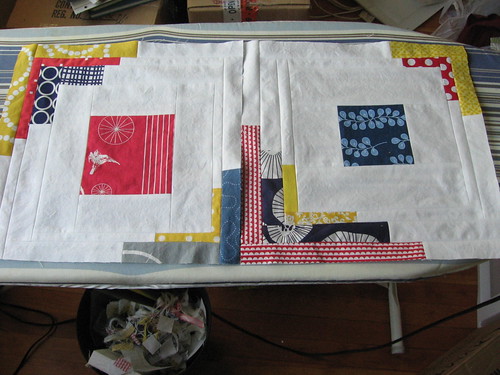
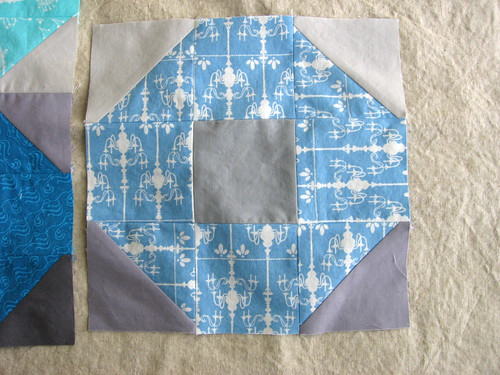
Some of my favorite bee blocks have been the ones where the quilter asked us to improvise off a theme (like the Asterisk blocks for Lee), so I was excited when Jacey asked us to make blocks based on a Shoo Fly but to have fun with them! I can't wait to see how the quilt comes together with all the different sizes and variations that folks made.
Thanks again to all my fellow love circle members! It has been so fun sewing together with you.
Friday, July 06, 2012
3 months of bee blocks
I feel like every blog post I have written lately starts with an apology about how long it has been since I last blogged, so I won't do that, other than to say I certainly didn't intend for it to be this long and hope to get back into a more consistent blogging habit soon! In good news, we are all moved into our new house and getting closer to mostly unpacked. We are really enjoying the new house and I am hoping to have much more time for sewing and other fun pursuits soon!
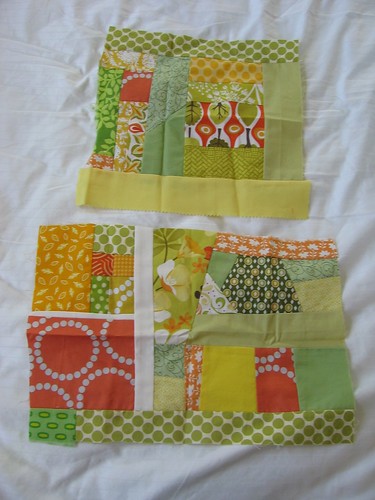
So, here are my last three months of bee blocks that I made for the Love circle of the do.good stitches bee. Above are this past month's improv block for Jacey - I hadn't done much improv piecing before, and I really enjoyed making them! I'll definitely have to do some more improv projects soon.
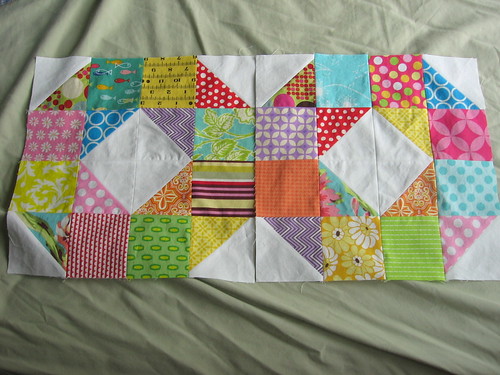
For May, Deb asked us to make Patchwork Wheel blocks from (tutorial by Elizabeth of Don't call me Betsy). I had fun making these scrappy bright blocks and enjoyed the secondary pattern of a star that emerges when you put them together.
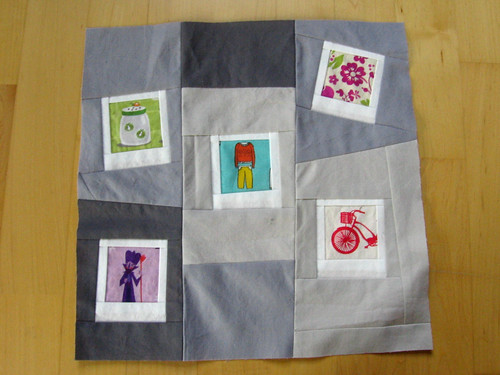
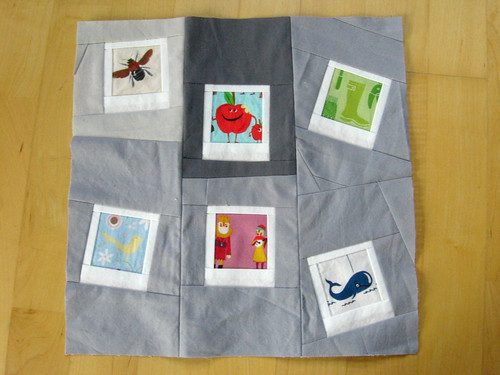
For April, Rachel asked us to make Polaroid blocks loosely following this tutorial - but said it was fine if they had fewer than 9 polaroids in each block. I liked the looser arrangement with fewer "photos" so I paper pieced each of the polaroids and then basically built each part up and fit it all together. It was really fun to get to fussy-cut some of my cute fabrics and showcase them with these blocks!
Monday, April 02, 2012
Aqua, Grey and Yellow
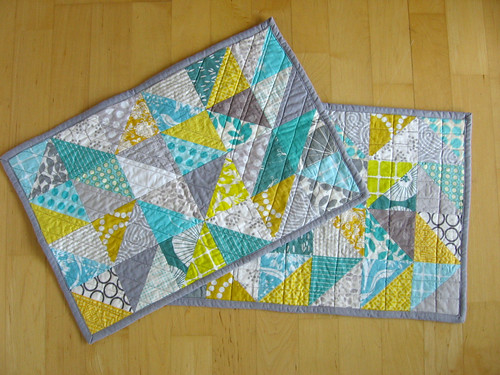
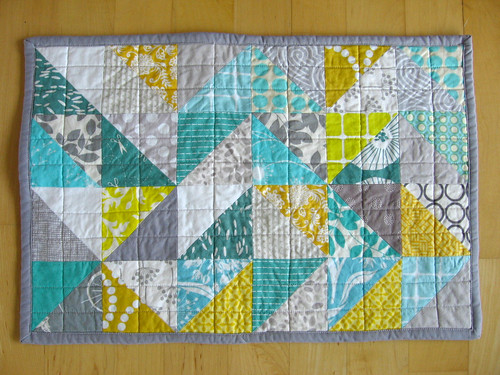
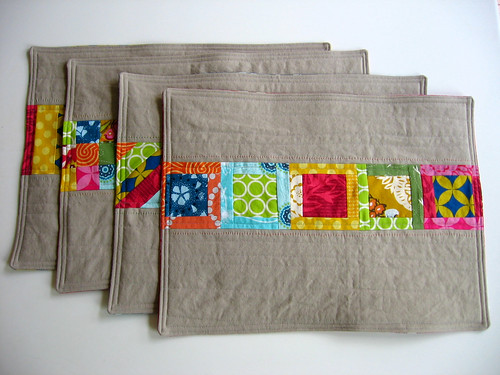
I just finished sewing my first quilt top with half square triangles (more on that later), and since I had never sewn half square triangles before, I wanted to do a quick project to practice before diving into making a whole twin sized quilt top. I made these using the method where you draw a diagonal line down the middle of a square and then sew 1/4" on either side of it - Jeni has a tutorial here. I originally planned to make a pillow top, but then midway through sewing up the rows I decided I was more excited about seeing these triangles on my table than on my couch, so I sewed up two more rows and made a set of placemats.
The finished triangles are 3" so these measure a nice 12"x18". I did my best to place them randomly, but I realized that with a scrappy patchwork version like this, where you don't have a defined light/dark or pattern/solid, pretty much any layout ends up looking like either zig-zags or flying geese. So I tried not to worry too much about the patterns that emerged and just went with it.
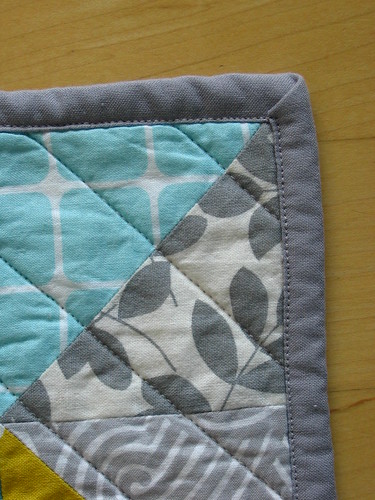
Both to save time, for more durability, and to practice my technique, I did the binding on these placemats all by machine - I have done this before but have to look it up each time, this time I followed AmandaJean's tutorial and was really happy with how it turned out!
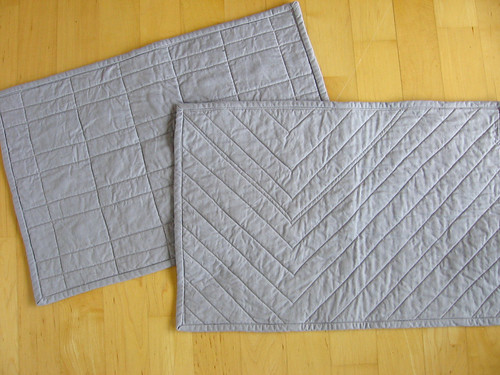
I bound and backed these in Kona Medium Grey, and had fun quilting them in two different patterns to create a little variety. I actually really love how the backs look, it makes me want to make a set of really basic solid placemats that just have fun quilting designs on them! Or maybe I'll just use the backs of these sometimes :) I had a lot of fun learning a new technique this way so I am thinking that I may use this same color palette (or something that goes) in the future to make other scrappy placemats with different patchwork techniques that I have been wanting to try out. Wouldn't that make a fun set?
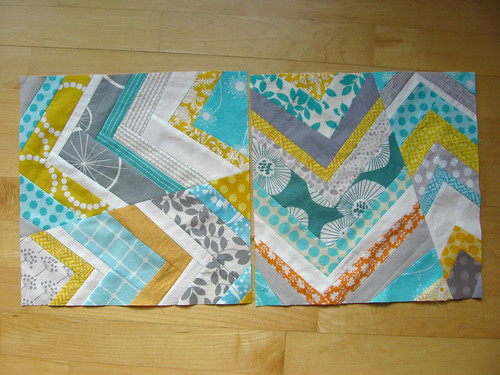
Speaking of this great color combination... when I went to pull fabrics from my stash to make the HST blocks, I just gravitated toward this color combination, and it was only midway through all the cutting and piecing that it occurred to me that it was nearly exactly the color combination that Natalie had picked out for our March do.good stitches blocks. I guess it was lurking in my subconscious, too funny! It worked out well, though, because it meant that I had already gotten out all the fabrics that I needed to make my bee blocks this month. I had a lot of fun with this pattern (following this tutorial) and definitely want to do more with it in the future - maybe make a table runner? It was definitely nice to do some loose, improv-style piecing after lots of precise HST corners!
[ETA] I'm linking up to Megan's Festival of Half Square Triangles over at Canoe Ridge Creations - there are lots of beautiful HST quilts entered, so definitely check it out if you haven't yet for some fun triangular inspiration!
Tuesday, February 21, 2012
Bee blocks and 1/4" seams
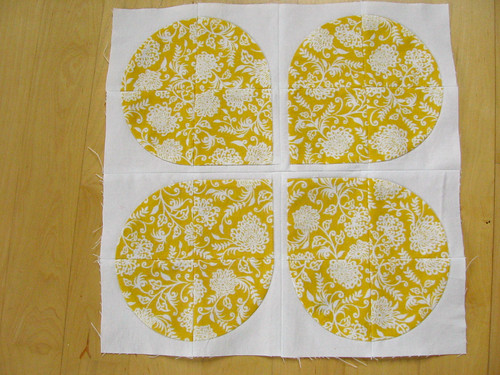
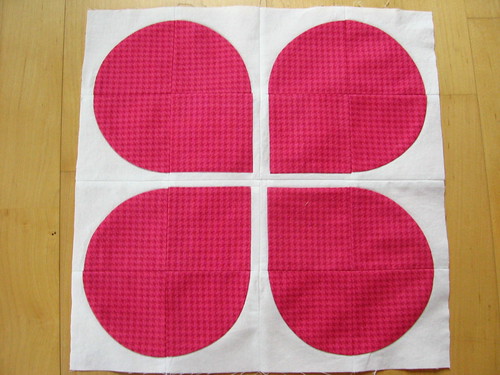
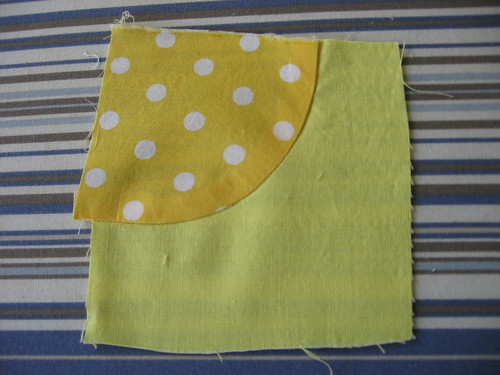
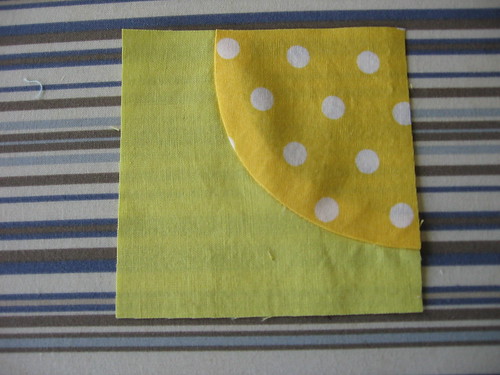
After a much needed month-off (and a reprieve to turn in my December blocks late), I finished my February bee blocks for the do.good stitches love circle this past weekend. Ara Jane picked the fun Retro Flowers pattern (which Christina kindly donated for us to use for this quilt). Ara Jane asked for bright blocks in warm colors, hopefully these fit the bill! I wasn't too intimidated by the curves in this block after sewing two drunkard's path quilts, but actually matching the seams correctly was somehow tricker than I expected (and I didn't get it perfect, as you can see on my first block below). I still enjoyed the block and am happy with how they turned out, though!
One thing that I have definitely been working on with my quilting over the past year has been getting a more reliable 1/4" seam, which if you make precisely quilted blocks you will know is the key to getting things to match up well and turn out the right size. I definitely still have room for improvement but I thought that I would share a few tips including one issue that came up specifically with this block.
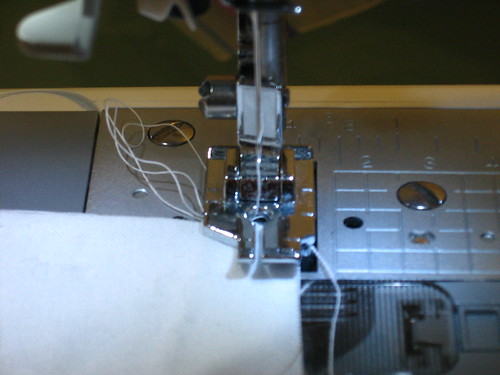
Earlier this year I bought this quarter inch foot (above) for my brother sewing machine. It was really cheap and definitely helped make it easier to line up the quarter inch seam with the side, but I found that it wasn't as precise as I had hoped... and it drives me kind of crazy that you have to use the center needle setting or your needle will hit the foot, and the default for my machine is a different position, so if I leave this foot on my machine, I will inevitable forget to change the stitch setting when I turn the machine on and mess up my needle. One thing that I have found that I really like to use this foot for is sewing curves. I think mostly because it helps me keep close to a 1/4" seam, but doesn't have too large a foot area and create puckers or anything.
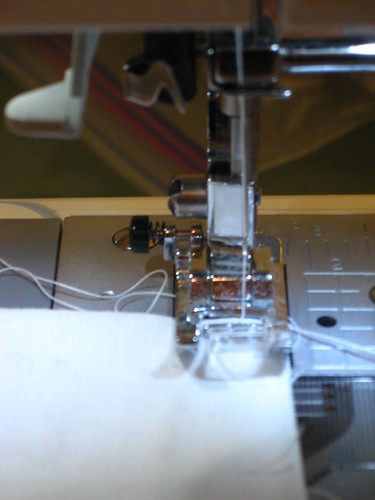
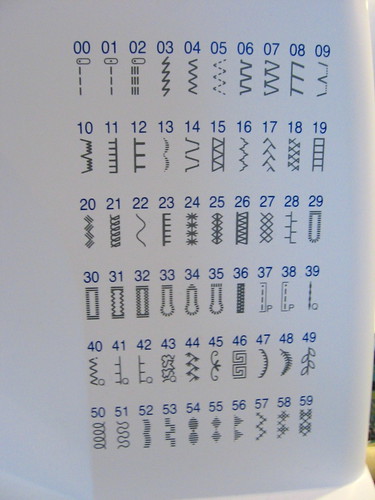
I know that lots of folks have a 1/4" foot with a metal guard on the side to make it more exact where the fabric is supposed to line up, and maybe someday I will get one of those. In the meantime, I have been using a trick which I picked up at the sewing summit. My machine has a ton of stitches, most of which I never use, and I never understood why there were special stitches for piecing and quilting. In one of the classes at the sewing summit they set up the machines using one of the piecing settings and let us know that that positioned the needle 1/4" in from the edge of the regular foot. Wow! I have been using this setting ever since and have found it to be more reliable for getting a 1/4" seam than my special 1/4" foot. This is setting #37 on my machine, and at least if you have a brother or a babylock you probably have a similar setting. This may be old news to folks but I thought I would share in case anyone else has been in the dark on this one! (and I still haven't figured out what the special "quilting" stitches are and how they are different from regular stitches - if you know, please do share).
Actually the hardest seams for me to sew in this block were the final ones where you join the four quarters of the block together, because the pieces you are sewing are each 1/2" wide to the next seam, which at least for me meant that when I sewed a 1/4" seam with the regular needle position, my foot was getting pushed out of place (towards the fabric edge, making a smaller seam allowance), by the thicker fabric from the previously sewn seam. Maybe if I had a nicer machine this wouldn't have happened, and I could have used a walking foot but that seemed like a pain. In the end I sewed these seams with my needle all the way to the left position (position 00 on my machine) which meant only less than 1/4" of my foot was on the fabric to the left of the needle and I just did my best to keep a 1/4" seam, which wasn't perfect. Has anyone else had this problem when sewing patchwork where the finished width is 1/4" or less, and if so, I'd love to hear if you came up with a better solution!
Wednesday, January 18, 2012
This and That
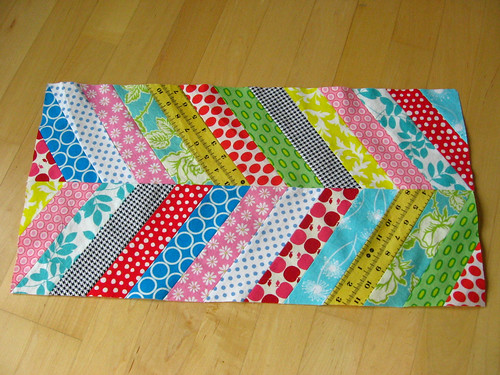
For our do.good stitches bee blocks this month, Rachel asked us to make a large herringbone block using her tutorial. Well actually it was for December, but luckily we decided to take the month off in January and Rachel gave us an extra few weeks to get the blocks done, which was much appreciated when I was frantically finishing up my holiday gifts. I had fun making this block and really like the fun, bright scrappy patchwork look of the color scheme she had us use - it'll be fun to see the quilt come together!
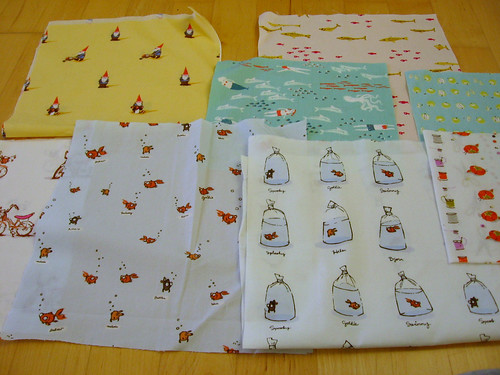
I was so thrilled to have won one of the giveaways on 2nd Avenue Studio for giveaway day (and happy to "meet" Rachel, who is a member of my guild here in Portland), and even more thrilled when this gorgeous package of Heather Ross fabrics came in the mail. I love all the cute creations I have seen other folks make with her fabrics, but other than the quilt I made with Far Far Away 2 I haven't had any of them myself. I am looking forward to some fun fussycutting in the future to show off these cuties, although I am a bit scared to cut into them!
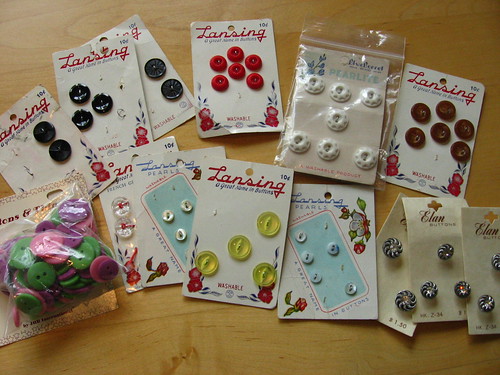
Among many other fun craft-supply gifts that I got for the holidays (thank you friends and family, you know me well!), my mother-in-law gave me these fun vintage buttons. I am building up a bit of a button collection and love having a supply to use in future projects.
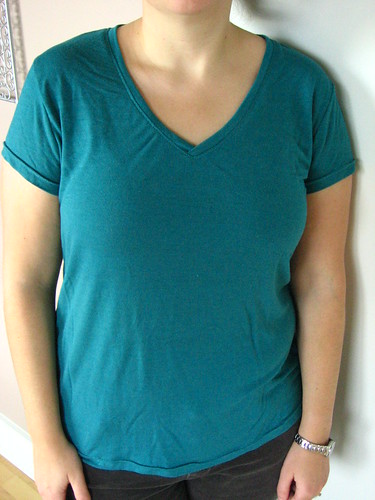
I took a t-shirt making class a few months ago (at local sewing studio, Modern Domestic) and have never gotten around to blogging about it here! I thought it would be fun to take a class to learn more tips and tricks about sewing with knits, although I felt a bit silly when I got there and realized it wasn't really different from the kids t-shirts I had sewed earlier this year.
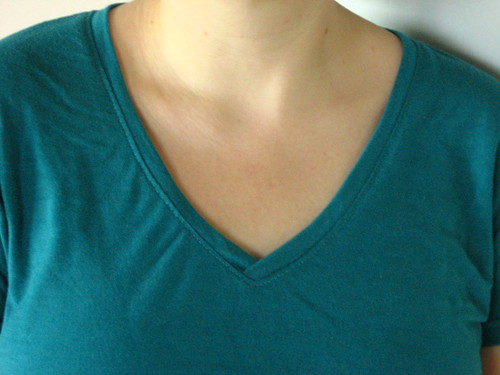
One cool new thing that I did learn was how to make a v-neck (they showed us how to use wash-away wonder tape to hold everything in place, although it was still a bit tricky to get it to turn out nice). I also got to try out the serger which was really fun, definitely makes me want to save up and get one! And somehow I had more trouble sewing the hems with a double needle on their fancy bernina than I have had when I have done it at home. I am really happy with how my t-shirt turned out, though, and look forward to making more!
Sunday, December 04, 2011
Asterisk Bee Blocks and tips
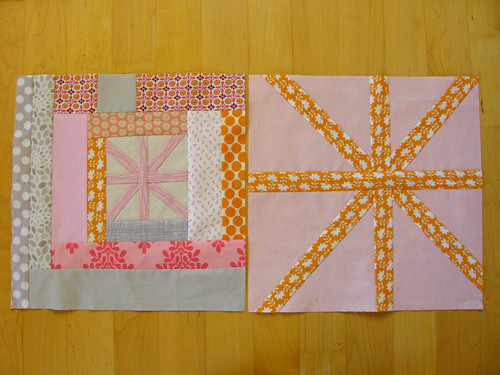
For last month's do.good stitches blocks for the Love circle, Lee from Freshly Pieced asked us all to make asterisk blocks in pinks, oranges, greys and whites - what a lovely winter palette! She directed us to this tutorial for the basics of how to make an asterisk block, but gave us free rein to play around with the blocks as long as they had one or more asterisk in them. I love these kinds of structured creative challenges so these were fun blocks to put together!
I made a smaller asterisk for one of my blocks and used it as the center of an improvisational log cabin block, which was really fun to make!
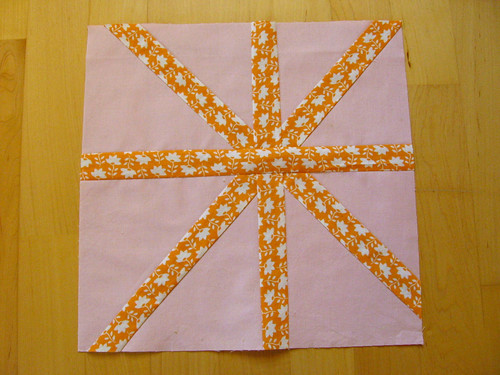
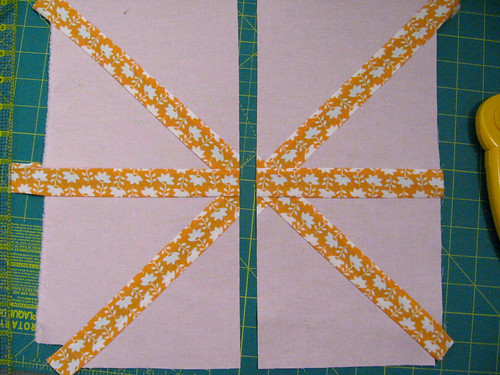
For my other block, I wanted to make a wonky/off-center asterisk with thicker fabric strips than the original tutorial called for. I didn't go much thicker, I used 1.5" strips (1" finished), rather than the 1" strips/0.5" finished that the tutorial called for. I wanted to share a quick tip for how to keep your asterisk strips aligned when using a wider strip. I imagine others have figured this out and may have blogged about it elsewhere, but I thought I would share in case this is helpful to anyone!
The original tutorial is great because it uses 1" strips of fabric, which means that when you cut the fabric and then insert the pieced strip, the 1/2" of the original quilt square eaten up by the two seam allowances is exactly replaced by the 1/2" of strip that shows on the top after it also loses 1/2" to seam allowances. So everything stays well aligned.
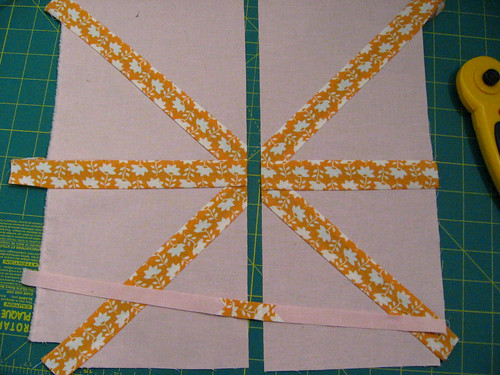
You may have seen asterisk blocks where the strips get kind of misaligned... I cut my in progress block and pulled it apart about 1/2" to show how this can happen - this is about how far apart the two sides would be if I had just cut it and then pieced in my 1.5" strip. It's not too extreme with such a small misalignment, but you can see that each of the diagonal strips kind of jumps across the divide rather than being a straight line. This problem would be more extreme and much more noticeable when using even wider strips, since the two pieces of the quilt block would be getting moved even farther apart.
The solution is simply to cut a strip out of the block where you are going to add the pieced strip. To figure out how wide a strip to cut out, you just subtract 1" from the size strip you are piecing in, to account for the 1/2" in seam allowances eaten up from each of the background and the strip you add. So, for my block, I cut out a 1/2" strip, since I was using 1.5" strips. I only did this for the final strip that I added, but in looking at it and thinking it through, I think I really should have done it for the final two (eg, the straight up and down segments, not the diagonal segments). You could do it for every strip you add, but it's definitely not necessary for the first one (nothing to line up yet) and for the second one, you can eyeball it to keep it lined up. I think my block turned out fine even though I only did this for the last strip, since I was not piecing with super thick strips, but I will remember to do it for both of the last two next time.
I definitely recommend the asterisk block if you have never made one before - they are really quick and fun to make!
Thursday, October 06, 2011
Bee blocks and getting ready for Sewing Summit!
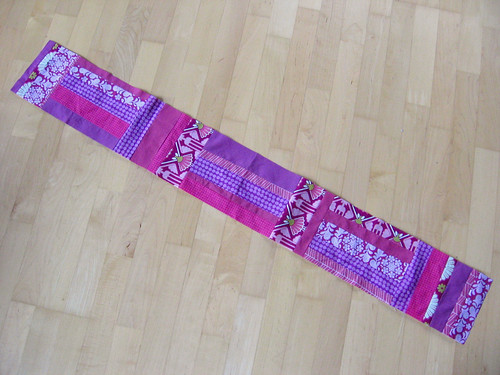
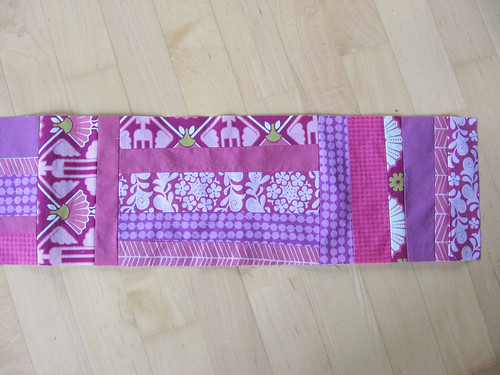
With everything we had going on, I waited until the very end of the month to sew my September blocks for the do. Good stitches bee - which was actually a long strip, rather than 2 blocks like usual. Natalie asked us to use our imaginations and we each stuck to a single color - I got plum and others did red and golden yellow as well. As usual, Natalie picked a gorgeous color palette and I can't wait to see how the final quilt turns out!
In a stroke of luck, Melanie of Texas Freckles had already posted the block design for October when I was working on my September strip, so I was able to do both at once. She had us make trip around the world blocks using this great shortcut, it was super easy! This was a fun block that I probably wouldn't have made otherwise, so I am glad I got a chance to try it out.
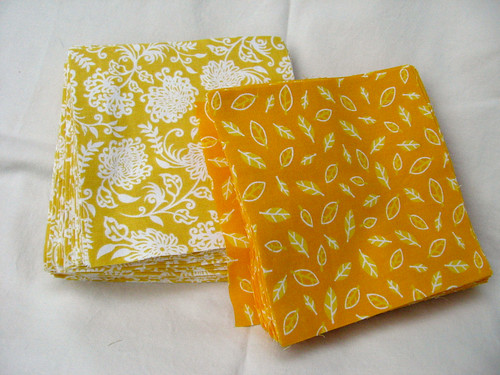
I am super excited for the Sewing Summit tomorrow! There has been a kind of insane amount of email traffic on the listserv that I have been doing my best to keep up with, but I am hoping that I'll be able to just jump into things when I get there even if I haven't been completely keeping tabs on all the goings on in advance. I did sign up for both the fat quarter swap and the charm square swap, so I have been pulling fat quarters from my stash to part with, and I bought two yards of fabric and cut them up into charms (good practice for the charms I'll be cutting for my Drunkard's Path quilt!). It is a rainbow charm swap and I was assigned yellow and yellow-orange, so this is what I came up with. I can't wait to see all the different fabrics I will be getting in exchange!!
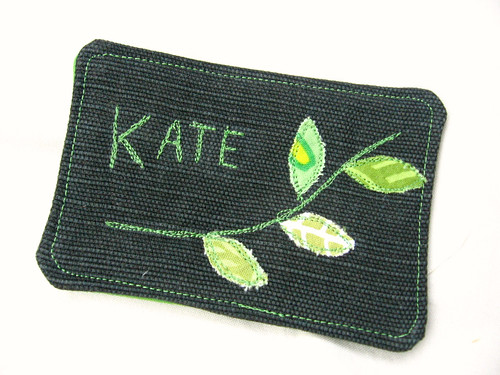
I also saw that a number of folks have been making themselves nametags for sewing summit, and I was inspired to make one too, although not patient enough to hand-embroider it. Instead I went for a free-motion embroidery/applique design inspired by the leaf design on my messenger bag pattern. It came together really quickly and I am happy to have something new homemade for the sewing summit since I didn't make a new bag or anything.
Oh, and I have been remiss in not giving an update on the Bloggers' Dinner Party! It has been fun doing this party, but I think I have too much going on to keep it going any longer - so it will be retiring, or at least hibernating for now. I may do one more month in December so folks can link up holiday projects. Thanks again to Michelle from City House Studio for hosting this past month!!
Tuesday, August 02, 2011
July Bee Block
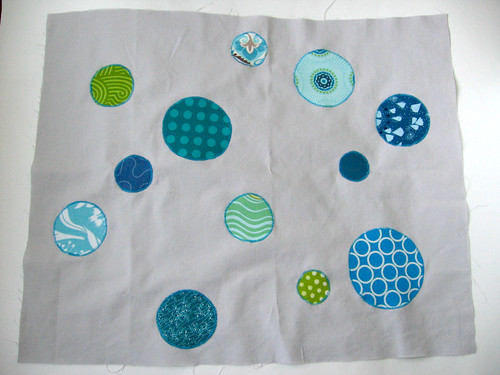
In between frantically packing for our move, I fit in a bit of sewing time yesterday to finish up a few projects and make my July bee block. For the Love circle for the do.good stitches bee, this month Rachel asked us to make a single large block rather than two regular-sized ones, inspired by the polka dot block in the new Block Party book. The color scheme was meant to evoke and ocean, with shades of saturated blue, green and then greys as well - it was actually pretty similar to a lot of the fabrics I used in my Kaleidoscope quilt top so I had kept those fabrics out and used a number of the same ones. Like Rachel, I made mine using fusible web to secure the circles to the background fabric, and then zig-zagging around the edges of each to secure them. While I really like the overlapping circles that many folks in our bee have done with this block, when I was laying out mine I was just more drawn to a design where they were all separate.
Since I am going to be largely MIA this month, Elizabeth from Don't Call Me Betsy was kind enough to agree to sub for me and make my bee blocks this month! Thanks so much Elizabeth :)
I have a few more finished projects to show you - hopefully I can take another break from packing soon and find time to write a post or two.
Wednesday, June 29, 2011
June Bee Blocks and WIP Wednesday
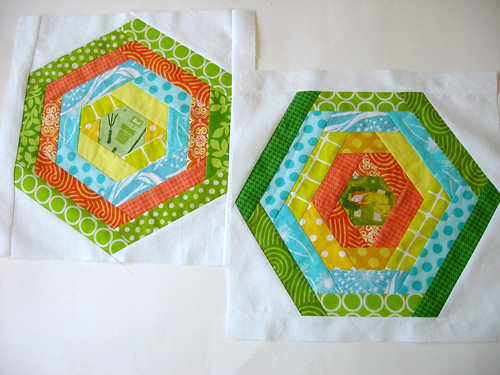
I don't have a lot of progress to show on my current quilting WIP, my drunkard's path quilt - I haven't touched it since my last WIP wednesday update two weeks ago! I have been traveling a bit, spent time with Lawson and enjoyed the beautiful weather over the weekend, and just haven't had a lot of time for quilting. The quilting time I have had has gone to my more time-sensitive projects... I just finished up my "hexing around the block" do. Good Stitches blocks for June (for Lee - you probably saw her fun tutorial for these blocks). I love the bright summery color palette she chose and these blocks are so fun to highlight a fussy-cut center!
And since I can't resist posting another photo, I also made these fun patchwork placemats for the Spicing Up the Kitchen Swap. I'll be getting the placemats and the bee blocks in the mail today. I also made my Knit Peasant Dress and wrote up the tutorial... so I guess it's not like I haven't had any time to sew, it's just that other things have jumped ahead of my quilt. I am really hoping to make some serious progress on the drunkard's path today and tomorrow, especially since I would like to finish the top for this quilt before I start cutting for the Kaleidoscope QAL (hopefully next week!).
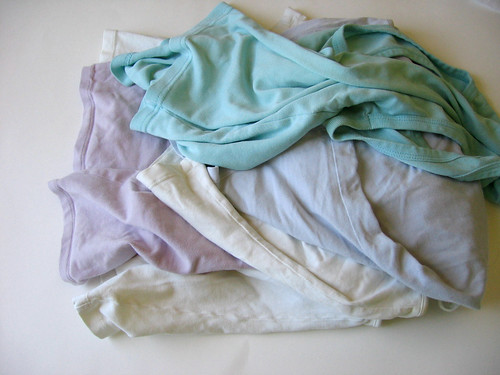
But then again, I just saw this call for boy's t-shirts from Fishsticks Designs (her blog was down when I checked but hopefully that link will work soon). I looked in my goodwill donations bag and found these too-small/too-short tank tops that I think will be great to refashion into little boys t-shirts (and I'm hoping to do some freezer paper stenciling again, too!). So hopefully I will have time to both work on my quilt and on this new fun distracting project in the coming week...
I'm linking up again to WIP Wednesday over at Freshly Pieced:
Sunday, May 22, 2011
Wonky Drunkard's Path Quilt Block Tutorial
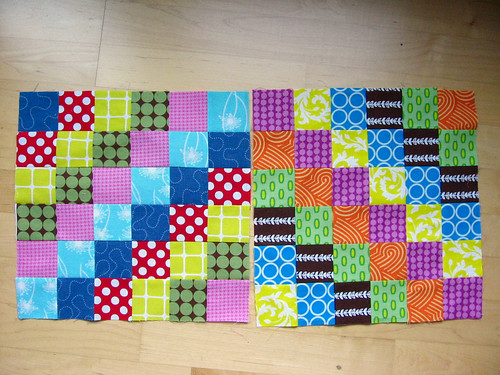
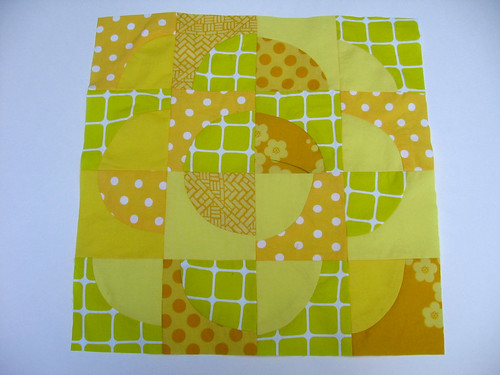
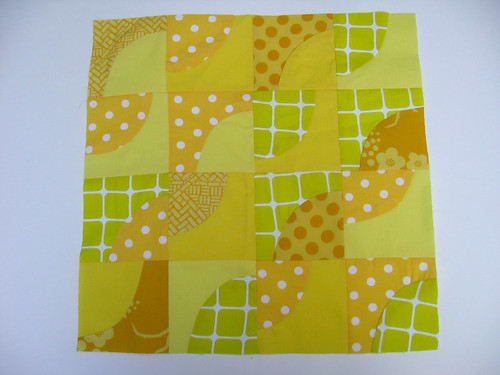
For our May blocks in the do.Good stitches bee in my circle, we each chose a color and are making our blocks all in that color in any design we want to make a "box of crayons" quilt. I got yellow and was excited because I have a lot of fun yellow fabrics, although when I actually looked through them I realized some were more mustardy... I tried to balance the orangey yellows with other bright lemony yellows, so hopefully these will still read as the yellow blocks in the finished quilt. I chose a wonky drunkards path for my two blocks, and had fun playing around with different arrangements, finally settling on these two layouts.
The drunkard's path block holds a special place in my heart because it was one of the four blocks in the first small throw quilt that I made - all hand pieced and hand quilted, as I learned in a class I took that taught a very traditional approach to quilting. Handpiecing the curves, it is not hard to get them all to line up, but it takes a while obviously. I thought it would be fun to try a looser, more wonky approach to the curves where I could piece them on my machine without worrying too much about cutting the shapes according to an exact template and then exactly matching the edges. It worked so well that my first batch of blocks didn't feel wonky enough and I intentionally made some of the later ones more wonky!
Since I know a lot of folks are intimidated by piecing curves, I thought I would share a tutorial for how I made these blocks. The circles may not match exactly when you piece them (although you could probably adapt this approach to get a less wonky result) but I really like how the finished blocks look. If you are interested in learning how to sew curves more exactly, Lesly on PickleDish is hosting a Ogee quiltalong and today she had a post and a video showing how she pieces curves - it's pretty similar to how I do it below, but she is more careful to keep an exact 1/4" seam allowance and she uses fun tools like tweezers!
Today I'll show you how to sew the curved piece which you assemble into a finished block, and Tuesday I'll be back to share different layout options for this block [Update: layout options post here].
This makes a 12.5" square block (12" square when pieced in a quilt), but could easily be adapted to other sizes.
Fabric requirements: Sixteen ~5" square pieces of fabric (after you have done a few to practice you could get away with somewhat smaller squares). This would work great with charm squares! Or you could make a block out of two fat quarters and have a bit left over. (Because you make the blocks large and trim them down, this approach is a bit fabric intensive).
To start, freehand draw a curved 1/4 circle line on your fabric square starting about 1/3 of the way along the edge.
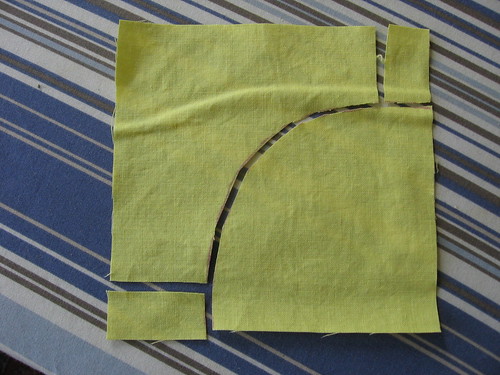
Cut along the line you marked, and then cut off about 3/4" from either end of the outer curve piece, as shown above. You can cut these using scissors several at a time and can use either half of your first one as a template to cut along as you go. Cut out all the fabric squares and you will have 16 outer curve pieces and 16 inner curve pieces.
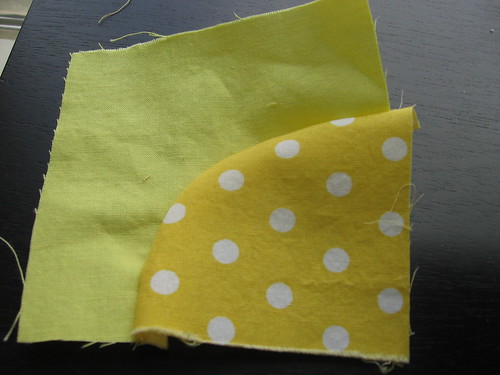
The next step is optional but helps the blocks come out nicely and not puckered. You'll see if you lay an inner curve piece on top of the outer curve piece that the two curves don't totally match. You want the two edges to be an equal distance apart (~1/2"-3/4") the whole length of the curve - to echo each other if that makes sense (like arcs of a rainbow - sorry for the cheesy example). So, you can just trim a bit off the curve of the inner curve piece to make it less of a sharp curve. It really doesn't have to be exact, and you can either do them all at once or do them as you go to sew them.
Put the inner curve piece facing up with the corner facing to the upper left, and then place the outer curve piece facing down on top, with the corner facing to the lower left, as shown above.
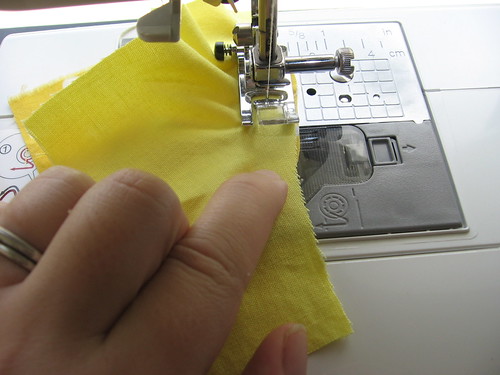
Start sewing down the seam, and pull the upper curve piece as you go to keep it lined up with the inner curve piece. You will be slowly turning both pieces as you go to follow the curve of the bottom (inner curve) piece and continue sewing roughly 1/4" from both edges. The fabric only needs to be lined up a bit at a time, so you can tug it into place, sew a few stitches, tug some more, keep sewing, etc.
It may look a little puckery behind or in front of your foot as you go, but as long as you don't sew over a pucker it should be fine. This may sound like it will take a long time, but really it doesn't take long, especially once you have done a few and gotten the hang of it.
When you are done sewing the seam, flip it open and it should look about like this.
Press the curve in place. You can either press the seam either in towards the inside of the curve or out towards the outside of the curve, it doesn't matter - sometimes the fabric seems to be wanting to go one way or the other, so I usually just did whatever seemed most natural.
After pressing, trim down to a 3.5" square (or just a smidge larger if you are worried about whether your seams will be exactly 1/4" in assembling the block). Arrange blocks as desired in a 4 x 4 grid (see my second post for layout ideas) and then sew together the rows of four blocks into strips, and then the strips into blocks.
Let me know if you have any questions about this technique! If you have been wanting to try sewing curves but unsure about it, I hope this will encourage you to give it a try!
DONATE TO SUPPORT THIS TUTORIAL - this tutorial is provided free of
charge, if you would like to show your appreciation and support the free
patterns I provide here, you can donate here
(or it helps if you click through to any of the amazon links on this site,
whether you purchase that particular product or not!). Thanks for your
support!
I'm linking up to Quilt Story's quilt block tutorial list:
