Thursday, October 27, 2011

Drunkard's Path QAL - Piecing your blocks


Now that you hopefully have all your fabric cut out, it's time to start piecing your blocks!  The original block-piecing tutorial has the instructions for how to piece this block, so you can refer back to that, but I thought I would share a few more tips as well now.

Drunkard's Path blocks


If you haven't yet, I strongly suggest sewing up a few sample blocks to get the hang of it, and trimming them down to size.  That way, if you are having any issues with the piecing you will be able to tell before you have sewn up a whole bunch.  I doubt you'll have a problem but it's always good to test things out, right?

Drunkard's Path chain piecing


Once you've tried out the piecing and gotten comfortable with it, you will hopefully be able to whiz right through piecing these blocks!  As you can see, they are totally amenable to chain piecing, which can make the piecing go really quickly.

After you piece your blocks, you will need to press them flat and then trim them to size... I personally like to sew some, and then press and trim them, then go back and sew some more, etc.  That keeps it more interesting for me than being left with a whole huge pile to press and trim at the end.  But hey, whatever way you prefer to work is fine of course.

As far as pressing seams, if you are planning to assemble your blocks in a design that has half, 3/4 or whole circles, then you may want to think about trying to press your seams in alternate directions so that they nest nicely.  If you aren't doing a design with any half, 3/4 or whole circles then you really don't need to worry about it because those seams won't be abutting anyways.  And really it will turn out fine even if you don't worry about it; for my original DP quilt, I just pressed some in and some out and then some of the seams ended up nesting and some didn't and it was all fine in the end anyways.

Drunkard's Path fabric cut out


As you can see I still have quite a few blocks left to sew up!  Can't wait to see your progress too.  And if you have any questions or tips to share, feel free to leave them in the comments or start a discussion thread over in the Flickr group!

{This post is part of the Drunkard's Path Quilt-Along that I am hosting with Kristie from OCD.  Check out my Drunkard's Path QAL page for the schedule and links to the posts so far, and feel free to join in any time!}

Wednesday, October 26, 2011

Kate Spain Month at Craizee Corners

Have you seen the fun series of fabric designer months that Sharon at Craizee Corners has been putting together? Each month she has a bunch of guest posters who share projects and inspiration from a certain fabric designer. When I heard October was going to be Kate Spain month, I knew I had to join in! Hop on over to Sharon's blog to hear me gush more about how much I love Kate Spain fabric... and be sure to check out the other fun guest posters that she has had this month, too!


Thanks again for having me Sha!

Friday, October 21, 2011

Drunkard's Path QAL - Cutting your fabric


Ladies and Gentleman, start your rotary cutters! (and scissors).  We are ready to start cutting!  I'll be showing the approach using the templates I designed, and Kristie will be using the Go! Baby cutter, so hop over there if you have one of those fun machines :)

Drunkard's Path Fabrics

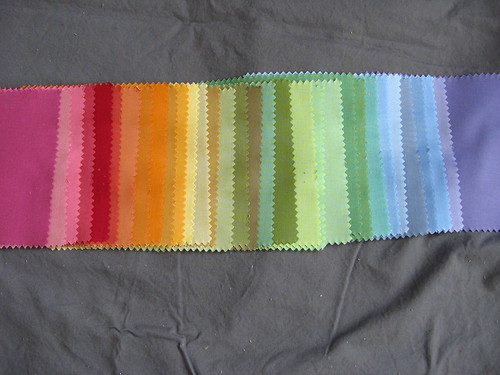
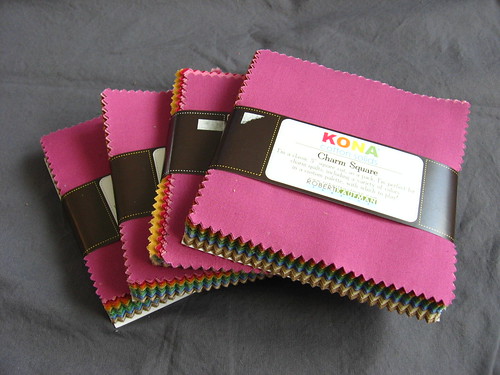
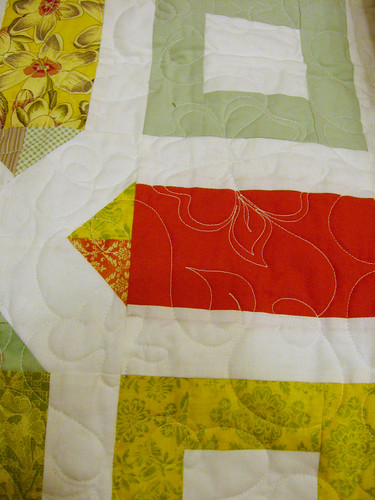
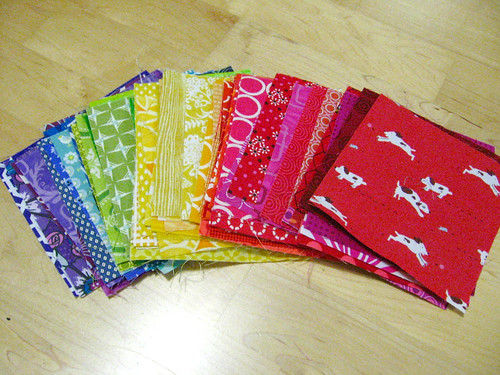
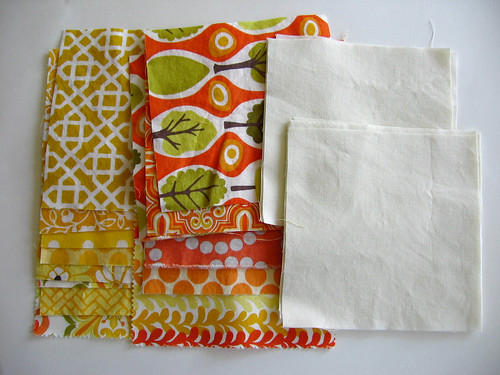
I decided to use several sets of Kona cotton charm packs in the Dusty selection with Kona coal as my contrasting "solid" for my quilt.  I haven't decided the exact size that I am making yet, but I want it to be a decent sized throw/large lap quilt, so I started with 4 charm packs (since I am not using the tans/beiges/browns from them I am hoping this will be enough), and 2 yards of the coal (although I may need a bit more).  The color scheme is inspired by several beautiful quilts that I have seen that pair rainbow solids with grey - this gorgeous diamonds mini by Lindsay of Lindsay Sews, and this fun pinwheel quilt from Spontaneous Threads.  Both of these examples used the Bright kona charms but I was more drawn to the Dusty selection, especially since I am hoping we will use this in our living room and I want it to be a bit understated.

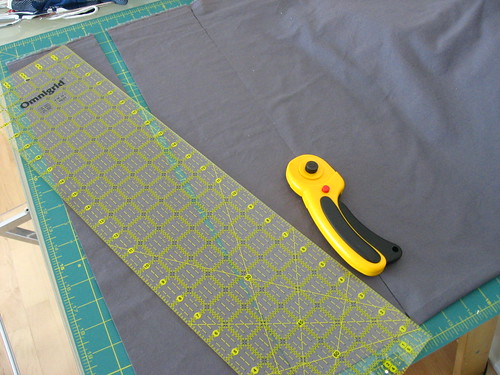
So, back to cutting your fabric!  I actually probably already covered most of what you need to know in the block-cutting tutorial, but I thought I would go through a few parts in more detail here.  First, hop back to that page to print the template if you haven't already yet.

Cutting charm squares

Hopefully you have purchased fabric and figured out how many blocks you need to cut from each at this point for your design (although I am actually planning to play around with my blocks once I get them sewn up and see what design appeals to me most - so that approach is fine too!).  If you are cutting any charms from yardage, as I mentioned in the fabric requirements post, Elizabeth from Oh! Fransson has a good tutorial for cutting charm squares.  I would note, however, that for making blocks using my templates, while you don't want to be too sloppy, you don't need to stress out about being exceedingly precise in your charm cutting since you will be trimming the final quarter-circle blocks down to the exact size.

Cutting charm squares 2

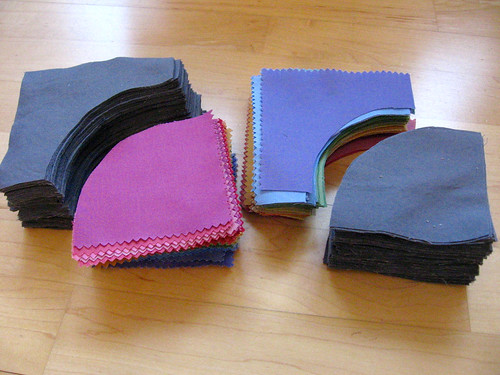
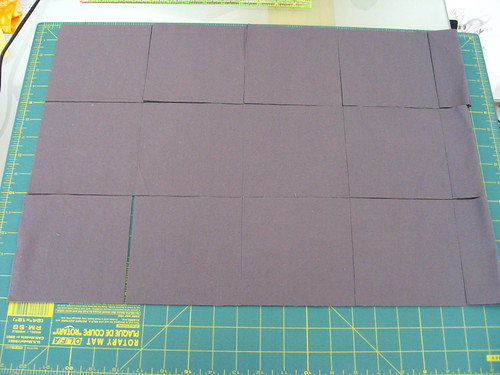
I found that it worked fine to stack the cut strips two on top of each other (so four layers of fabric deep), and three in a row, and then cut them in rows.  I am sure this is not the best way to do it if you need them to be exactly precisely 5" square, but since a tiny bit different will be fine for our purposes, this was a great way to speed things up.  If you can tell you are a bit off, just try to err on the side of larger rather than smaller I would say.

Stack of cut charms

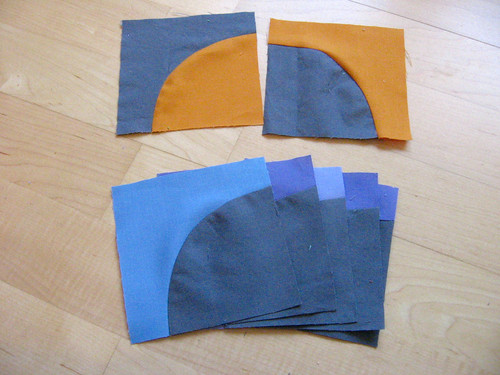
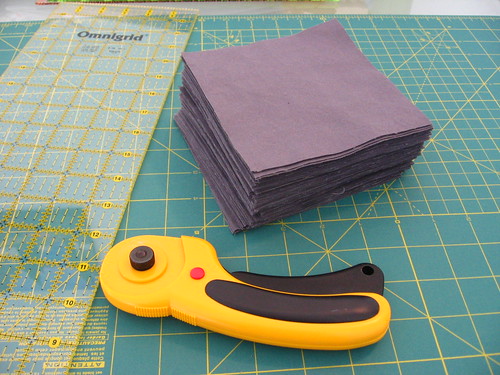
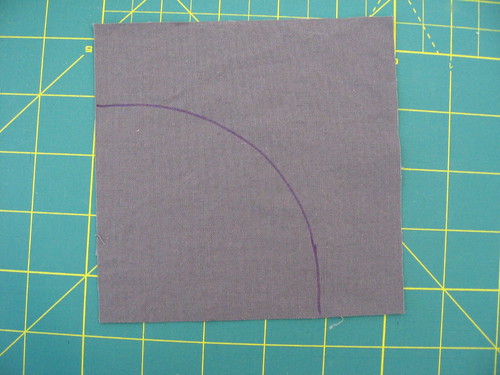
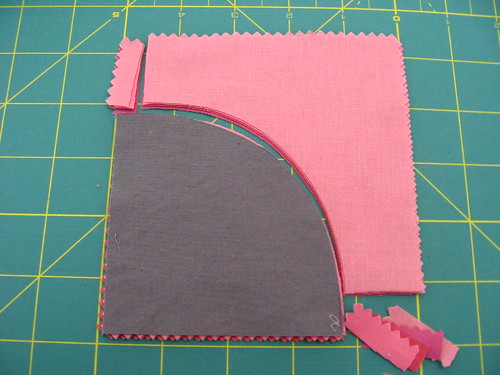
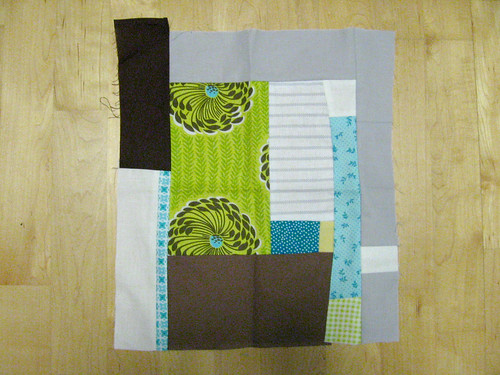
Once I had my stack of contrasting solid charms cut, I used a disappearing pen to mark the quarter-circle on the square, lining up the template with the corner.  You can also rotary cut around the template or use scissors to cut around the template while holding it, this just seemed easiest to me.

Traced DP template

Then I like to use that first fabric piece that I cut out as a kind of fabric template when I cut the rest with scissors (again, feel free to use a rotary cutter or do this however is easiest for you - just wanted to share what worked well for me).  I line that fabric template with the corner of the charms - and when I am using precut charms I try to line up the edge with the outer tips of the pinked edge, rather than the inner one - I think that is most accurate and avoids cutting too large a inner curve piece and thus leaving too small an outer curve piece.

cutting DP from charms

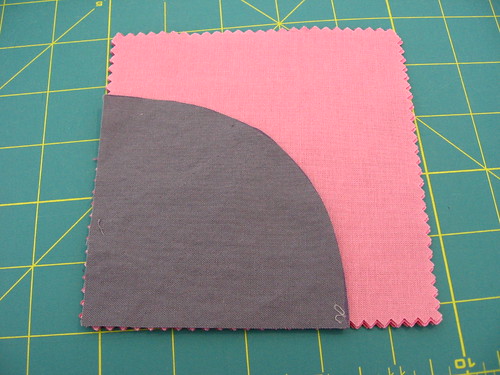
I just hold onto that piece of fabric and hold it in place as I cut around with scissors, being careful not to cut anything off the grey piece that I am using as a fabric template.  Then I got ahead and use the scissors to trim the two ends (3/8").  I found that I could cut 4 pieces of fabric at once with my prewashed Kona coal, but only 3 pieces with the unwashed precuts, since they were more slippery and it was harder to keep them lined up properly while cutting.

cutting DP from charms 2

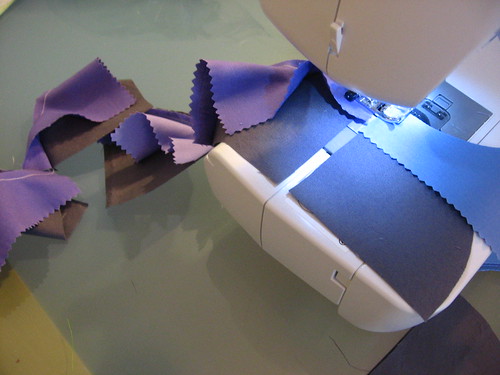
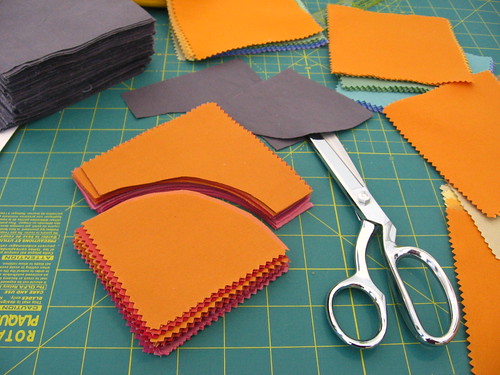
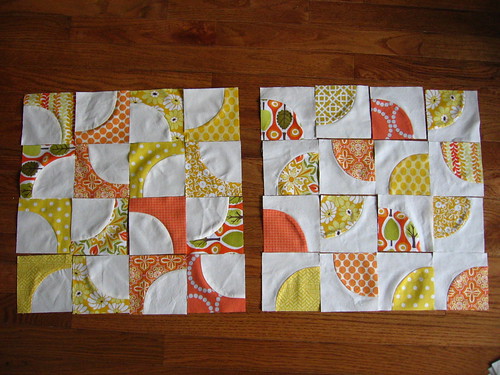
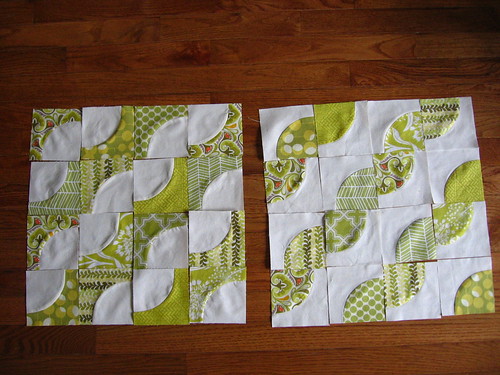
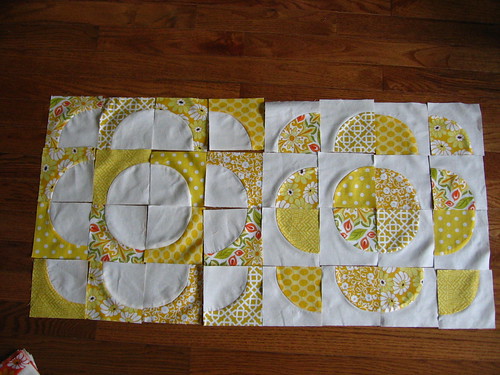
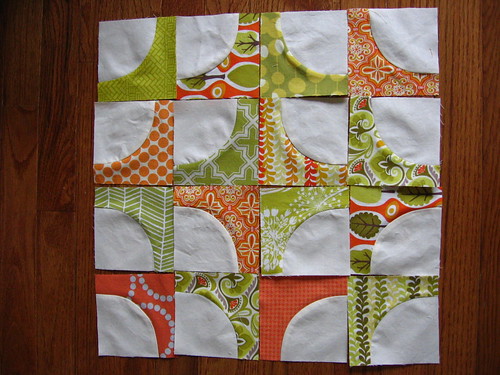
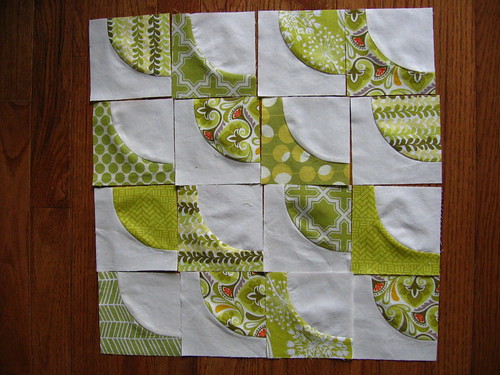
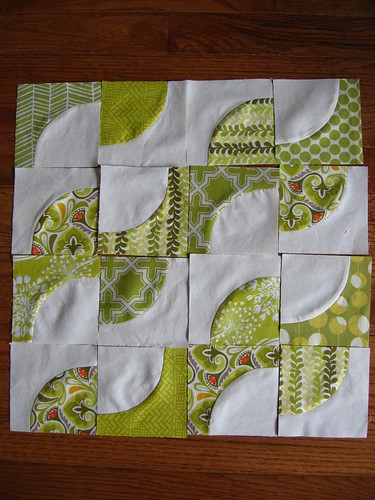
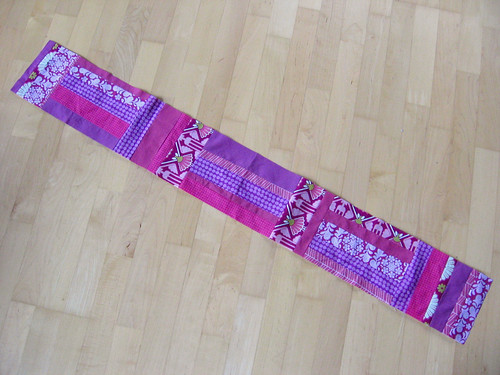
This may sound tedious but it actually goes really quickly!  I had only cut a portion of my fabric when I took the picture below but I finished cutting the rest later and my total cutting time, including cutting out the kona coal charms and cutting all the inner/outer curve pieces, was about 2 hours (for a larger lap quilt).

DP cutting more

I hope that helps, and happy cutting!  I'd love to see your progress as you get going over in the Flickr group.


{This post is part of the Drunkard's Path Quilt-Along that I am hosting with Kristie from OCD.  Check out my Drunkard's Path QAL page for the schedule and links to the posts so far, and feel free to join in any time!}

Tuesday, October 18, 2011

WIP weds - my first pieced quilt back

Central Park DP quilt back

Although I am itching to start lots of new quilt tops, I am trying to stay focused and finish my first drunkard's path quilt (and hopefully my kaleidoscope quilt too) before I start too many new projects.  I pieced this quilt back for the drunkard's path quilt - this is actually my first pieced quilt back!  I often make baby quilts where I can get away with just using a 42" width of fabric for the back, and while I have been thinking of this as a baby quilt, since it measures 45" square, I knew I would have to piece it somehow to make it big enough.  When I was cutting charms for the front, I saved the random ends thinking that this would make a nice design, and then I cut some more to make enough for this pieced stripe.  I like how it looks - the fact that I love the flowery central park fabric that I used as the main fabric doesn't hurt either.  I hope to baste and quilt it this week.

Drunkard's Path QAL fabrics

And while I am trying to finish that up before I start too many new things, I can't ignore the Drunkard's Path QAL that Kristie and I are hosting... so I have picked out my fabric and started cutting!  More on that later this week.

I'll be linking up to WIP Wednesday over at Freshly Pieced - very happy to be back in the swing of things and looking forward to seeing what everyone else is up to!

WIP Wednesday at Freshly Pieced

Monday, October 17, 2011

Muhummara - Roasted Red Pepper and Walnut Dip

Muhummara

This is one of my absolute favorite dips, and is always a huge hit when I make it for parties, and I have thought about posting it here many times before.  Partly I hadn't posted it before because it always gets all eaten up and then I have nothing to take a picture of the next day!  But the bigger reason I have never posted it is because I felt silly posting a recipe that requires this many ingredients that I know most reasonable people will not own; we had friends for dinner recently who absolutely insisted we give them the recipe, so I figured it was time to go ahead and do a post about it.  The recipe is from a great, but very complicated, middle eastern cookbook - Spice by Anna Sortun (chef of Oleanna in Cambridge, MA).  Other than the strange ingredients, I have simplified this recipe a bit so that it is not too onerous to make, and it is well worth the effort.  The dip has a delicious spicy-smoky-sweet and slightly sour taste that really is a perfect balance.

Anyways, I have mentioned my love for Aleppo peppers several times here, including this post, and those are one of the obscure ingredients required to make this dip - you can get them at Penzeys if you have one near you, or at any number of places online.  The recipe also calls for Urfa peppers, which I know you can buy in person at Formaggio kitchen in Cambridge, but also looks to be available from several places online too (which also stock aleppos, so you could order them together).  If you didn't want to get both peppers, I think they are pretty similar in taste so you could also try just getting aleppos and then substituting them for the urfas.  Finally, this recipe also calls for pomegranate molasses, which I have found at upscale food stores like Formaggio kitchen in Cambridge and PastaWorks in Portland, or is also available online.  The recipe doesn't call for much and it keeps indefinitely in the fridge, so a bottle will last you quite a while.

Ok, enough explanation, here's the recipe - let me know if you try it!

Muhummara - Roasted Red Pepper/Walnut Dip
Adapted from Spice by Anna Sortun
  • 2 large red bell peppers, roasted and peeled OR 1 jar roasted red peppers, drained
  • 4 scallions, root ends trimmed off and the rest chopped
  • 1 teaspoon roughly chopped garlic
  • 2/3 cup chopped walnuts, lightly toasted
  • 1/2 cup ground toasted bread crumbs (about 1 slice sandwich bread - I use whole wheat)
  • 1 tablespoon lemon juice (juice of 1/2 lemon)
  • 1 tablespoon pomegranate molasses
  • 1 tablespoon aleppo chilis
  • 1 tablespoon urfa chilis
  • 1 teaspoon ground cumin
  • 1 tablespoon yogurt
  • 1/4 cup olive oil
  • 1 teaspoon kosher salt
I almost always make this using canned roasted red peppers and it turns out great, although I also bought a bag of roasted sweet peppers at the farmers market and used those recently and that was really great too.  If you are making bread crumbs from a toasted slice of bread, rip the toasted bread into pieces and finely grind it in a food processor first.  Then, add all the other ingredients and process until smoothly pureed.

Serve with pita bread, crackers, or vegetables to dip.


I'm linking up with Tuesday at the Table at A Quilter's Table!

Friday, October 14, 2011

Drunkard's Path Block Design Ideas


I don't know about you, but I can't wait to get going on this QAL!  One of my favorite things about this block design is that there are so, so many different design options - I can't wait to see all the different directions that you all take it.  Kristie has been sharing some great inspiration pics on her site too, so if you haven't checked them out, make sure to jump over there too and take a look.

I shared a bunch of design ideas before, but many of them were just sketches, so when I made my first drunkard's path quilt top, I played around a bit with the fabric and different layouts as I was making it...

Drunkard's Path - Scrappy

I mentioned in my fabric requirements post that the cutting using my templates is easiest if you are going to use both the inner and outer curve piece from each fabric square in your design... But there are some pretty cool designs that use only inner pieces or only outer pieces from your colored/patterned fabric.  If you wanted to go this route, you could alternate the blocks in your quilt, or you could even think about making two quilts - one with the positive pattern and one with the negative pattern.  Here are a few examples of this kind of pattern:

Drunkard's Path - Pinwheels
Drunkard's Path Pinwheels

Drunkard's Path - Diagonal 1
Drunkard's Path Diagonal (I love this one!)

Drunkards Path - 5
Drunkard's Path - Inward facing circles

Drunkard's Path - 2
Drunkard's Path - Outward Facing Circles

If you want to keep it simple and use a design that will use equal numbers of your patterned/colored inner and outer curve pieces, there are luckily some gorgeous designs like that too.  Here are just a few more, in addition to the flower-like design I used in my first quilt (and there are lots of other ideas out there).

Drunkard's Path - Scallop

Drunkard's Path - Diagonal 2
Drunkard's Path - another one

I have been thinking about the design and layout as a repeating 4x4 block, but as many of the inspiration quilts that Kristie has shared show, you can really also think of it as a whole quilt design - so don't feel that you have to take a block-based approach.   I wish that I had had the fabric (and well, the patience) to try out larger layouts when I was playing around with these - the patterns just get more interesting the larger you go.  Hopefully these help to spark your imagination and you can get an idea of how cool they look when you start to see a larger pattern!  I had a lot of fun sketching out different ideas with graph paper and colored pencils, so feel free to play around with that as you think about possible designs.

Don't forget to share your photos in the Flickr group as you start picking fabrics and thinking about your design - we can't wait to see what you come up with!


{This post is part of the Drunkard's Path Quilt-Along that I am hosting with Kristie from OCD.  Check out my Drunkard's Path QAL page for the schedule and links to the posts so far, and feel free to join in any time!}

Thursday, October 13, 2011

Stacked Coins Quilt - 100 Quilts for Kids

stacked coins quilt

I finished up my stacked coins quilt the other day all in one evening after work - basted, quilted and bound.  I was pretty excited that I was able to get it done in time to link up to 100 Quilts for Kids over at Swim, Bike, Quilt.  Since this charity quilt drive is being hosted by the DC Modern Quilt Guild, which is was my guild before I moved, I really wanted to participate - and it seemed like a great way to get back into the quilting groove after moving.  Once I got the top done at Sewing Summit (with lots of help from Natalie!), I figured I should try to finish it up in time.

stacked coins detail

It was also a great chance to practice my free motion quilting, which was fresh in my mind after the class I took at Sewing Summit.  I had fun playing around with this loopy pattern, it was easier for me than stippling since I didn't have to worry about quilting myself into a corner.  I definitely need to work on keeping my pattern at a larger scale, though - I was working pretty small and it took a while to do it.  For the binding, I decided to try doing it entirely by machine, which I have done on smaller projects before but never on a whole quilt - partly because it would be faster, and partly because I figured it would be more durable for this quilt which will hopefully get lots of use!  It actually turned out better than I expected, and I would definitely do it again.  One thing that I found helped was that I quickly basted the mitered corners before I sewed the binding down the final time - that helped to keep them more neat and even.

I'm donating this quilt to a group at my mother's church which gives baby items to mothers in need.  I hope that it brings joy and love to the baby that receives it!

Swim, Bike, Quilt

Monday, October 10, 2011

Sewing Summit!

view from hotel

I got home last night from an awesome two days at the sewing summit in Salt Lake City.   It was so fun to get to meet so many people that I had gotten to know online, take fun classes, and talk about fabric, sewing, blogging (and everything else) endlessly.  There were so many great people there that I wanted to talk to, my only regret is that it wasn't a longer event so that I could really spend time with everyone that I wanted to.

Natalie on balcony

One of the best parts was getting to actually meet Natalie, who I felt like I already knew so well from reading her blog and emailing back and forth.  I was really happy that we were roommates since we got to spend lots of time together and talk each others' ears off :).  Natalie is searching for an academic job now, which means she could end up moving kind of anywhere, and I am not-so-secretly hoping that she will end up in Portland with me!

Free motion quilting

There was so much going on that I didn't take a lot of pictures at the sewing summit (oops), not to mention that the lighting was pretty crummy... but they had a whole room of sewing machines set up that were used both for hands-on sewing classes and then were available for open sewing the rest of the time.  I got to do a lot of the hands on classes which was really fun!  I took a free motion quilting class with Allison from Cluck Cluck Sew - it was great to get her tips and get to practice more, I am definitely still building up my FMQ chops.  Check out the awesome floral design she quilted above!

Improv pieced block

I have really been wanting to try improv piecing so I loved the improv piecing class with Jess from Urban Patchwork.  She had some great tips too (and beautiful example quilts - wish I had gotten a photo of some but you can see lots on her blog).  I will definitely have to do more of this, it was so fun and low-stress and I love how it looks!

home decor panel

We participated in a fun discussion about incorporating modern sewing into your home decor - lots of great ideas came up and Erin had pulled together this great spread of examples too.

rainbow charms

I joined in a great rainbow charm swap that Kati of From the Blue Chair organized - what a great way to do this!  Now I just have to think what I should do with these lovelies...

stacked coins quilt top

I had brought a pile of fabrics from my stash in case there was time to sew, thinking that I could make a quick quilt top for 100 Quilts for Kids and get the quilt done before the October 14 deadline (um, just looked that up to put it in here and realized how soon it is - eep!  Hope I have time to finish it before then... if not, I will still finish and donate later).  Anyways, Natalie and I decided it would be a fun project to knock out in an hour or two (um, kind of late at night), and it was super fun!  I have never really sewn or quilted with a friend before, it was like having a fabulous quilt assistant - she did all the cutting and most of the ironing so I mostly just had to sew things together.  Plus she was a great advisor with tips for how to make a stacked coins quilt super fast (I had never made one before) and design advice.

swag and prizes

Last but not least, there was a ton of swag and prizes (and then we went to a fabric store on top of that), here is just a small selection of some of the stuff I came home with - an apron kit that I won, aurifil thread, a kona charm pack, an izzy and ivy pattern and clothing labels, insul-bright insulated batting (all of those from the amazing swag bag), and my favorite, the Kona color card that they gave out to everyone in Jeni's class on fabric selection.  Wow!

Hope to see all you wonderful ladies next year!!

Thursday, October 06, 2011

Bee blocks and getting ready for Sewing Summit!

Sept Do Good Strip Block

With everything we had going on, I waited until the very end of the month to sew my September blocks for the do. Good stitches bee - which was actually a long strip, rather than 2 blocks like usual.  Natalie asked us to use our imaginations and we each stuck to a single color - I got plum and others did red and golden yellow as well.  As usual, Natalie picked a gorgeous color palette and I can't wait to see how the final quilt turns out!

Sept do go stitches strip block detail

In a stroke of luck, Melanie of Texas Freckles had already posted the block design for October when I was working on my September strip, so I was able to do both at once.  She had us make trip around the world blocks using this great shortcut, it was super easy!  This was a fun block that I probably wouldn't have made otherwise, so I am glad I got a chance to try it out.

October Bee Blocks

I am super excited for the Sewing Summit tomorrow!  There has been a kind of insane amount of email traffic on the listserv that I have been doing my best to keep up with, but I am hoping that I'll be able to just jump into things when I get there even if I haven't been completely keeping tabs on all the goings on in advance.  I did sign up for both the fat quarter swap and the charm square swap, so I have been pulling fat quarters from my stash to part with, and I bought two yards of fabric and cut them up into charms (good practice for the charms I'll be cutting for my Drunkard's Path quilt!).  It is a rainbow charm swap and I was assigned yellow and yellow-orange, so this is what I came up with.  I can't wait to see all the different fabrics I will be getting in exchange!!

Yellow charms

I also saw that a number of folks have been making themselves nametags for sewing summit, and I was inspired to make one too, although not patient enough to hand-embroider it.  Instead I went for a free-motion embroidery/applique design inspired by the leaf design on my messenger bag pattern.  It came together really quickly and I am happy to have something new homemade for the sewing summit since I didn't make a new bag or anything.

Sewing summit name tag

Oh, and I have been remiss in not giving an update on the Bloggers' Dinner Party!  It has been fun doing this party, but I think I have too much going on to keep it going any longer - so it will be retiring, or at least hibernating for now.  I may do one more month in December so folks can link up holiday projects.  Thanks again to Michelle from City House Studio for hosting this past month!!

Monday, October 03, 2011

Drunkard's Path Fabric Requirements


We know that folks may need a few weeks to decide what fabric they want to use for the quilt-along and get it shipped to them if they are ordering it online, so we wanted to make sure you had the fabric requirements for the quilt far enough in advance.  And check it out, we started a Drunkard's Path QAL Flickr group so that we can all get to know each other and you guys can share pics of your fabric selections and progress as we get going!

Yellow and Orange Fabrics for Drunkard's Path
Haven't picked my fabric for this QAL yet so this is from my earlier quilt!

As I mentioned in my block tutorial, the templates that I made use 5" fabric squares, so if you have charm squares, now is a great time to use them!  You can also cut your own 5" squares to use from a layer cake of 10" squares (makes 4 charm squares per layer cake piece), from fat quarters (makes 12 charm squares), or from yardage (56 charm squares in a yard of fabric).  Elizabeth from Oh, Fransson! has a tutorial for cutting charm squares from yardage that you may find helpful.

Drunkards Path Quilt Top
Speaking of my earlier quilt top...

The drunkard's path quilt design is made up of larger blocks made up of 16 of the smaller blocks; using my block tutorial, each of these larger blocks will measure 15" square.  For each larger square you will need a total of 16 charm squares, 8 of the patterned/colored fabrics and 8 of your contrasting solid (off-white in my quilt top above).  For my central park quilt, I used nine of the larger blocks to make a 45" square quilt, which you can think of as either a large baby quilt or a small lap quilt.  For a smaller baby quilt, you could make just four blocks, making a 30" square quilt - which you could also add borders to and make it a bit bigger if you wanted.  I'll provide the fabric requirements for both of these sizes, but if you wanted to make a larger quilt, you should be able to figure out how much fabric you need pretty easily!

Drunkard's Path Blocks - Circles blocks


The one tricky part of this is that the amount of fabric you will need depends a bit on the design that you are planning to use... Kristie and I will both be posting more about the different design options with this quilt next week (and Kristie had some more awesome inspiration pics up in her fabric requirements post today), and you can check out my earlier post (with lots more drawings like the one above).  Cutting both pattern pieces out of a single charm square, like I have you do in my tutorial, will only work out right if you are going to use both the inner and outer curve piece from that charm, like you would in the pink/red designs above.  If you are planning to do a design like in the yellow/green designs above where your patterned/colored pieces are all inner or all outer curves, you will need more fabric and the cutting will be a bit more involved.

Here are the fabric requirements for a basic quilt design where you'll be using both the inner and outer curves from each charm square (see the paragraph above for the number of charms you can get from different fabric cuts if you are cutting your own):

Small baby quilt - 30" square
For the quilt top: 32 pattern/colored charms, 32 contrasting solid charms
For the quilt back - 1 yard fabric
For the binding (using 2.5" wide strips cut on the grain): 3/8 yard (or you may be able to get by with just 1/4 yard, but it could be close)

Larger baby quilt/lap quilt - 45" square
For the quilt top: 72 pattern/colored charms, 72 contrasting solid charms [Thanks to Katie for pointing out the error in this originally - sorry about that!!]
For the quilt back: 3 yards (or 1.5 yards if you add a 3-4" pieced strip to make it wide enough)
For the binding (using 2.5" wide strips cut on the grain): 3/8 yard

Let me know if you have any questions!  And don't forget to go check out and join the Flickr group :)


{This post is part of the Drunkard's Path Quilt-Along that I am hosting with Kristie from OCD.  Check out my Drunkard's Path QAL page for the schedule and links to the posts so far, and feel free to join in any time!}

Sunday, October 02, 2011

Store/Patterns Update

Before we moved, I mentioned that I had opened up a new Meylah shop with automatic downloads of pattern purchases, and that I was putting both of my patterns on sale for $5 until after our move, and putting my Etsy shop in vacation mode.  I had thought that I would end the sale and reopen the Etsy shop a week or two after we got here, and it has been on the back of my mind to do so, but I haven't had time until now!

I'm reopening the Etsy shop now, but will keep the patterns on sale in the Meylah shop until Wednesday, so if you have been thinking about getting one, now is your chance before the price goes back up to the regular $6!  Also, at least for the near term, I will only be selling patterns in my Etsy shop and not handmade items - I don't have much time now to make and list things, or to go to the post office, but I may decide to go back to doing so in the future.

Thanks everyone! And sorry for the photo-less post :)
Related Posts Plugin for WordPress, Blogger...