While it's not the usual order to start a quilt-along with the block tutorial before the fabric requirements and other design info, since
Kristie and I are each using a different block construction approach, we thought it made sense to show you the choices before you committed to one way or the other by buying fabric. I also know that some folks are intimidated by sewing curves so I wanted to be sure that you had a chance to try it out and see that it isn't that hard!
Kristie is using the Go! Baby cutter to cut her drunkard's path pieces, and I am using templates that I designed. The technique with my templates is actually pretty similar to how I made
my wonky drunkard's path blocks - you don't have to worry as much about cutting and sewing the pieces perfectly exactly, and then you trim them to the correct size. If you'd like to use another approach such as more precise templates, wonky blocks, or anything else, you are free to go for that too!
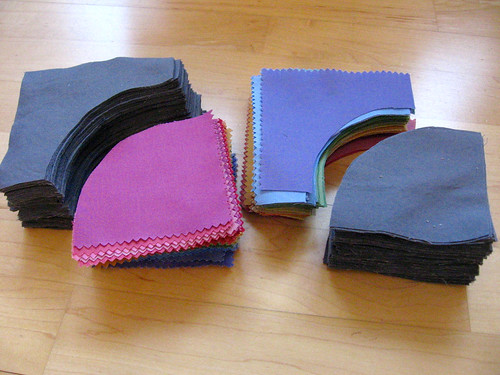
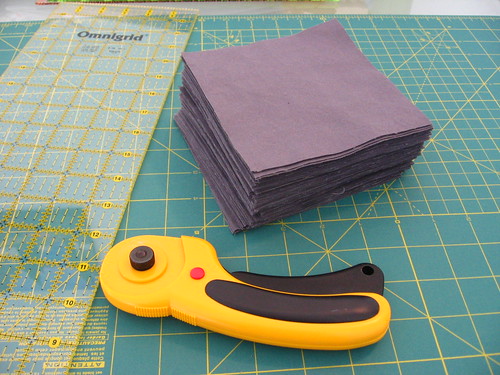
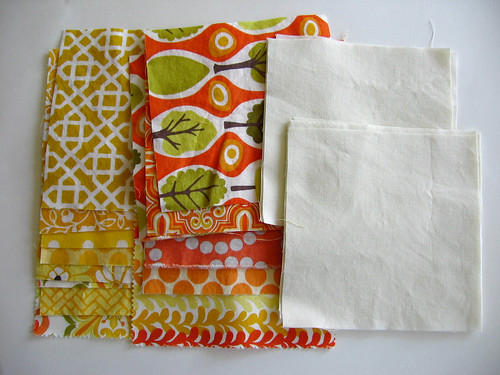
I am also psyched that the templates I made use 5" squares - that's right, this means you can easily use charm squares and avoid a whole bunch of fabric cutting if you want! Maybe you have some charms you have been looking to put to use? You can also cut your own 5" squares for some or all of the blocks, of course.
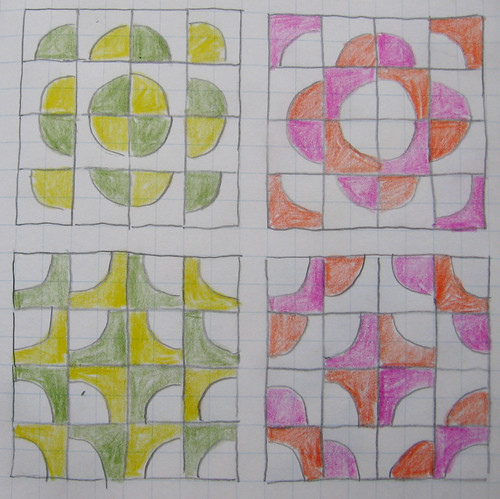
Download the template HERE - I suggest saving it to your computer, then when you print be sure to set page scaling to none. There is a 1" box on there for you to check the scale - make sure it measures 1" and you are good to go. I'll go into this more in a later post, but if you are making a design where you will have equal numbers of the inner and outer curve pieces from each pattern,
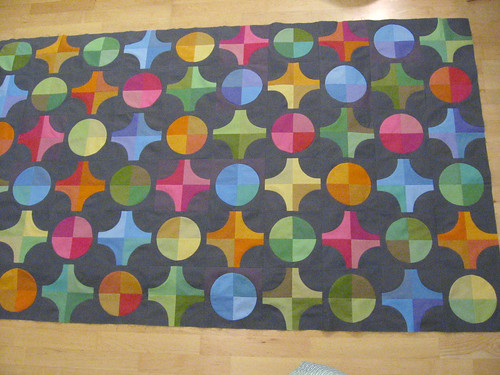
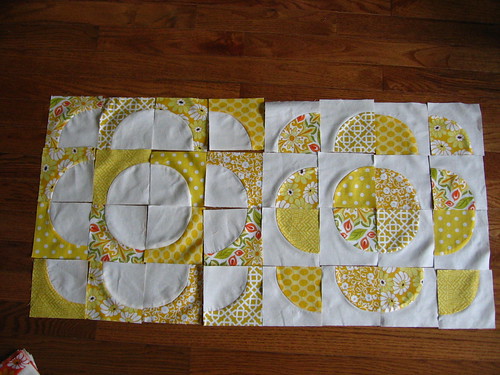
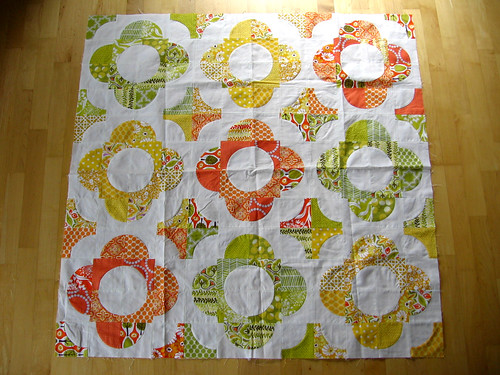
you will only need to use the inner curve template piece - just ignore the outer curve template piece. (This is what I did for my
central park drunkard's path).
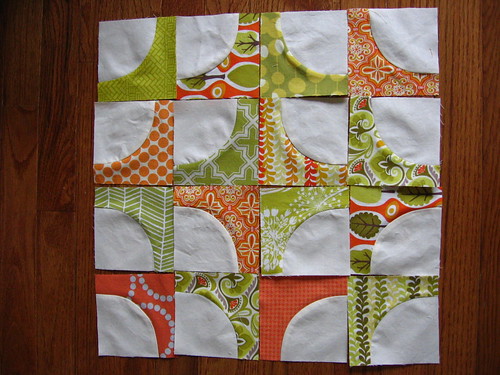
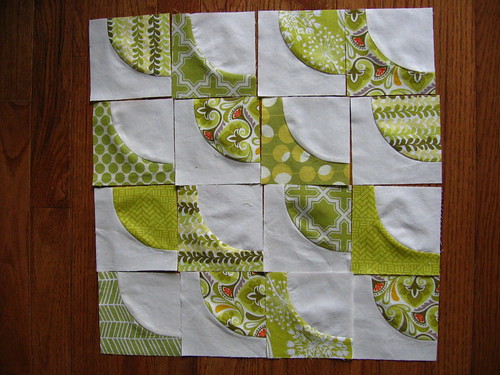
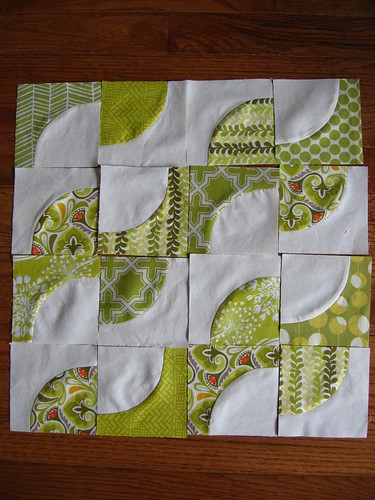
Here's how to make the blocks:
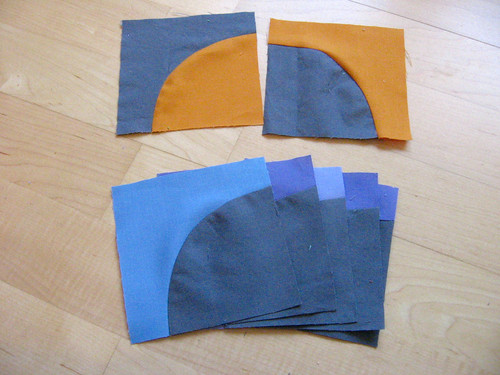
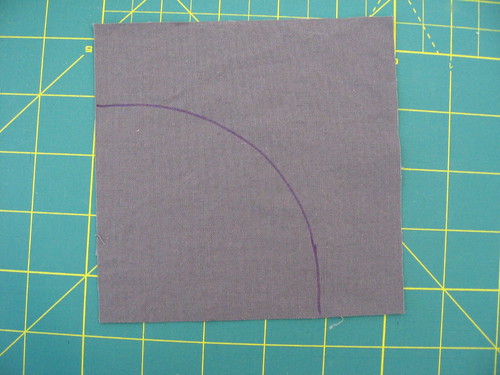
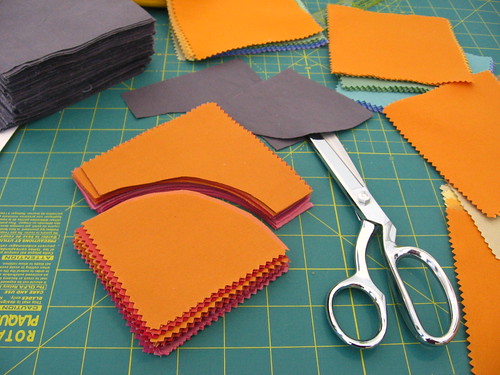
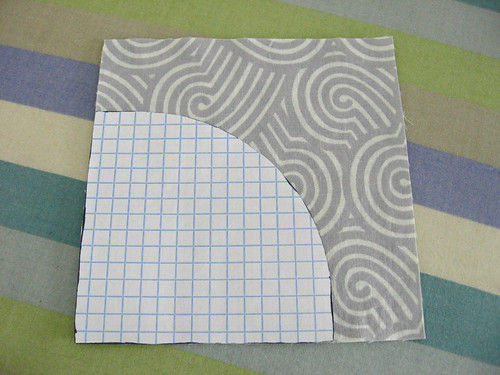
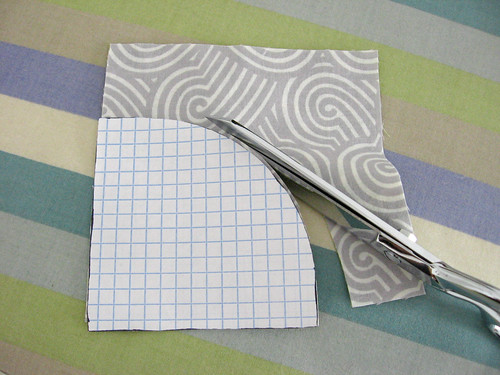
Start with 2 contrasting 5" fabric squares. Put the inner curve template piece down on the squares, with the corners aligned.
Cut around the curve of the template. Note: when I made my quilt, I cut the first using the template and then used one of the cut out inner curve fabric pieces as the guide to cut the rest. You can also mark with a fabric pen and cut along the line, or you can use a rotary cutter (and possibly use template plastic to make the template more durable). I found that I could cut 4-5 pieces of fabric at once and so it went pretty quickly!
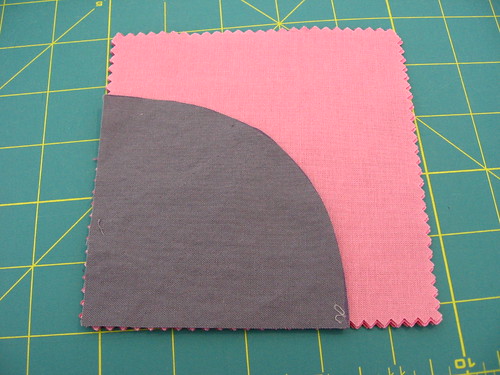
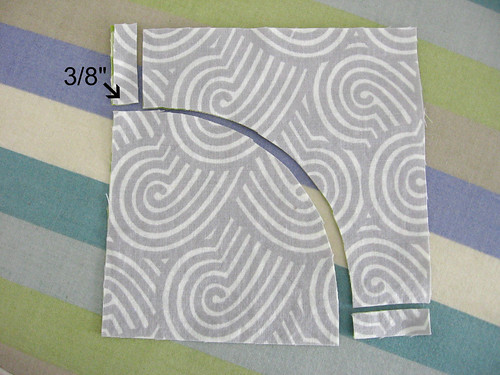
After you have cut the inner curve piece, trim the 3/8" off the ends of the outer curve pieces as shown above (I usually just eyeballed it and used my scissors, but you could measure and/or use a rotary cutter if you prefer).
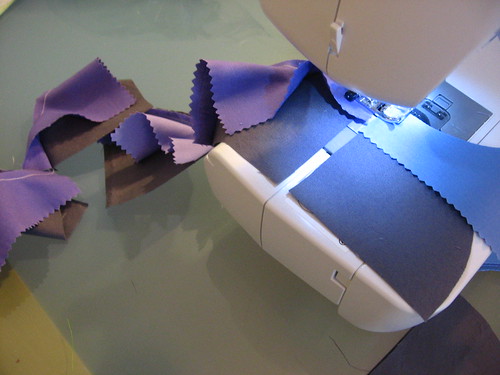
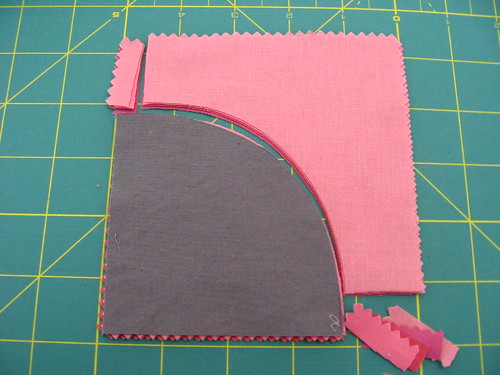
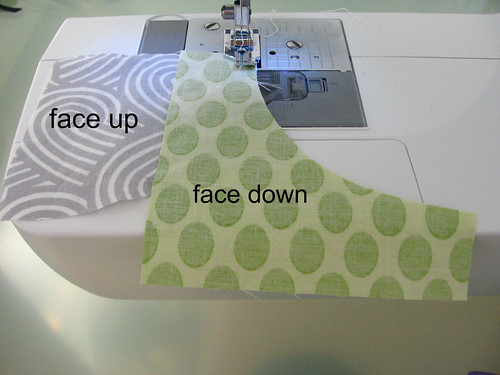
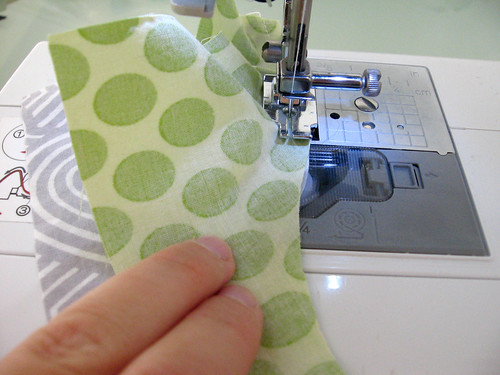
Put the inner curve piece facing up with the corner facing to the upper left, and then place the outer curve piece facing down on top, with the corner facing to the lower left, as shown above. Align pieces so that your needle is 1/4" in from the curved edge.
You can basically sew straight for the first 1/4"-1/2", until the pieces start to curve away from each other.
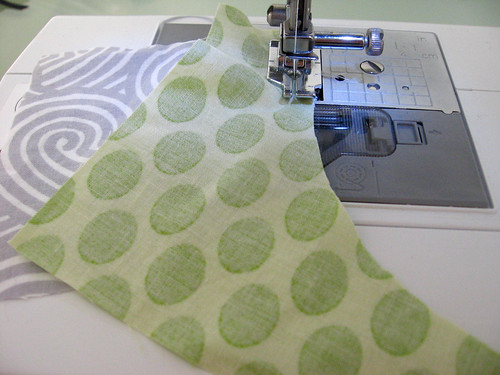
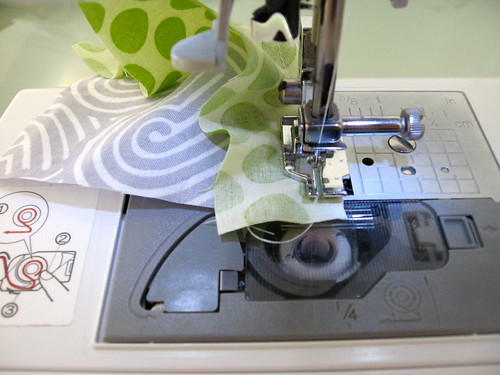
After the first bit, you will need to pull the top (outer curve) piece to the left so that it stays lined up on top of the lower (inner curve) piece as you sew around the edge. I just pull the top piece into place gently, and don't pull the bottom piece at all - the goal is the keep the edges lined up and avoid any puckers in your seam, without stretching the fabric too much. Continue sewing with a 1/4" seam, adjusting as you go - it doesn't take too long once you get into the hang of it.
As you get towards the end, continue to pull the pieces into place so the edges are aligned - you should basically be able to sew straight for the last little bit too.
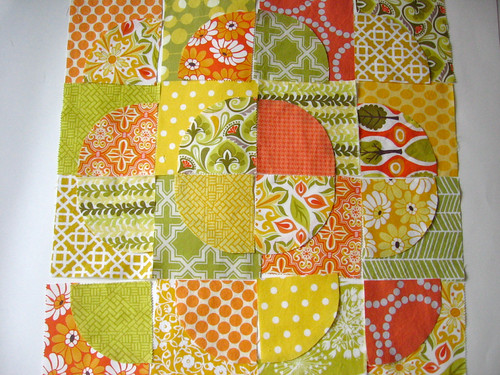
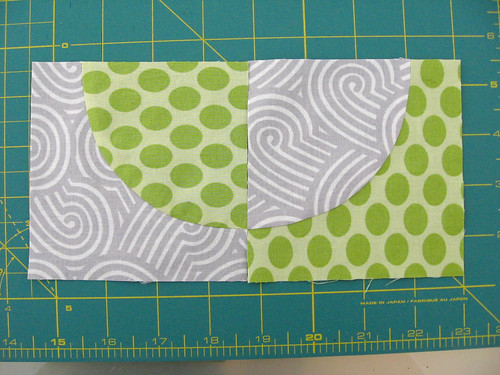
This is what it should look like after you sew the seam.
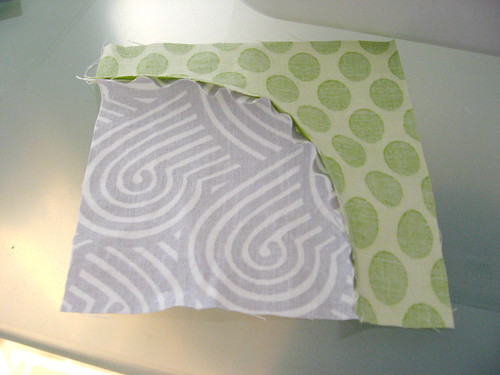
Press the seam flat in whichever direction you feel like. If you wanted to you could clip the curve inside the seam allowance before you press but I didn't have any problems getting it to lay flat without clipping and it seems like it will be more durable if you don't clip it.
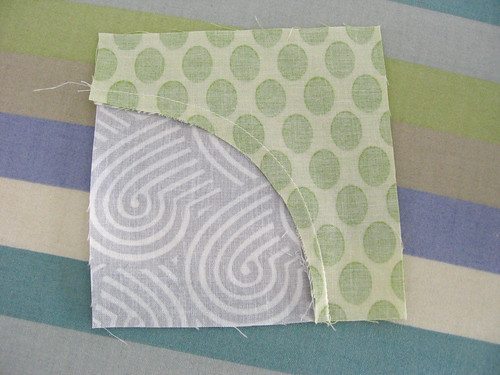
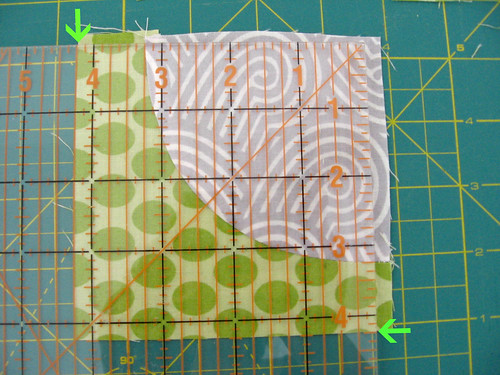
Now, to trim the block, place the block with the inner curve facing to the lower left corner as shown above. Take a square ruler and line up the 1" lines with the edges of the curve on both the left and lower sides (red arrows above), then trim off the edges. The final trimmed size of the block will be 4.25" so you may want to check that the block isn't going to be too small by making sure the fabric goes past the 4.25" lines (green arrows above); you may have to rotate the ruler slightly to get it to fit. (note: I slightly modified the template after I took these photos - so you will have more to trim in this step and less to trim below, ie, the amount you trim in each step will be about equal).
After you trim the first two sides, flip the block around so that the inner curve faces towards the upper right corner, and line up the just-trimmed edges with the 4.25" lines (green arrows), then trim the other two edges.
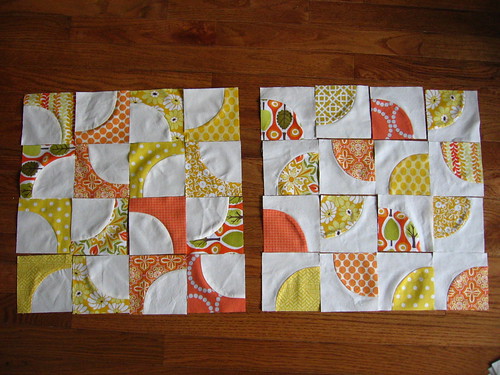
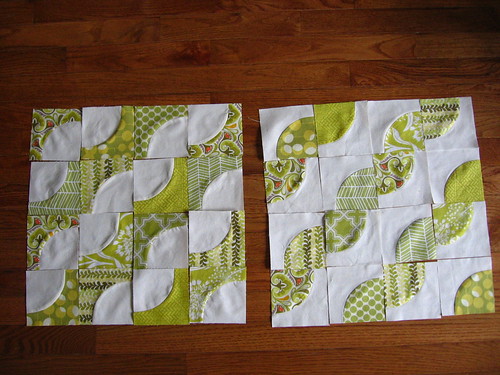
And then check it out - since you lined up the circles with the 1" line when you trimmed, your blocks line up perfectly!! And I promise, the trimming part gets quick as you do it, too.
Let me know how your blocks turn out if you try this, or if you have any questions!
DONATE TO SUPPORT THIS TUTORIAL - this tutorial is provided free of
charge, if you would like to show your appreciation and support the free
patterns I provide here, you can donate here
(or it helps if you click through to any of the amazon links on this site,
whether you purchase that particular product or not!). Thanks for your
support!
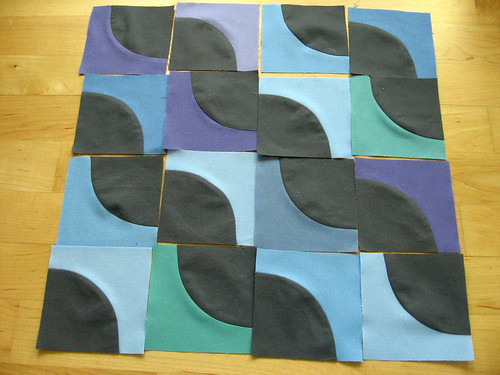
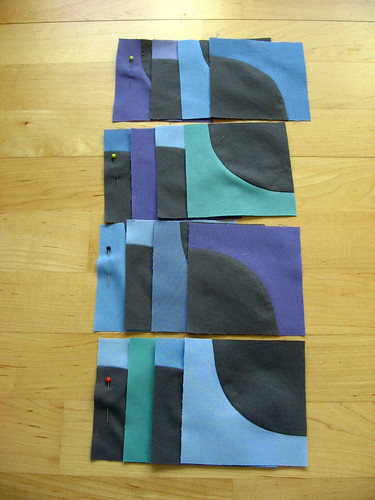
{This post is part of the Drunkard's Path Quilt-Along that I am hosting with Kristie from OCD. Check out my Drunkard's Path QAL page for the schedule and links to the posts so far, and feel free to join in any time!}


 Alli at B. Yazoo, and...