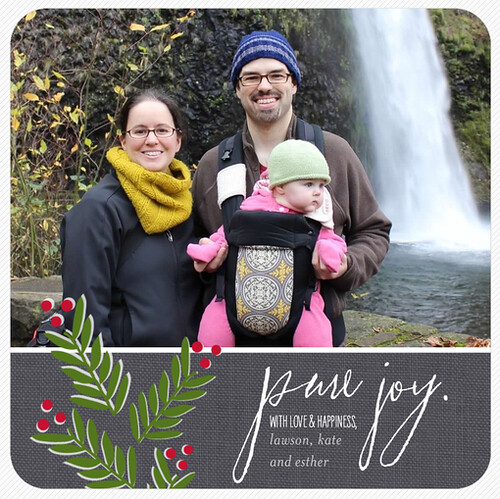
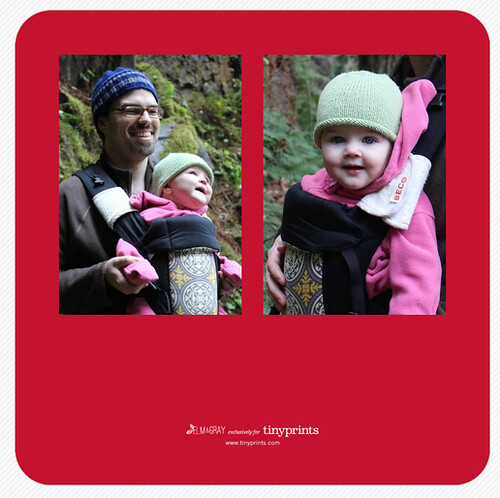
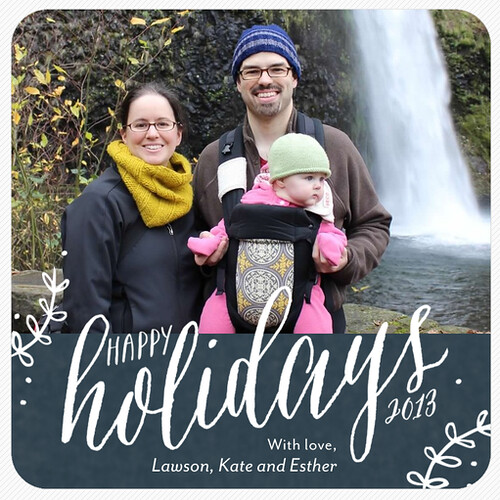
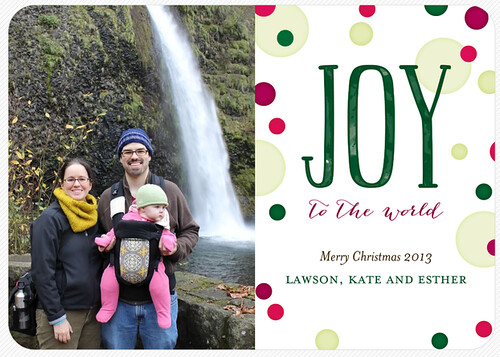
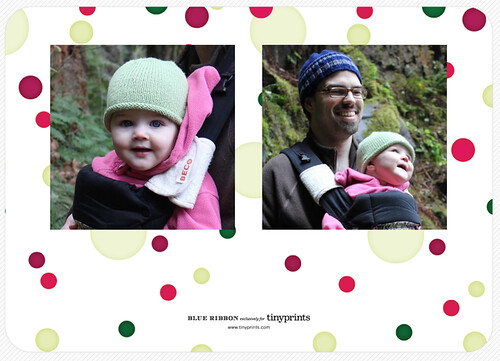
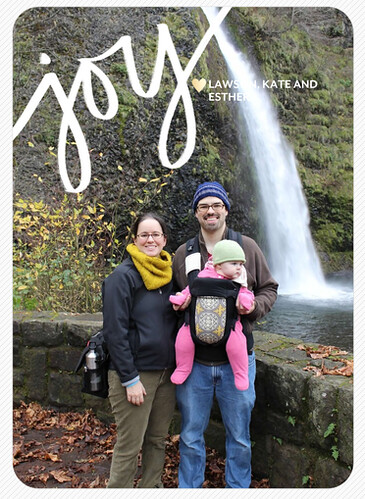
This is the first year that Lawson and I are getting photo cards for our holiday cards - with our cutie-pie to show off, how could we resist? We took photos this past weekend on a beautiful hike (just before the temperatures dropped this week, good timing), so we thought we'd use those photos for our card. I think the family photo turned out pretty well since we were relying on the kindness (and photography skills) of strangers, but it isn't the best photo of Esther ever, although it does reflect her inquisitive side (she really could not stop staring at the waterfalls). Luckily we'll be able to include some additional cute photos of her on the back of the card. Also, I kind of love that everyone in our family is wearing something I knitted in the photo.
I have always admired the cards at TinyPrints, both ogling their options online and seeing the nice baby announcements and holiday cards that we've gotten from friends. I'm super excited to be partnering with them for our cards this year and I had fun playing around on the site mocking up some cards. There are tons of cute options, but I narrowed our choices down to this selection. What do you think?
This joyful holly card is my favorite, I think - love the square shape and the cute motifs. Plus, pure joy pretty much captures our sentiment this year I think. They have an option for a cute patterned back, but since we'll be putting photos on the back I think it looks less cluttered with the solid red background.
I also love this cozy feeling card - another square option. The back would look pretty much the same as the last one except with a solid blue (or there's a red or green option for the card and back, too).
I think this card (delightfully dotted) may be more traditional than we are going for but the dots are fun! Plus you can see more of the waterfall in the photo. Speaking of which, I really appreciated how easy it was to zoom/crop your photos on the TinyPrints site - it makes it really easy to customize each card, particularly when you are trying different photo orientations and also want to customize what looks best with each card.
I actually think the patterned background on this one looks good with the photos!
Speaking of playing around with photo placement to see what looks best with the card... I was bummed out that our photo just really didn't work well with this joyous heart card. This card was one of my favorites but the waterfall is definitely not compatible with the name placement. I'd be more disappointed if I didn't like the other options so much, though.
So what do you think? Which card is your favorite, and what are you doing for your cards this year?
You may have seen that TinyPrints has been having some great black friday week deals - if you aren't going to get your cards picked out this week, though, you can still get 20% off and free shipping using the promo code TPH85Z - the code expires 1/31/14, so there's still plenty of time to get your cards for the holidays. Just paste the code in the "promo code" box at checkout and you're good to go!
Disclosure: I am excited to be partnering with TinyPrints on this post and they will be providing me with some of our cards. All opinions expressed are my own.
Showing posts with label holiday. Show all posts
Showing posts with label holiday. Show all posts
Wednesday, December 04, 2013
Tuesday, October 08, 2013
Halloween Sewing
I'm still trying to get back to blogging regularly, as you can tell - in addition to being busy with the baby (and summer fun stuff until recently), I really have continued to struggle with what I should post about - I have such a backlog of fun things to share, I can't decide which to post so I just don't get around to posting! This is totally silly, I realize, but I do really want to share it all with you, so I'm going to just try to be better about jumping in and sharing something already. In this case, though, it was an easy choice since these photos have been sitting on my computer since last October and I wanted to be sure to share before halloween!
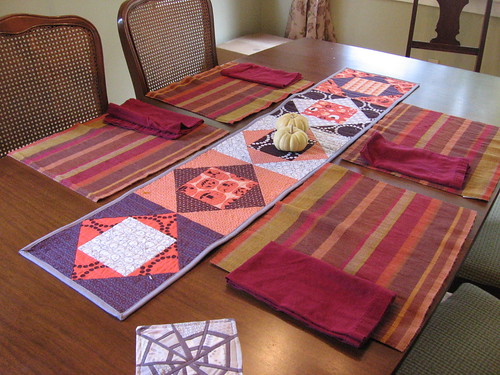
One of the wonderful things about owning a house and being somewhere we intend to stay a long time is that we have finally started acquiring grown-up furniture. After years of having a tiny ikea dining room table that barely fit 4 placemats, we now have a lovely vintage dining room table with plenty of space for a table runner! I have visions of making a whole slew of runners for our table but so far this halloween one that I whipped up last year is the only one that has come to fruition.
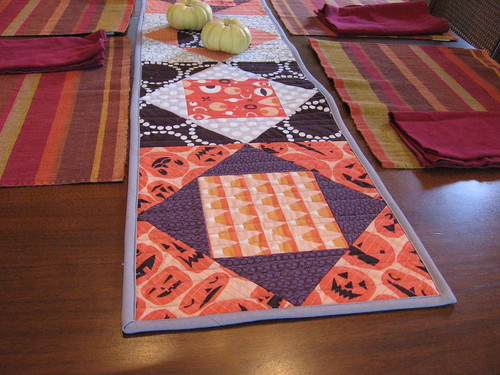
I had bought up this awesome Lizzy House halloween fabric last year and I was determined to actually use it rather than having it sit in my stash. I thought these fun square in square blocks would be a great way to show it off (I am sure there is a real name for these blocks that I don't know - anyone?). I just pieced them by measuring and cutting the squares and triangles but I realized after the fact that they would have been much faster and easier if I had foundation paper pieced them.
I backed and machine bound the runner with a solid grey kona fabric, with the goal of having the runner be reversible. This is probably why I haven't motivated to sew any more runners since last year, the grey side of this has been a great all purpose, all season runner for our table that matches most of our placemats! Making your runner reversible is a great way to get more bang for your buck (so to say), especially if you're making something like this where one side is really only useful for a few weeks a year. I actually often lose track of the fact that this is actually our halloween runner and get a surprise when I take it off the table to wash it! Which reminds me, it's been October for a week, I really need to go flip it over while it's still halloween season.
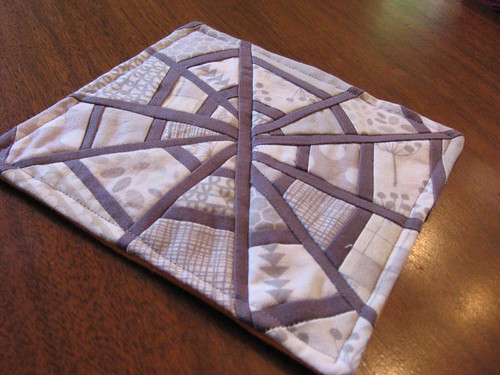
In the top photo above, you can also catch a peek of this fun spiderweb mug rug that I whipped up last year. It's a bit of a play on the traditional spiderweb block, but done in a more improv style. This was also a fun chance to play around with my low volume grey fabrics! Maybe this year (or realistically at this point, next year) I'll make a couple other cute mug rugs/trivets that are also halloween themed to make a set.
How about you, have you been doing any halloween sewing?
Tuesday, January 03, 2012
A Lotta Holiday
Now that all the holiday presents have been gifted, I can show off some of the things I have been working on! I ended up making nearly all my sewn holiday gifts with Lotta Jansdotter's fabric line, Echo, so I'm putting all of those gifts in this post and will come back and share the others after I finish up one last (totally late) gift. It's funny, when I first saw Echo I wasn't sure if I would get any - which is crazy, since I have several of Lotta's books and love her designs. But I just wasn't sure it would play well with other fabrics and I didn't want to make a whole quilt out of it. Then when I started thinking about making holiday gifts, I decided to use it to make a few gifts... and then realized that it would be great for a number of folks on my list and ended up going back to get more fabric! Getting to use a fabric that I loved made the last minute frantic holiday sewing still feel fun, and I think everyone really liked their gifts.
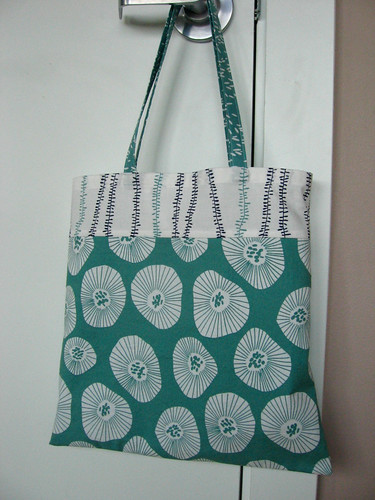
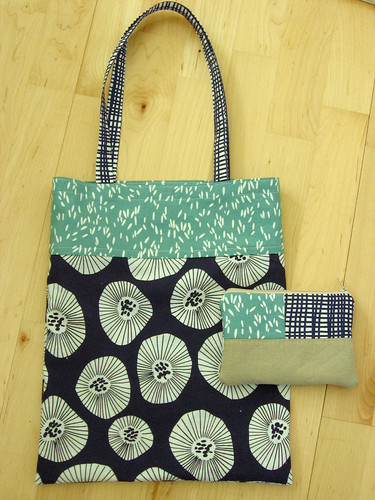
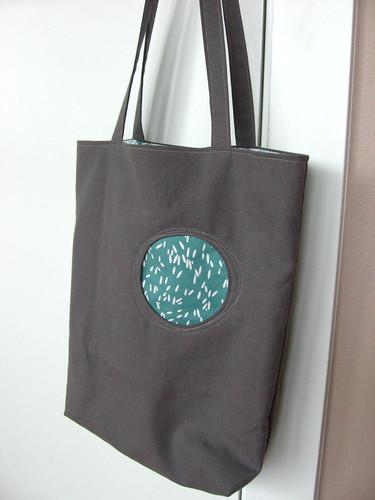
I made a couple totes using my easy tote bag tutorial - the one at the top was sized up quite a bit to make a more substantial bag, while the one above was the regular size.
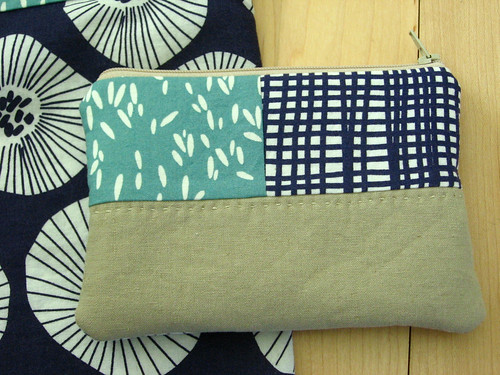
I also made a matching zip pouch to go with this tote, with some essex linen and a line of hand-stitching as an accent.
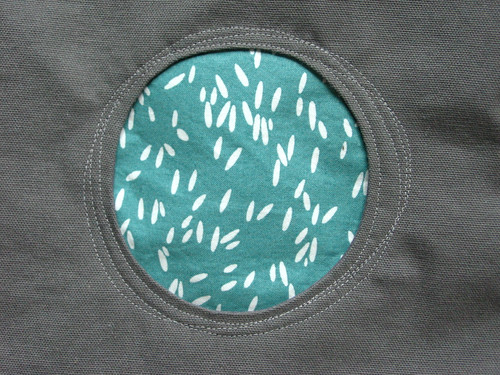
I think this tote bag with a reverse applique circle was my favorite sewn gift that I made - the idea of the circle with the off-kilter stitches was inspired by this bag on flickr.
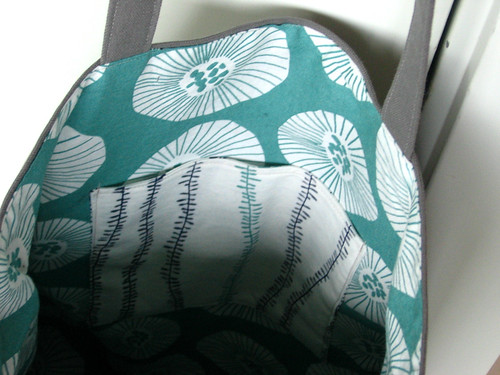
The inside is lined with another Echo print and has a pocket.
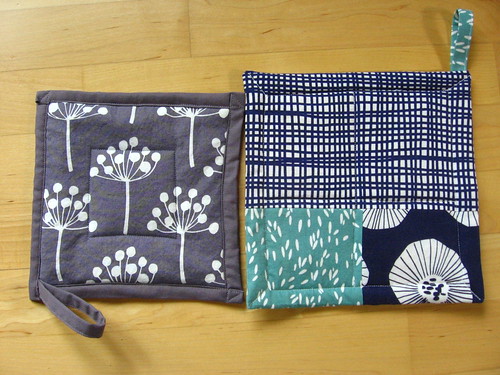
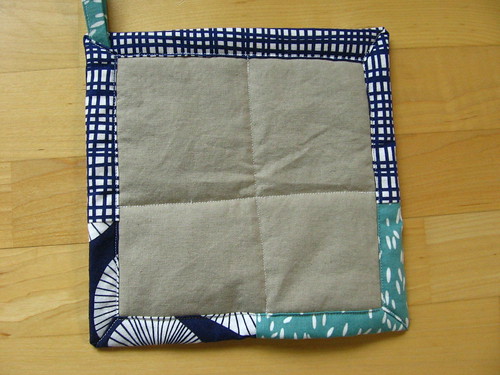
Finally, I made a couple potholders, using a cut up bath towel as the inner layer rather than batting - I made a whole slew of potholders as gifts five or six years ago and that was the method I came up with at the time, it makes a nice, well-insulated potholder although the terry sheds everywhere in the process.
More essex linen on the back of this one.
Luckily I still have a bit of Echo left so I can make myself a little something too!
Sunday, December 18, 2011
Giveaway Winner and Ornament Ideas
Thanks so much to everyone who entered my giveaway! I had so much fun reading about handmade ornaments you have made or ideas you would like to make - definitely got me inspired. I actually got inspired and made some ornaments myself (even though I should have been sewing holiday gifts...) - more on that below. First, the winner!
Congratulations, JuneBug! I've emailed you to find out which pattern you would like.
If you didn't win but wanted to get a pattern, they are available in my meylah shop (with instant downloads!) and in my etsy shop :).
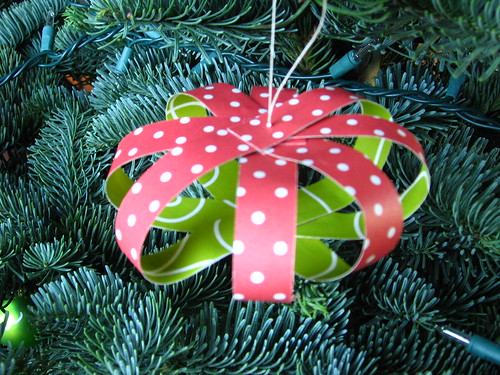
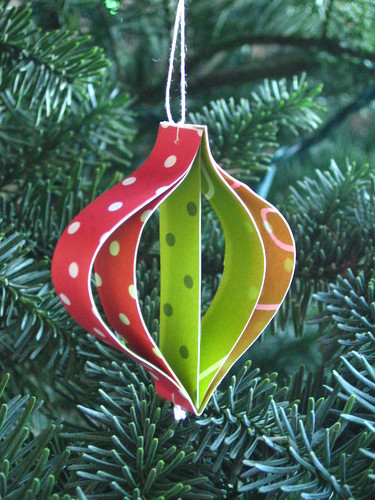
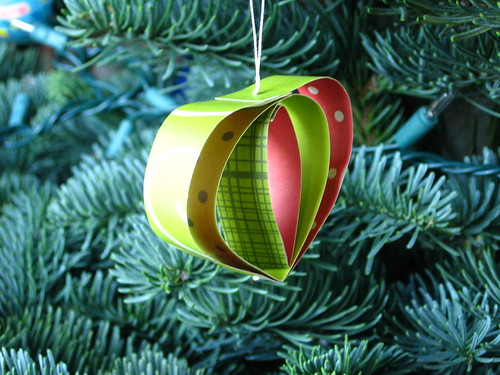
So, here are some photos of the quick ornaments I made:
To make these, I glued together two sheets of lightweight scrapbook paper to get a heavier weight paper with patterns on both sides, then cut strips and made them into various shapes. The middle ornament was inspired by a felt ornament in fa la la la felt, and I think the top one (and other similar sphere ones I made) was subconciously inspired by this ornament that I had seen probably last year. The glueing together two sheets of scrapbook paper wasn't ideal, really, and the paper puckered a bit on some of the ornaments I made but overall I was happy with most of the ones I made. I used perle cotton to sew knots and hold them together, and to make the hanging loops. I actually think these would be even better if you used fusible web to fuse together two pieces of fabric and then cut strips of that to work with, I may try to do that at some point.
Since you all were so nice to share your inspiration, I thought that I would share the ornament ideas that I have been feeling inspired by lately:
Paper flower ornament
Spiky paper starburst ornament
Paper ball ornament made from circles
Felt snow ball ornaments
Another felt ball ornament
String ball ornament
Water marbled glass ornament
And here are some great lists/roundups/sources for more ideas:
How About Orange (you may have noticed I love her ornaments!)
Martha Stewart Crafts
Craftzine
Pink Chalk Studios round-up
Stumbles and Stitches Christmas in July (includes several free patterns from Fa la la la felt)
Hope you all have a great holidays!! I may be back before then with a blog post, but I may be too busy finishing up making the last of my gifts (and possibly getting distracted making more fun ornaments).
Tuesday, May 31, 2011
Needle Felting
I was super excited when I won the Felt Week giveaway on Stumbles and Stitches a few weeks ago, since the prize from A Child's Dream Come True included a large bundle of beautiful sheets of wool felt, and a needle-felting kit. I knew I would get lots of good use out of the sheets of felt but I was possibly even more excited about the kit, since I have been wanting to learn how to needle felt (especially after reading more about it in the posts during Felt Week!).
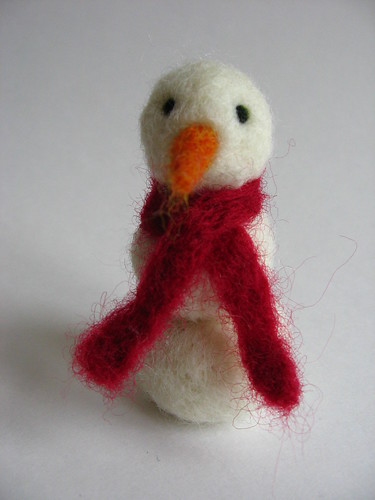
I was really impressed with how fast their shipping was - the needle felting kit came just a few days after I found out I won the giveaway! I was so excited that I started playing with it right away, and found it easier and more intuitive than I expected. After making a few basic shapes, I jumped in and made the snowman above. I figured I may not have much use for needle-felted items in my everyday decor, but they would make great holiday decorations - I'm not sure if this guy will be left as is or turned into a tree ornament (although I do plan to make several more buddies for him).
I am thinking this bird will be a Christmas tree ornament too, especially since we have a bit of a bird theme in our ornaments (especially after I made several last year out of wool felt).
The other thing I immediately thought to make was little toys for some of the kiddos in my life. I always love the way the tiny knitted or crocheted amigurimi monsters and animals look, but I don't have the patience to make something so small and deal with all the shaping on tiny needles. So I figured needle felting would be a good way to make some similar little monster guys.
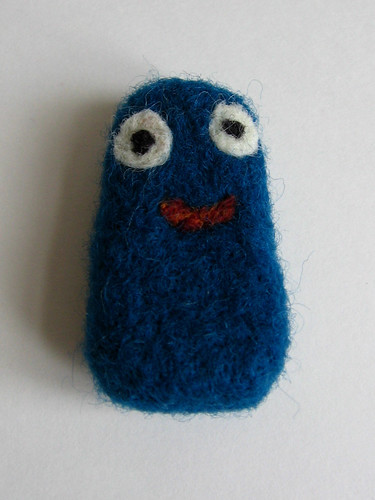
I wanted to start out simple so I made this blue monster guy... he is a bit funny looking and kind of shaped like a chicken nugget, but still pretty cute I think.
I also made this little dino guy although he maybe could be confused for a fish.
I found that getting basic shapes was pretty easy but making smaller parts was a bit trickier for me - I should probably actually read some tutorials online to get more tips on how to make more complicated items. Have you ever tried needle felting and do you have any tips to share?
Thursday, April 21, 2011
Ukrainian Easter Eggs
Today I got out the Ukrainian eggs which make up the entirety of our Easter decorations and I thought I would share them here. I learned how to make Ukrainian eggs as a kid and have always loved doing it, although I haven't made them in a number of years. I love the rich, vibrant colors and intricate designs which you can get with this technique. Most of these eggs are based off traditional Ukrainian designs but I have also made ones that were more modern - polka dots, daisies, and words, among others - I think my mom has most of those still. I have an egg-blower tool so luckily I can safely store these and get them out year after year!
It's fun to play with how to fit the design onto a 3-D shape and to figure out the dye sequence to get the desired colors.
What are your favorite egg-decorating techniques? Have you ever tried making Ukrainian eggs? I think this is it for me this year but I'm hoping to either make more Ukrainian eggs next year, or try out another decorating technique.
Wednesday, January 26, 2011
Blogger's Pillow Party - Christmas Tree Pillows, Redux
OK, I am late to the game here but I decided I wanted to put my Christmas tree pillows up for the bloggers pillow party. I was wavering on whether I wanted to, since I had already posted about these pillows and since it is totally no longer the holiday season (although, ahem, we still have some decorations up). On the other hand, it is really snowing here today so it really feels like winter if not the holiday season. Also, I have been having a really good time seeing other people's pillows (especially Shelley's on Rebel Homemaker - check them out!)... so in the end I decided to jump in too despite my reservations. I hope to participate again next month with an actual new pillow...it seems like pillows are the theme for February in the craft blogosphere!
I had a lot of fun making these pillows, and I think the one with the big tree and the little tree is my favorite. I already talked a bit about my process in the original post, but basically the trees are foundation pieced in a pretty free-form manner and then I built up the rest of the pillow around the trees. I really like how the larger tree in the two pillow tree looks like an evergreen with drooping branches because of the piecing method I used. I like the 4 tree block a lot too but I think it would look better if the trees were closer together on each row and if I had made the block smaller and the borders larger.
I used pretty much entirely fabrics from my stash for these pillows, and the fabrics are a bit more muted and traditional than a lot of the things I have been making recently (especially for the borders and the backs). I like how they turned out, though... but I may be tempted to make something alternate holiday pillows with a bit more modern of a fabric choice in the future. These were out on our living room couch for all of the holidays but now they are going to be stored until next year.
Saturday, December 25, 2010
Merry Christmas
The tree is lit...
The table is set...
I'm wearing my Christmas socks...
It must be Christmas! Happy Holidays and thanks for reading my blog!
[Updated 12/25 - I posted this by email from my phone and somehow the words didn't get included in the post].
Sunday, December 19, 2010
Wrapping Paper Gift Bows
We are out staying with my inlaws for the holidays, and I was wrapping gifts up yesterday while everyone was out of the house. As excited as I was about the green grocery bag challenge this year, I didn't have time to make reuseable bags for all my gifts, and I really do love wrapping gifts the traditional way. My mom and I have always put a lot of effort into carefully wrapping gifts with coordinated ribbon and gift tags. This year, I had fun playing around with making some gift bows out of strips of wrapping paper - a great way to use up those strangely shaped scraps!
Both of these bows are made with equal length strips of paper. The bow on the left has 4 strips that are taped into loops around eachother and then taped together on the bottom; you could also secure this at the middle with a brad or by punching holes and it would make a nice shape - I was just keeping it simple. The bow on the right has 6 strips that are each taped together at the end into a teardrop type shape and then all taped together. I really like how both of these look with the double-sided wrapping paper.
For this bow, I made the central double-bow with one long strip of paper looped around over itself and secured with tape, and then I taped on the "tails". You could also make the central bow as a triple (or more bow) and could just as easily make it with separate strips of paper of different lengths rather than with a single long strip.
What are your wrapping traditions or what fun wrapping ideas are you trying out this year? Hopefully these instructions make sense, let me know if you have any questions. This certainly isn't rocket science but I thought it was fun!
Friday, December 17, 2010
Gingerbread Cookies
Looking for the Giveaway Day Post? Scroll down or click here to find it. I realized I never posted a closing time - I will keep the giveaway open until 9 pm eastern time, so you still have time to enter if you haven't yet!
Thanks to everyone who has commented to enter the giveaway so far! It has been a great response and I have loved reading all of your favorite cookies (and other kinds of desserts). In light of the theme, I thought I would post a favorite cookie recipe of mine to share with all of you. I have mentioned making gingerbread cookies a few times on the blog and was just making them last week, so I thought that would be a good one to share.
I love making gingerbread cookies because they are delicious and fun to decorate with simple piped white icing. As you can tell from this picture and the one in my blog header, my favorite holiday cookie shape is the snowflake. I have a great snowflake cookie cutter set that comes with smaller shapes to do cutouts - the package looks slightly different but I think it is basically the same as this one . Now that I am looking on Amazon I see lots of other fun snowflake cookie cutter sets... I may have to get this one
  to add to my collection for next year! I think one of the things I love about making snowflake cookies is that like snowflakes, there seem to be an infinite number of variations to how you can decorate them, making each one unique.
This year for the first time I have been baking cookies using these silpat baking mats and I have been so impressed by how they work! (sorry, the pic above is from when I made our halloween cookies, I forgot to take one when I was making xmas cookies this year). We got them as a wedding gift and they really work - you don't need to grease the cookie sheet at all, and when the cookies are done they slide right off the mat. I have had so many fewer broken cookies this year, it really has been great. Does anyone else have these, and if so have you used them for baking things other than cookies? I am wondering if there are other things they work well for.
My mom and I seem to have a hard time remembering which gingerbread cookie recipe is the one we like to make. I remembered having copied down one from one of her cookbooks a year or two ago but couldn't remember which one it was when I was up for thanksgiving... we made some from Craig Claiborne but they didn't taste quite like the ones I have been making lately. When I got home I checked and realized I had actually been using a recipe from Rosie's Cookie book (a favorite local bakery) and made them again for Christmas. They are crisp and rich but not too buttery, and taste to me like a traditional gingerbread cookie should. Here's the recipe -
Gingerbread Cookies
Adapted from Rosie's Bakery Cookie Cookbook
Icing for Cookies
Thanks to everyone who has commented to enter the giveaway so far! It has been a great response and I have loved reading all of your favorite cookies (and other kinds of desserts). In light of the theme, I thought I would post a favorite cookie recipe of mine to share with all of you. I have mentioned making gingerbread cookies a few times on the blog and was just making them last week, so I thought that would be a good one to share.
I love making gingerbread cookies because they are delicious and fun to decorate with simple piped white icing. As you can tell from this picture and the one in my blog header, my favorite holiday cookie shape is the snowflake. I have a great snowflake cookie cutter set that comes with smaller shapes to do cutouts - the package looks slightly different but I think it is basically the same as this one
This year for the first time I have been baking cookies using these silpat baking mats
My mom and I seem to have a hard time remembering which gingerbread cookie recipe is the one we like to make. I remembered having copied down one from one of her cookbooks a year or two ago but couldn't remember which one it was when I was up for thanksgiving... we made some from Craig Claiborne but they didn't taste quite like the ones I have been making lately. When I got home I checked and realized I had actually been using a recipe from Rosie's Cookie book
Gingerbread Cookies
Adapted from Rosie's Bakery Cookie Cookbook
- 3 cups flour
- 1/4 teaspoon salt
- 1 teaspoon baking soda
- 2 teaspoons ground ginger
- 1 teaspoon ground cinnamon
- 1/2 teaspoon grated nutmeg
- 1/4 teaspoon ground cloves
- 3/4 cup brown sugar
- 12 tablespoons unsalted butter (1 1/2 sticks)
- 1/2 cup molasses
- 1 large egg
Icing for Cookies
- 1-2 tablespoons of butter (room temp)
- 1 cup powdered sugar
- 1 teaspoon vanilla
- 1-3 tablespoons of milk
Wednesday, December 08, 2010
Christmas Decorations
As I mentioned yesterday, we decided not to get a Christmas tree this year, so I put extra effort into all the other holiday decorations. In addition to the pillows that I showed you yesterday, I also sewed up a tree bunting garland using this tutorial.
When I saw this tutorial, it immediately reminded me of a Christmas garland that we hang on the mantel at my mom's house every year - my grandmother made it using wallpaper samples cut out in stocking shapes, and it is a very special family heirloom. So I was very excited about the prospect of making my own special garland, and I love how it turned out! As I have mentioned, green is my favorite color, so I have quite the stash of green fabrics. This was a great way to showcase some favorites... some are new favorites, and some are scraps from quilts that I made about ten years ago. I look forward to using it for years to come.
I also have some pottery displayed on the mantel. Lately I have had a group of celadon vases out on the mantel, but I switched them out for these copper red glazed vases for halloween and then realized they were also great for fall and Christmas! My pottery studio had a new glaze this year which reliably gave this copper red color (which is often hard to acheive) so I was very excited about it and made several vases - although the second from the left was a gift which I did not make.
On our coffee table, I put out two of the items that I made in the warm glass class I took last year - the Christmas tree sculpture and the slumped green plate. I also filled a bowl with decorated glass ornaments that I made a couple years ago.
These ornaments are a quick and fun holiday project - you just buy some colored glass ornaments and a metallic paint pen, then draw designs on the ornaments. We made a bunch of these the first year we had a real tree to help fill it up a bit, since we didn't have a ton of ornaments yet.
This year we actually have quite a few ornaments, especially with the new ones I made after I won Fa La La La Felt in the giveaway... so I was sad not to get to put them out on the tree. We decided to hang a few favorites, both new and old, from the chandelier over our dining table. It doesn't look entirely elegant but we like it!
Finally, we got a Pointsettia plant for our sideboard and we hung our fake evergreen bunting on the railing (we also have a lovely wreath on our front door which was a gift). So now it certainly feels festive even without a tree!
Subscribe to:
Posts (Atom)

