Sunday, February 26, 2012

Bento Bikes Baby Quilt

Bento Bikes Quilt 1

Good friends of ours are having a baby at any moment, and I had been holding on to this fabric to make them a baby quilt for a while, and got it done just in time.  Now that they have recieved the quilt I can share it with you!

Bento Bikes Quilt 2

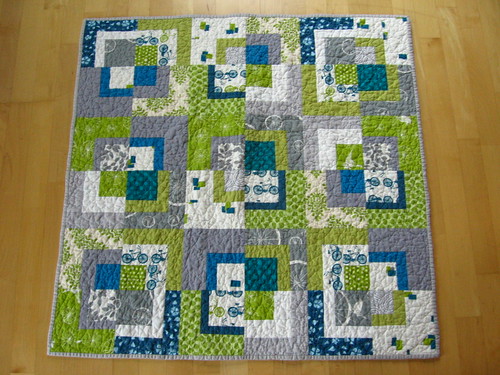
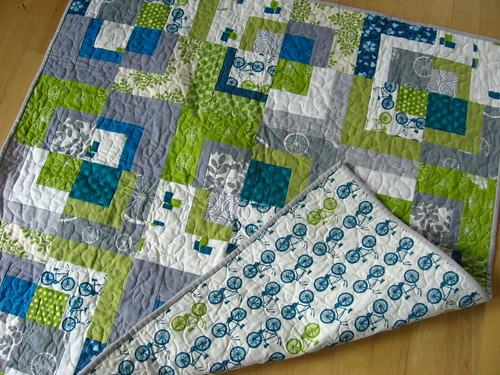
Here's a photo of the whole quilt, post washing.  They are both avid bicyclists, so when the Avalon fabric line from Birch fabrics came out, I knew it would be perfect for them!  I used a number of fabrics from the line and then supplemented with other grey, green, and teal fabrics from my stash.

bento squares before

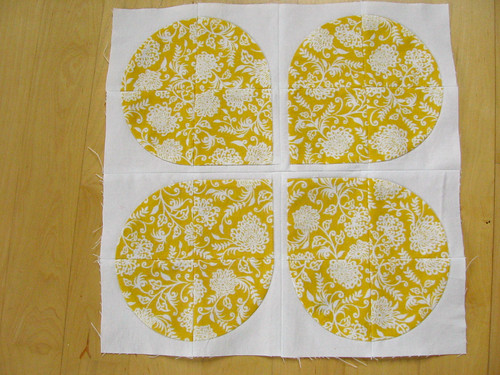
To make this bento box design, I made nine log cabin/square within square blocks and then cut them into quarters.  Each of the larger blocks was 13.5" square before I cut them up, which was kind of a pain of a size to make, but was the right size to get the final quilt size I wanted (since I had a yard and 1/4 of backing fabric - so my final quilt was something like 39" square).   I used different size center squares to start and different width strips, so that the blocks would each be different.  I tried to keep in mind how the blocks would look when cut into quarters as I pieced them, so that each quarter would look good on its own.  I almost chickened out and left them as whole squares, but I went ahead and cut them up.

bento alternate arrangement

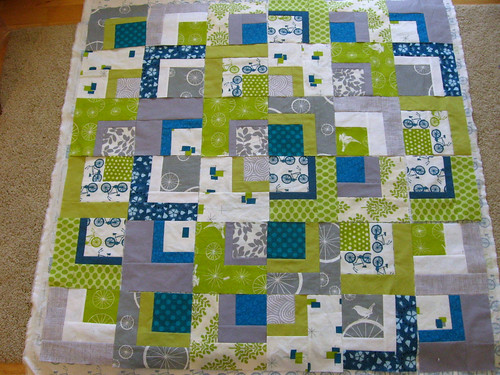
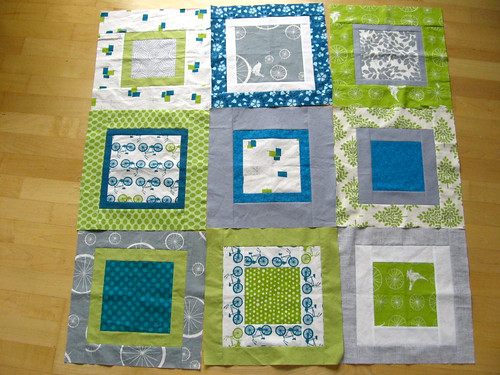
I also considered this layout which I like too, but I ended up deciding that I liked a regular bento box layout better.

Bento Bikes Quilt 3

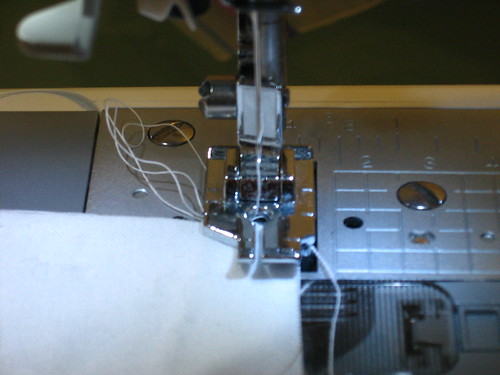
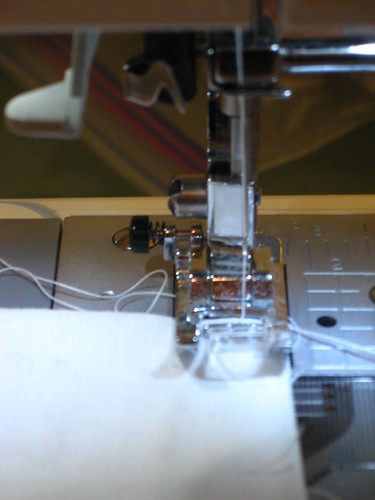
I couldn't find the little quilting table extension thing for my machine when I went to free-motion quilt this, so the quilting was a bit frustrating (and far from perfect) but it all looked fine after a good wash and dry.  And the soon to be parents loved it, which is the most important thing!

I'll be linking up to Sew Modern Monday on Canoe Ridge Creations - click over to check out other modern sewing finishes!

{Sew} Modern Monday at Canoe Ridge Creations

Tuesday, February 21, 2012

Bee blocks and 1/4" seams

retro flowers 1

After a much needed month-off (and a reprieve to turn in my December blocks late), I finished my February bee blocks for the do.good stitches love circle this past weekend.  Ara Jane picked the fun Retro Flowers pattern (which Christina kindly donated for us to use for this quilt).  Ara Jane asked for bright blocks in warm colors, hopefully these fit the bill!  I wasn't too intimidated by the curves in this block after sewing two drunkard's path quilts, but actually matching the seams correctly was somehow tricker than I expected (and I didn't get it perfect, as you can see on my first block below).  I still enjoyed the block and am happy with how they turned out, though!

retro flowers 2

One thing that I have definitely been working on with my quilting over the past year has been getting a more reliable 1/4" seam, which if you make precisely quilted blocks you will know is the key to getting things to match up well and turn out the right size.  I definitely still have room for improvement but I thought that I would share a few tips including one issue that came up specifically with this block.

quarter inch foot

Earlier this year I bought this quarter inch foot (above) for my brother sewing machine.  It was really cheap and definitely helped make it easier to line up the quarter inch seam with the side, but I found that it wasn't as precise as I had hoped... and it drives me kind of crazy that you have to use the center needle setting or your needle will hit the foot, and the default for my machine is a different position, so if I leave this foot on my machine, I will inevitable forget to change the stitch setting when I turn the machine on and mess up my needle.  One thing that I have found that I really like to use this foot for is sewing curves.  I think mostly because it helps me keep close to a 1/4" seam, but doesn't have too large a foot area and create puckers or anything.

quarter inch setting

I know that lots of folks have a 1/4" foot with a metal guard on the side to make it more exact where the fabric is supposed to line up, and maybe someday I will get one of those.  In the meantime, I have been using a trick which I picked up at the sewing summit.  My machine has a ton of stitches, most of which I never use, and I never understood why there were special stitches for piecing and quilting.  In one of the classes at the sewing summit they set up the machines using one of the piecing settings and let us know that that positioned the needle 1/4" in from the edge of the regular foot.  Wow!  I have been using this setting ever since and have found it to be more reliable for getting a 1/4" seam than my special 1/4" foot.  This is setting #37 on my machine, and at least if you have a brother or a babylock you probably have a similar setting.  This may be old news to folks but I thought I would share in case anyone else has been in the dark on this one!  (and I still haven't figured out what the special "quilting" stitches are and how they are different from regular stitches - if you know, please do share).

machine stitches

Actually the hardest seams for me to sew in this block were the final ones where you join the four quarters of the block together, because the pieces you are sewing are each 1/2" wide to the next seam, which at least for me meant that when I sewed a 1/4" seam with the regular needle position, my foot was getting pushed out of place (towards the fabric edge, making a smaller seam allowance), by the thicker fabric from the previously sewn seam.  Maybe if I had a nicer machine this wouldn't have happened, and I could have used a walking foot but that seemed like a pain.  In the end I sewed these seams with my needle all the way to the left position (position 00 on my machine) which meant only less than 1/4" of my foot was on the fabric to the left of the needle and I just did my best to keep a 1/4" seam, which wasn't perfect.  Has anyone else had this problem when sewing patchwork where the finished width is 1/4" or less, and if so, I'd love to hear if you came up with a better solution!

Wednesday, February 08, 2012

A surprise hat and a few cowls

surprise hat 1

It is a testament to how little time I have had for blogging lately that it is the second week in February and I am only just now getting around to posting about the hat that I made Lawson for Christmas.  Every weekend I kept forgetting to take pictures of him wearing it, so much so that I finished another two knitting projects in the meantime... so we had a little photoshoot this weekend and now I can finally share!   I knit this hat using the Knotty but nice pattern from Knitty and I love how it turned out... this was the first time I had made traveling cables like this (my term - is that what they are really called?) and it was surprisingly easier than I expected.  Details of my project are on ravelry here.

surprise hat 2

The best part about this hat was that it was a surprise!  I had shown Lawson the pattern and he helped pick out the yarn, but he had no idea that I was actually making it for him for Christmas, and was totally shocked when I gave it to him.  Mostly I was able to knit it in carpool or when he was out of the house, but I ended up frogging it a bit because I thought it was too small, and so I was still knitting it up to the last minute whenever he would go out for an errand (or even sometimes when he was in the other room).  I felt pretty sneaky!

looped loop 1

After that, I had been really wanting to make myself a cowl, and I found this pattern (looped loop) on Ravelry and thought it would be perfect.  I really love how it turned out, it has a twist in it (a full twist, not a moebius half twist), so when you wrap it around your neck twice it loops around itself perfectly and there is no twist.  I didn't think I would like it as much wrapped just once, but I am finding that I also like it that way... it is super comfy and I have been wearing it all the time since I made it!  Ravelry details here.

looped loop 2

I decided to continue right on and make the honey cowl next, because I got this gorgeous, soft Manos Maxima yarn as a christmas gift and it just seemed like the perfect pattern for it.  I probably should have gone up a needle size to get better drape in the fabric, but I actually like that it is pretty dense fabric and really warm.  I haven't actually worn this yet since it has been pretty warm here, but it will be great for outdoor adventures or for trips back east in the winter.  I wanted it to wrap around twice but still fit pretty snugly, so I used somewhat fewer stitches than the large size - I think I used 210 but I don't actually remember;  Ravelry details here.

honey cowl 1

The yarn really is as soft and delicious as it looks - I think I may have to get more of this to make other projects!  It reminds me a lot of Malabrigo worsted but doesn't seems as pilly, which is nice. 

honey cowl 2

I actually may make myself yet another cowl - more of a single wrap/neckwarmer type - but for now I have cast on a pair of lacy socks which are pretty fun!

And I have been working on a few sewing projects too, but don't have any photos of them yet.  While I am not looking forward to getting up an hour earlier, I am looking forward to daylight savings time and the possibility of it actually being light any time that I am home during the week so that I could have time to take photos!

Related Posts Plugin for WordPress, Blogger...