Showing posts with label fabric. Show all posts

Wednesday, October 08, 2014

Dr. Seuss Outfit

I am very excited to be participating in the Fat Quarter Shop Dream Big with Dr. Seuss blogger challenge, using their Dr. Seuss ABC's Fat Quarter bundleDr. Seuss's ABC's is a favorite book in our house, so I was very excited about these fabrics, and I kept having phrases from the book pop in my head as I was working with them (it's catchy!).  Fat Quarter Shop put together a video tutorial showing how to make a cute baby quilt with the bundle; I went in a different direction and made a cute toddler outfit.

seuss outfit

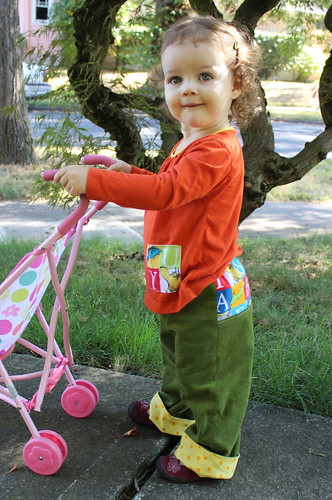
Esther has nearly outgrown her last set of quick change pants, so I made her some 24 month sized ones to last through the winter. The main fabric for these pants is a lightweight green corduroy that I had on hand, and I used the ABC patchwork print for the bum panel and a patch on the shirt.  Rather than making the pants reversible, they are mostly lined in upcycled flannel (from a sheet) with the yellow polka dot print just on the bottom inside to make a cute cuff.

back of pants

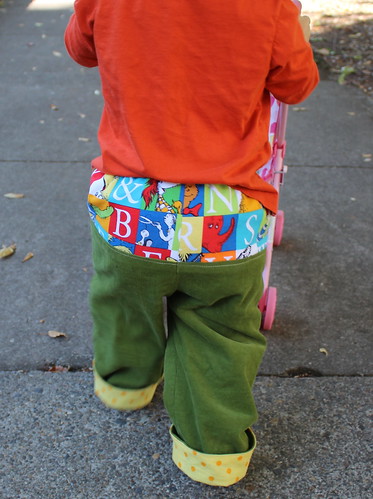
The alphabet bum is so cute and colorful!  In making the pants, I made the same basic modifications as my last pairs - I narrowed the outside leg seams (making the waist/legs wider) but them added more curve to the inseam to make the legs a bit narrower again.  That way they aren't too much of a squeeze to get on over her diaper bum but have a bit less of a boxy look.

seuss pants front

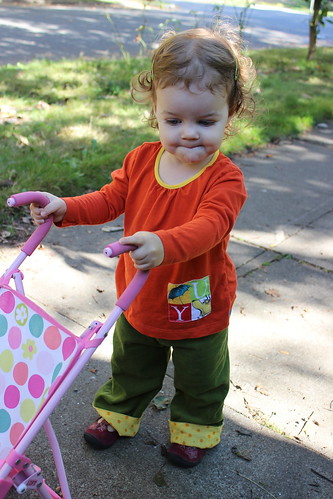
Not that I shy away from unisex clothes, but I thought with the boy-ish style and colors of the pants, it would be good to have a shirt that was more clearly a girls style.  I upcycled a orange shirt to make a long sleeved top with a gathered neckline (my own pattern), with yellow fold-over elastic for the neckband giving a nice contrast color.  I wanted the shirt to tie in with the pants so I put a patch on from the same patchwork ABC fabric.

umbrella yak patch

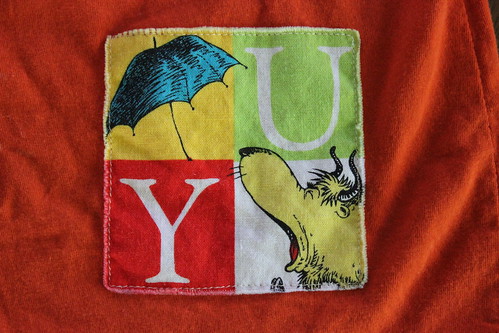
Originally I cut a patch out of the big alphabet panel to use on this shirt (with the E elephant for Esther) but it was a bigger patch and it was too stiff to work well with the gathers in the neckline.  So I picked it out and made this smaller, lower patch and am saving the E for another shirt!  I am planning to save the rest of the panel to use for applique patches for other kids items in the future - I foresee lots of cute initial T-shirt gifts.

I also made a second pair of pants which turned out even more boy-ish so I think I am going to save them for a future baby gift.

bear pants

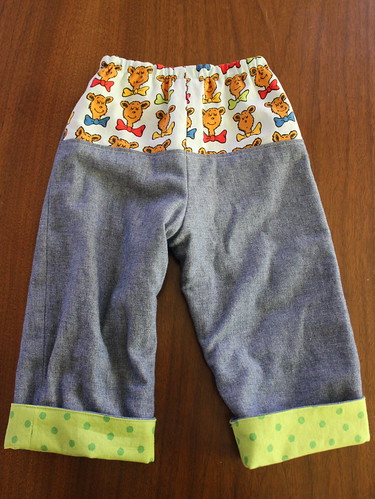
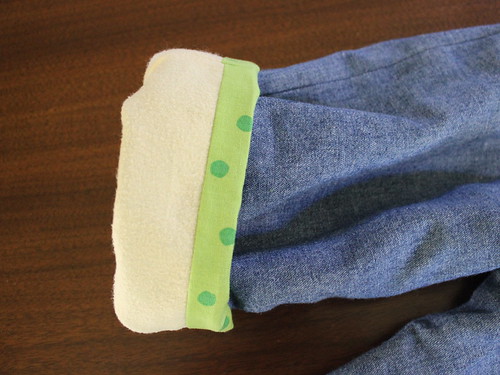
I used the bear fabric for the bum panel on these and the green dot for the contrast cuff lining.  The main fabric for these is upcycled from a chambray shirt of Lawson's, and I actually used the reverse side which was a bit lighter.  I lined these pants in upcycled flannel as well, so both pairs of pants should be nice and warm for the winter.

flannel lining

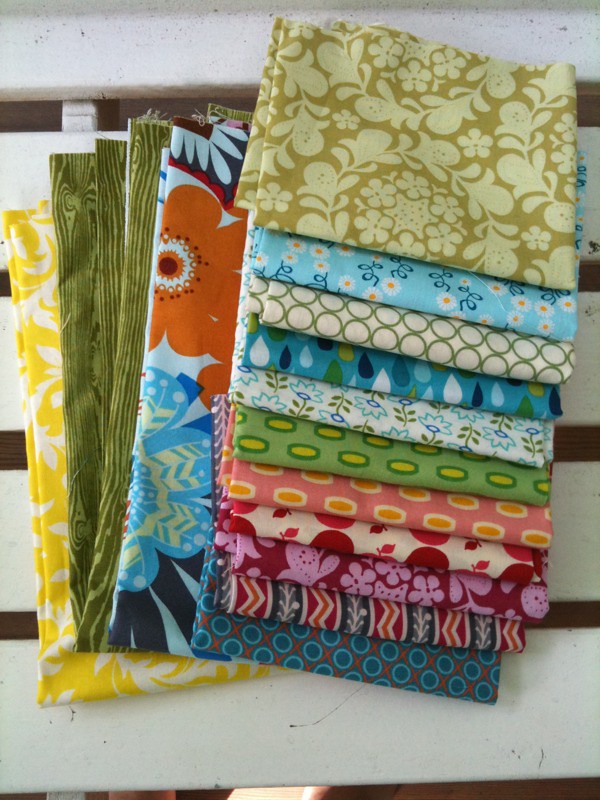
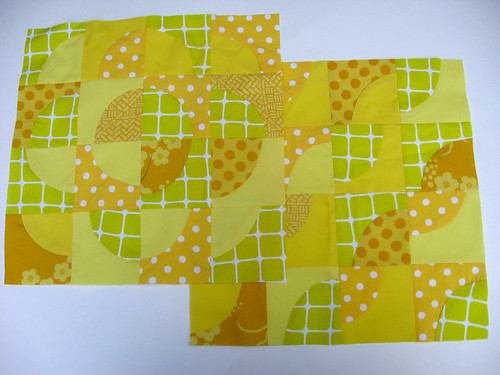
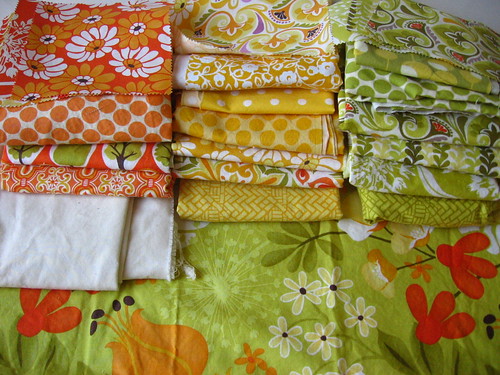
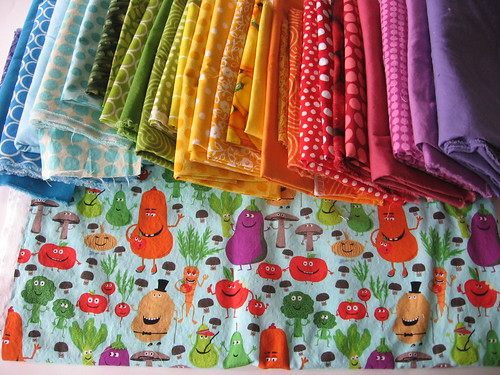
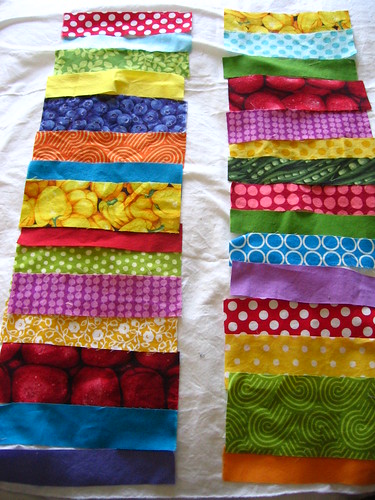
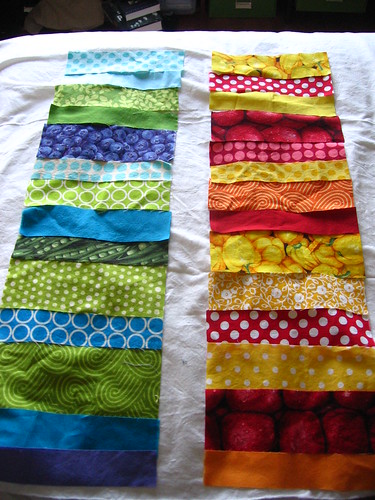
I usually think of sewing kids clothes with fabric yardage so this was a fun challenge to realize how much I could do with a few fat quarters!

Disclosure: Fat Quarter Shop provided me with the fat quarter bundle of fabric for this challenge, but all opinions expressed are my own.

Wednesday, January 18, 2012

This and That

Things have been pretty busy for me lately and I have a bit of a backlog of things to post about, so I thought I would throw a few different things together in a this and that update.

Herringbone Bee Block

For our do.good stitches bee blocks this month, Rachel asked us to make a large herringbone block using her tutorial. Well actually it was for December, but luckily we decided to take the month off in January and Rachel gave us an extra few weeks to get the blocks done, which was much appreciated when I was frantically finishing up my holiday gifts. I had fun making this block and really like the fun, bright scrappy patchwork look of the color scheme she had us use - it'll be fun to see the quilt come together!

heather ross fabrics

I was so thrilled to have won one of the giveaways on 2nd Avenue Studio for giveaway day (and happy to "meet" Rachel, who is a member of my guild here in Portland), and even more thrilled when this gorgeous package of Heather Ross fabrics came in the mail. I love all the cute creations I have seen other folks make with her fabrics, but other than the quilt I made with Far Far Away 2 I haven't had any of them myself. I am looking forward to some fun fussycutting in the future to show off these cuties, although I am a bit scared to cut into them!

Buttons

Among many other fun craft-supply gifts that I got for the holidays (thank you friends and family, you know me well!), my mother-in-law gave me these fun vintage buttons.  I am building up a bit of a button collection and love having a supply to use in future projects.

v-neck t-shirt


I took a t-shirt making class a few months ago (at local sewing studio, Modern Domestic) and have never gotten around to blogging about it here! I thought it would be fun to take a class to learn more tips and tricks about sewing with knits, although I felt a bit silly when I got there and realized it wasn't really different from the kids t-shirts I had sewed earlier this year. 

v-neck detail


One cool new thing that I did learn was how to make a v-neck (they showed us how to use wash-away wonder tape to hold everything in place, although it was still a bit tricky to get it to turn out nice).  I also got to try out the serger which was really fun, definitely makes me want to save up and get one!  And somehow I had more trouble sewing the hems with a double needle on their fancy bernina than I have had when I have done it at home.  I am really happy with how my t-shirt turned out, though, and look forward to making more!

Wednesday, October 26, 2011

Kate Spain Month at Craizee Corners

Have you seen the fun series of fabric designer months that Sharon at Craizee Corners has been putting together? Each month she has a bunch of guest posters who share projects and inspiration from a certain fabric designer. When I heard October was going to be Kate Spain month, I knew I had to join in! Hop on over to Sharon's blog to hear me gush more about how much I love Kate Spain fabric... and be sure to check out the other fun guest posters that she has had this month, too!


Thanks again for having me Sha!

Tuesday, October 18, 2011

WIP weds - my first pieced quilt back

Central Park DP quilt back

Although I am itching to start lots of new quilt tops, I am trying to stay focused and finish my first drunkard's path quilt (and hopefully my kaleidoscope quilt too) before I start too many new projects.  I pieced this quilt back for the drunkard's path quilt - this is actually my first pieced quilt back!  I often make baby quilts where I can get away with just using a 42" width of fabric for the back, and while I have been thinking of this as a baby quilt, since it measures 45" square, I knew I would have to piece it somehow to make it big enough.  When I was cutting charms for the front, I saved the random ends thinking that this would make a nice design, and then I cut some more to make enough for this pieced stripe.  I like how it looks - the fact that I love the flowery central park fabric that I used as the main fabric doesn't hurt either.  I hope to baste and quilt it this week.

Drunkard's Path QAL fabrics

And while I am trying to finish that up before I start too many new things, I can't ignore the Drunkard's Path QAL that Kristie and I are hosting... so I have picked out my fabric and started cutting!  More on that later this week.

I'll be linking up to WIP Wednesday over at Freshly Pieced - very happy to be back in the swing of things and looking forward to seeing what everyone else is up to!

WIP Wednesday at Freshly Pieced

Sunday, August 14, 2011

Adventures in Maine and birthday socks in progress

I am savoring the relaxed feeling after our week off in Maine as we sit in the airport and wait for our flight home, where several more days of frantic packing and moving await us.


My primary craft project for this trip was the annual pair of socks that I make Lawson for his birthday (which was this week) although as usual I am late in finishing them up. Like last year's socks, these are also made with knitpicks stroll sport, which I find knits up much faster but still makes a nice mid-weight sock. After making him regular fingering weight socks one year, I really appreciated how much larger men's feet are than women's, and decided to stick to heavier weight yarns for his socks from then on.

Some highlights from the rest of our trip:


After visiting friends, we headed up to Acadia national park and camped for three days. It rained the first night and the next day, but we were undeterred and went for a nice hike by the coast and up a small mountain... We figured we should get used to hiking in the rain since we are moving to Oregon!


We were rewarded on our hike when we found a delicious patch of wild blueberries, yum!


We also went for a nice bike ride on the carriage roads - definitely something I recommend checking out if you are in Acadia.


Our last day the weather was totally sunny and gorgeous and we enjoyed the coast some more (and we were extra excited that the weather worked out that way since we were able to dry our tent out entirely before packing it back up).


There are also lots of fun shops in midcoast Maine and I indulged in some vacation craft shopping, including these lovely fabrics from alewives fabrics in damariscotta mills...


And these luscious sock yarns (both sport weight, too, so I can knit quick socks for myself, too!) from heavenly socks yarns in Belfast Maine.


I definitely recommend a visit to both shops if you are in either area!

Wish me luck with the next three days of packing/moving, and then we are off to Hawaii! I can't wait!


Wednesday, May 25, 2011

Rainbow Rail Quilt Progress/WIP Wednesday

Rainbow Fence Block Layout

Thanks to everyone who voiced an opinion about the layout for this rainbow colored quilt from last week's WIP Wednesday!  While I had been hoping to make a stacked coins quilt I ended up feeling (as many folks did) that this rail fence layout really looked the best, and it worked the best for me to be able to incorporate all the colors I had wanted to include without it looking totally over the top rainbow-y.  I sewed up all the blocks and laid them out, but still need to assemble the quilt top, quilt and finish it.

Binding options

I started thinking about options for binding the quilt and pulled a few solids (the veggies are the quilt backing)... I am actually leaning towards the brown although I will have to see how it looks once everything is put together - it might be too dark or too much.  Also I am bad at naming things generally but I have been thinking of this quilt as a "rainbow rail".

Drunkard's Path bee blocks

My one quilting-related finish this week was these bee blocks for do.Good stitches - I got super excited about the drunkard's path design and wrote a tutorial for wonky drunkard's path blocks and shared a bunch of possible design options with these blocks.  I am hoping to finish my rainbow rail quilt next week so that I can jump right into making a drunkard's path quilt!

Fabrics for 2nd Central Park Quilt

I already pulled the fabrics from my stash that I will use for the quilt - greens, yellows, and oranges from Central Park with some stash fabrics mixed in as well.

Drunkard's Path Possible Design

I have been further exploring the design possibilities for the inward facing 1/4 circles block option (if anyone knows if this block layout has another name, let me know!) and am considering these two options, as well as a few others.  I am so excited about this quilt I can't wait to get started!
Drunkard's Path Design Option 2

It has been a creative storm here lately... it helps that Lawson was out of town for four days - I missed him a lot but got a ton done! In addition to working on blocks and quilt designs I also learned to sew with knits and to needle felt - more on both of those soon :)

I'm linking up again to WIP Wednesday over at Freshly Pieced:

WIP Wednesday at Freshly Pieced

Wednesday, May 18, 2011

WIP Wednesday - New Baby Quilt

Veggie Rainbow Fabrics

I got started on a new baby quilt this week, inspired by the Michael Miller "Edgy Veggie" fabric above (which will be the backing).   My original plan for this quilt was to make a stacked coins quilt, although I wasn't sure if I wanted it to have sashing in between the stacks or have them right next to eachother.  I started pulling fabrics that coordinated with the backing and I ended up with so many colors that I decided to go for the full rainbow.  I am also using the realistic fruit/veggie fabrics that I used recently in some baby clothes again, so that will be a good tie-in with the backing.  I got excited and went ahead and cut out a bunch of 8" long strips in varying widths and then played around with arranging them.

Stacked Coins Layout - Random

My original thought had been to have the colors randomly mixed together, and while I actually somewhat like this (and like it more with white sashing), it does seem like it is too busy.  I also tried arranging them in rainbow order and that looked nice but I am not sure the folks that I am giving this to would like it.

Color Block Arrangements

I thought it would work better if I arranged them more by color without having it feel totally like a rainbow, so I played around with having blocks in different colors in a kind of rail fence pattern.  I like how this looks much better, but it makes me a bit bummed because I was really hoping to make a sliced coins design.

Stacked Coins Layout - by color

I showed them to a friend and in talking it through with her it occurred to me that they might look better as sliced coins if I alternated cool colors in one stack with warm colors in another (although I couldn't figure out where to put the purples - they looked a bit off with the warm colors).  I like how this layout looks quite a bit... Although I like the rail fence design too, so I am not totally decided.  I have a few fabrics coming in the mail that I think will be good additions to this quilt so I will probably wait to make a final decision until they come - in the meantime, I would love to hear which design other folks like better.

I am hoping to sew up my blocks for the do.Good stitches bee in the next week and maybe work on a few garment sewing projects too... now that it is really warming up I am itching to try my hand at it a bit more and make some cute summer clothes!

I'm linking up again with WIP Wednesday over at Freshly Pieced - head on over to see the other fun projects that folks are up to:

WIP Wednesday at Freshly Pieced

Thursday, April 14, 2011

Free-Motion Applique Messenger Bag Pattern and Giveaway!


I am so excited to be releasing my new PDF sewing pattern, for a free-motion applique messenger bag!  I decided to do another giveaway to celebrate - more on that at the end of this post.


The pattern is for a medium-sized messenger bag with two design options for a free-motion applique decoration on the flap of the bag.


The design includes a handy divided organizer pocket under the flap to store your phone, keys, and other essentials - or you can leave the pocket undivided if you prefer.


The bag also includes two interior pockets, one open and one zippered, so there are lots of places to stash all your essentials!


The pattern would also be great as a basic messenger bag pattern if you have your own decoration idea for the flap, or if you wanted to make it in a patterned fabric rather than a solid.

Huge thanks to my pattern tester, Shelley, for all her suggestions to clarify and improve the pattern!  I am really proud of the final product.

The pattern is sold as a printable PDF file, and includes computer-drawn printable pattern pieces, cutting diagrams, and detailed step-by-step instructions/photo tutorial.  The pattern is available for purchase from my Etsy shop [update: and in my Meylah shop with automatic download].  I'm also selling a few finished bags in my shop if you want to buy one already made up!

To celebrate the release of this pattern I am having a giveaway!


 I'm giving away a copy of the pattern and either:

  • The materials required to make the bag as pictured above - 3/4 yard of dark green corduroy fabric, 1/2 yard of Amy Butler Love green spots, and a fat quarter each of solid terragon Kona cotton and the green trees on white background from It's a Hoot by Momo, and an 11" zipper and a magnetic snap ; OR
  • A $25 credit to my Etsy shop.
The winner of the giveaway can choose which of these options they prefer.  Feel free to enter even if you don't sew if you are interested in the shop credit!

Each person can have up to four entries - make sure to leave a separate comment for each:

  1. Leave a comment on this post
  2. Tweet about this giveaway: RT one of my tweets or write your own with a cc to @NeedleNSpatula and a link back to this post - Example - Check out this giveaway from @NeedleNSpatula for a sewing pattern and fabric or shop credit!  http://t.co/3Cd1iPE
  3. Follow or subscribe to my blog (or let me know that you already do)
  4. Like Needle and Spatula on Facebook (or let me know that you already do)
This giveaway will be open until next Wednesday, April 20, and is open to international folks (although I may ask you to pay any additional shipping for sending the materials if you win them, depending on how much it costs).

If you don't have an email listed on your blogger profile, please be sure to include one in your comment -- feel free to substitute (at) for @ symbol etc if you like.

Thanks and good luck!

GIVEAWAY CLOSED!  Thanks!

Wednesday, April 06, 2011

Baby Shower Activity - Decorating Onesies with Freezer Paper Stencils


I guess I had a lot to share about the baby shower we co-hosted last weekend - I posted about the decorations and the desserts earlier this week and today I wanted to share the fun craft activity that we did during the shower, decorating onesies using freezer paper stencils.  I made a stencils in a variety of designs including animals, fruits and veggies.  It was a very accessible project because using the stencils made it less intimidating for folks that otherwise don't do a lot of craft projects - they didn't have to think of their own design or figure out how to draw a certain shape if they didn't want to, but they still had a chance to get creative and make something.


I had so much fun coming up with cute designs that I didn't have enough onesies to fit them all!  If you want to make your own onesies (or anything else) with freezer paper stencils, you can download and use my animal, fruit and vegetable freezer paper stencil patterns here.  I also found great designs by searching for different key words and "stencil" or "outline" - so not every design you see in this post is in the file, only some of the ones I drew myself.  As usual, these patterns are for personal use only, so please don't sell the pattern or items that you make from them.


You may have seen other projects using freezer paper stencils - this was my first time using it and it was really fun!  You want to make sure you get freezer paper, which has a plastic coating, not wax paper.  I also got a sampler of fabric paint (which had the benefit of being one of the kinds you don't have to heat set), brushes, and fabric markers for those who wanted to draw their own design rather than paint in a stencil.  I traced the designs onto the freezer paper and cut them out with a craft knife.


Then I went ahead and ironed the freezer paper stencil right onto the front of the onesie, and put a piece of folded card stock inside to make sure the fabric paint didn't seep through to the other side.  One thing we did find was that if you watered down the paint it tended to seep under the freezer paper so if you are doing this project I would definitely recommend using the paint without thinning it out with water at all.  The folks that just used the paint straight had virtually no seepage and very crisp designs!


I felt bad that some of the earlier ones did have some paint seeping through so I went back and painted over those parts with white paint on some of them and it mostly covers it up.  I love the way these turned out with the cute faces and fun colors and designs that people painted on them.


Check out this amazing tiger whale design that one couple did!


I also left a number of onesies blank so that people who wanted could draw freehand designs.  Didn't these turn out great too?  (The parents-to-be are in a bocce league if you are wondering about the middle shirt).


One final onesie... this baby is going to be a rockstar!

I hope you have been enjoying this series of baby shower posts!  If you can believe it, I have one more post coming, then we can move on to other things.

What is your favorite activity that you have done at a baby shower?

I'm linking up at a few linky parties:


Creations by Kara


Related Posts Plugin for WordPress, Blogger...