Showing posts with label fruit. Show all posts

Thursday, May 26, 2011

Mixed Berry Ice Cream

Mixed Berry Ice Cream

I don't know about where you live, but here in D.C. it has been feeling decidedly like summer.  Today it was over 90 degrees out!  I have been wearing skirts and dresses non-stop, and the other day I got the urge to make some ice cream.  I like to keep bags of frozen berries in the fridge as they are great for whipping up a last minute cobbler, pie, or sorbet, and I had been wanting to try making a berry ice cream.  Most of the times I have made ice cream I have gone all-out and made a custard but this time I kept it simple and made it "Philadelphia Style" which just means I used cream (or half-and-half, in this case) straight, with no custard.  As a result, this lands somewhere in between a rich ice cream and a light sherbet - deliciously fruity with a hint of creaminess.  This recipe is pretty low fuss, the only somewhat time consuming part is straining out the seeds, but it makes the texture of the ice cream much nicer so it is definitely worth it.

Straining Puree


Mixed Berry Ice Cream - Philadelphia Style
Inspired by a few recipes in The Ultimate Ice Cream Book
  • 2 cups half and half (or if you wanted it to be more like sherbet, you could probably use milk)
  • 3/4 cup sugar
  • 1 pound frozen mixed berries - I used a mixture of blackberries, blueberries, raspberries and strawberries, but really any berry mix should be fine
Take the berries out of the freezer and put them in blender to begin to defrost.  Put the half and half and sugar in a saucepan over medium heat and stir until sugar is mostly dissolved, not letting the half and half boil (it should be warm but not too hot at this point).  Pour the warm half and half over the berries in the blender and puree thoroughly.  Strain the puree through a fine strainer to get out the seeds.  The mixture should still be somewhat cool, but if it is not, refrigerate until cool, then freeze in your ice cream maker according to the instructions.  Enjoy!

Saturday, December 04, 2010

Festive Hanukah Meal - Sweet Potato Latkes and Baked Apples


Growing up, my family celebrated both Christmas and Hanukah, but I don't always celebrate Hanukah now, so I was excited to cook up a celebratory Hanukah meal when I had a good friend over for dinner last night.  We actually didn't light a menorah (we were going to jerry-rig one using birthday candles but I didn't have enough)... but the dinner still felt like Hanukah in any case.  I wanted to think of a menu that had some traditional elements but that took healthy, vegetarian and interesting approach.  I love sweet potatoes, so I thought it would be fun to try sweet potato latkes, and rather than making apple sauce I decided to make baked apples.  I also made rolls using 1/2 whole wheat, 1/2 white flour and the artisan bread in 15 minutes a day cookbook, and I made a lentil stew with potatoes and spinach.  I was very happy with how it turned out!  The baked apples were especially delicious, I want to make them again soon.

For the latkes, I used this recipe, although I had a lot of sweet potatoes so I added another egg.  I liked the spices but I think they might have actually been better without them.  Also, mine had slightly cooled before I ate them, which really isn't ideal.  They are definitely best when eaten piping hot!  I served them with sour cream.


For the baked apples, I modified this recipe (inspired by this recipe from Epicurious, but not having the necessary ingredients/time to do something that complicated).  Basically, in each apple I put a tablespoon or so of brown sugar, as many raisins as would fit, a sprinkle of cinnamon and then topped with a small pat of butter (definitely not as much as the recipe called for).  I baked them at 350 for about 45 minutes or maybe more (until they were tender).  They were tender but not disintegrating and the addition of cinnamon and raisins definitely made it a more interesting taste.

Happy Holidays!  I hope you are having good celebratory meals with friends and family!

Friday, October 29, 2010

Butternut Squash Soup with Ginger Pear Compote, and Artisan Bread in 5 min a day


I was looking through my recipe box the other day and came upon a handwritten recipe from my mother for this soup.  It doesn't say where the recipe was from originally, but it sounded delicious and like just the thing for the start of fall.  I picked up fresh cider, pears and butternut squash at the farmers market and I was all set to try it out.  I have to say that this recipe had a lot of butter in it... my mom's notes indicated she had cut the butter in half, and I cut it in half again, and it still seemed like a lot to me.  I am sure the soup would be delicious with even more butter but it seems excessive to me - I think it would taste good using half butter and half vegetable oil and/or cutting down the amount of butter even further than I did.  In any case, it was a really great flavor combination and we enjoyed it a lot.


Butternut Squash Soup with Pear Ginger Compote

For the soup:

  • 3 tablespoons butter (or less, or sub vegetable oil for part)
  • 2 small chopped onions
  • 2 lb butternut squash, peeled and cut into 1-2" cubes (about 4-5 cups)
  • 3 cups fresh apple cider
In a medium saucepa, melt butter and add onion, cook over medium heat until transparent.  Add squash and cook for 2-3 minutes, then add cider and bring to a simmer.  Lower heat and cover, and cook until squash is tender (about 1/2 hour or more).  Puree either with a hand blender or in a regular blender (being careful not to burn yourself).  Season with salt and pepper.

For the compote:
  • 2-3 ripe pears, chopped with skin on
  • 1 tablespoon butter
  • 2 tablespoons minced ginger
In a medium skillet, melt butter and cook pears gently over low heat for 5 minutes.  Add ginger and continue cooking with lid on until tender (10-15 minutes).  Serve soup topped with a dollop of compote.


The other part of this meal was fresh homemade bread.  A few months ago I bought the Artisan Bread in Five Minutes a Day cookbook, which I had been hearing all about and wanted to check out.  It has a lot of really great-looking recipes and I was excited to try their technique.  The basic idea is that you make a large batch of very wet bread dough and store it in your fridge for up to a couple weeks, and then you are able to take out a loaf's worth and cook it after a relatively short rise.  The wet dough keeps the bread moist and as the dough ages in the fridge it takes on a sourdough type of flavor.  I was tempted to jump right to one of the whole grain loaves, but they advise starting with the "master recipe" for a white bread boule, so I started there.  

Despite making a number of mistakes (like not putting enough flour on the dough when I was shaping it, and forgetting to slash the top before baking), the bread turned out to be really delicious!  The master recipe was published in the NYT a few years ago if you are interested in trying out the technique without buying the book yet...  Now I just have to decide what to do with the remainder of the dough I have saved... I am thinking probably pizza, but I am tempted to try another loaf of bread.


Friday, July 23, 2010

Fun with Farmer's Market Fruit

I have always been a big fan of farmer's markets, and I am loving the fact that this year they started doing a farmer's market right outside of my office building every Wednesday! It makes it so much easier to get to a market every week, especially if we are away on the weekend, and I find that I am often stopping by several different markets to pick up different things during the week. DC folks, if you don't already know where your nearest market is, here is a listing of all the ones run by FreshFarm markets (not totally comprehensive, but a good start).
 
Amazingly, I have been finding that this summer, I have been able to grow nearly all the vegetables we need, so my farmer's market purchases have trended more towards fruits (well, fruits and green beans, as my beans this year have again not been so successful).  I have been loving snacking on fresh apricots, which have such a lovely delicate flavor compared to dried ones.  I am a huge peach and nectarine fan, and have been enjoying trying the different varieties as the season progresses.  Berries always feel like a splurge to me but this week I got blackberries which I have been eating in my cereal each morning.  Growing up going to Maine each summer I really can't get on board with the big (relatively) bland blueberries that we get down here in the mid-Atlantic, but the abundance of other delicious fruits makes up for it pretty well!

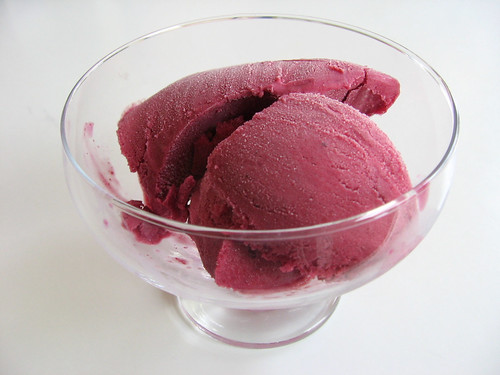
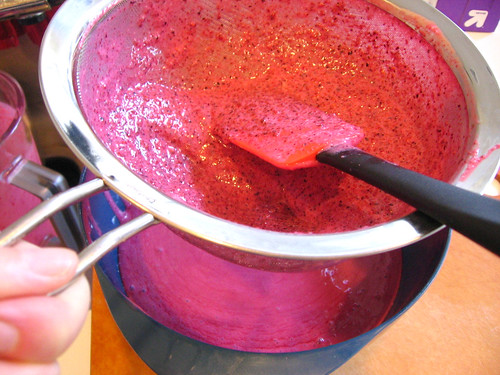
I have been eating up the fruit as a delicious snack, but with such an abundance I have also been enjoying trying out some fruit recipes.  In addition to the two shown below, I made peach ice cream from The Ultimate Ice Cream book, which I had made last summer and it was really yummy once again.  I have found the book to be really comprehensive and all the recipes we have tried have turned out really well.  Although, I have recently been tempted to get another ice cream book, The Perfect Scoop.  Is it bad to want to own two books of ice cream recipes?

For a coworker's going away party today, I made a recipe from my mom, a plum torte.  It looks fancy (I think) but is actually really easy to put together, and very tasty.  You make it in a springform pan, here is mine after I took off the outside ring today:


Plum Torte
  • 1 cup sugar
  • 1/2 cup butter
  • 2 eggs 
  • 1 cup flour
  • 1 tsp. baking powder
  • 1/8 tsp. salt
  • 1 tsp. vanilla
  • 4-5 plums (underripe is OK, mine were overripe which was OK but not ideal)
  • more sugar and lemon juice (lemon juice optional) 

Butter and flour 9" springform or deeper than usual cake pan, and preheat oven to 350°.  In a medium-sized mixing bowl, cream together the butter and sugar, then beat in the eggs.  In a separate bowl, mix together the flour, baking powder and salt, then add the flour to the wet ingredients in several additions, mixing after each, and then adding the vanilla and mixing until it is smooth.   Spread the dough (which is fairly thick dough) to cover the bottom of the pan.  Cut the plums in half and arrange them around the pan, cut side down.  Sprinkle pan with sugar and lemon juice if desired. Bake for 50 minutes to an hour (I baked mine an hour and it was a bit on the done side); as it bakes the dough rises up around the plums and kind of encases them.  You can serve it plain or with vanilla ice cream.  Cut and serve from the pan--don't try to take the bottom off the springform/remove it from the cake pan.

Finally, the last fruit recipe that I have to share is a savory dish and super easy and delicious. I am pretty sure this is a Mark Bittman recipe, but I originally was served this at a friends and have made it several times since.  It's just a variation on a classic tomato basil salad where you add peaches to the mix... and dressed with a simple drizzle of olive oil and plenty of salt.  For mine, I had yellow pear and red carmello tomatoes from my garden, green and purple basil also from my garden, and then white and yellow peaches from the farmers market.  Yum!

Related Posts Plugin for WordPress, Blogger...