Wednesday, October 23, 2013

More Baby Shirts for Kids Clothes Week!

Pink Gathered Yoke Shirt 3

After all the sewing that I got done on Monday (as I described in yesterday's post), I didn't get as much time to sew yesterday, and I only managed to cut out the pieces for another long sleeve top for the baby.  Today I got a bit more time to sew so I was able to sew together that top, and cut and sew another button-front top for her as well.  It's so fun really making time to sew and getting so many cute things made for her!

Pink Gathered Yoke Shirt 2

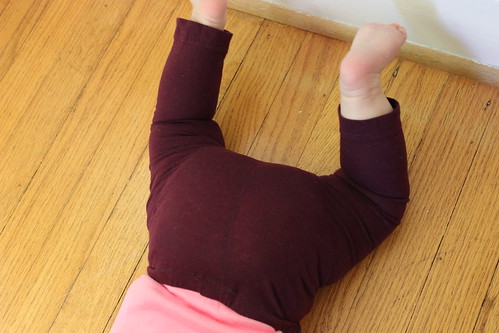
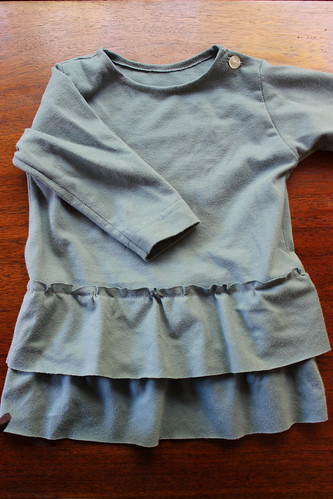
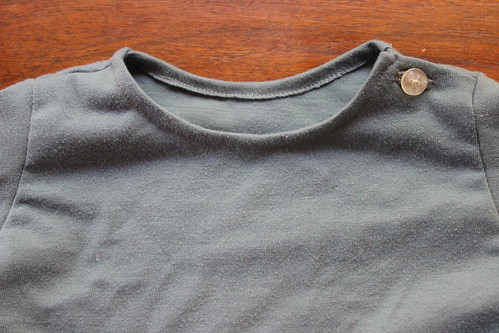
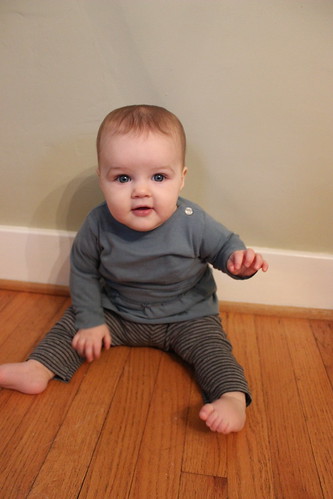
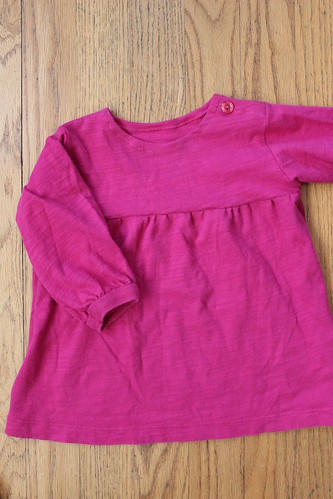
I love how this pink top turned out; it was inspired by a similar styled shirt that she has which she has almost outgrown - as you can see, this one has a bit of room to grow.  I adapted the self-drafted pattern I used for the first set of shirts again, removing the button placket/front opening, adding a shoulder button, and here cutting a yoke just below the armholes and then adding a gathered bottom to the yoke.  The sleeves of the shirt this was made from were gathered, so I just cut out sleeves and reused that hem with the gathers, giving this shirt cute gathered cuffs with no extra work for me!

Pink Gathered Yoke Shirt 1

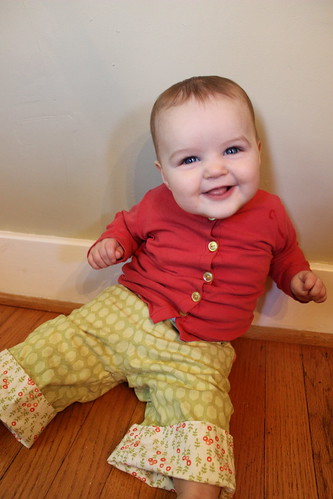
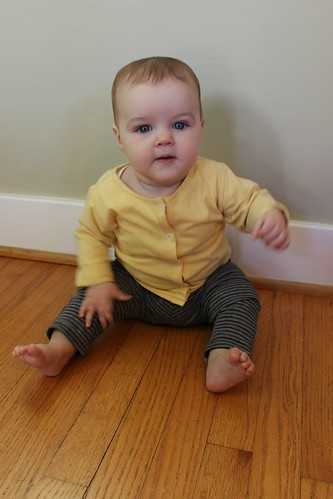
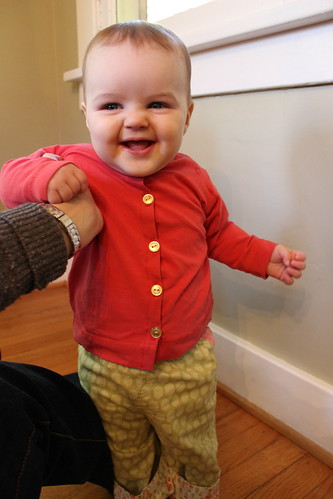
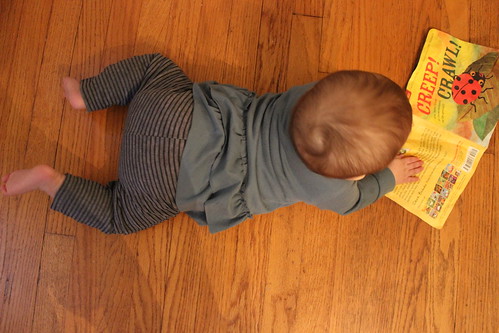
The pants that she is wearing above are not ones I sewed but I like the a lot!  I have been feeling a bit torn about whether to embellish these shirts a bit more -- I have lots of ideas of ways that I could do that, but at least for these ones, I am really enjoying just having some good solid color basic shirts for her.  She has a lot of shirts with designs on them, and then a lot of (non-matching) pants with designs on them too, so it's nice to have some basics that are really versatile and will go with a lot of her more interesting pants.

Grey Stripe Cardigan Shirt

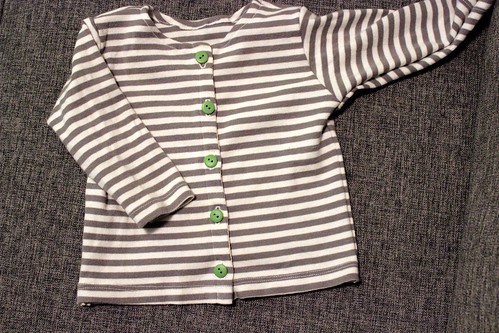
I finished it after she had gone to bed so I'll have to take a photo of her wearing it later, but here is the second shirt that I made today - a fun grey and white striped cardigan style shirt. I almost put pink buttons on it but I couldn't resist the green. This shirt is very similar to the coral red shirt that I shared yesterday, but without the added length. Also, for this shirt, I decided to use twill tape to stabilize the button placket rather than just folding over the knit - this fabric (again, from an upcycled plus size shirt) seemed particularly stretchy and like it would benefit from that added structure, and I'm really happy with how that turned out. Although for some reason, not sure if it was related to the reinforced placket or not, I had a heck of a time getting the buttonholes to sew correctly and had to rip out and restart a couple of them when they got messed up. Luckily that worked and I was able to get them all made and looking decent in the end. And I am kind of amazed that ALL the stripes match up! Not only in the front but on both side seams and the sleeve seams too - I wasn't going to stress about it but it worked out amazingly well without too much effort.

I'll be honest, I feel a little embarrassed about how excited I am about these new shirts and that I have fun planning my baby's outfits. But it's just so fun to have a kiddo of my own to sew for and I'm thrilled with how these tops are turning out - not only do I think they're really cute but I also know they will a ton of use. After sewing for other people's kids for a long time but not really knowing what size or type of clothing they needed most or what would really get used, it's so great to feel like I know just what I want and can make it for myself. And I love getting to experiment with how many different ways I can adapt a pattern - as I mentioned yesterday, I probably have more ideas for these little shirts than would actually be practical to make (um, in fact, I sketched out a bunch just to get the ideas down and had 8 or 10 more variations that I'd love to try). But I should maybe cut myself off soon and save the rest of those ideas for later, to sew in a larger size! Not to mention that my sewing time the rest of this week will be scarce, so this may be it in any case for now. I may not technically end up meeting the challenge of KCW to sew for an hour a day all week but I am more than satisfied with how much I got sewn already this week, so I'm calling it a success!

Tuesday, October 22, 2013

Kids Clothing Week!

Baby outfit 1

Have you seen that it's Kids Clothes Week this week?  It is such perfect timing for me, I wasn't paying attention that it was this week but I had just sewn several things for Esther on Sunday and was excited to do more sewing on Monday when I found out it was that time again!  I have enjoyed reading about KCW in the past and following along as others sewed, but this is my first time sewing along myself, now that Esther is 7 months old (I think there was at least one other KCW since she's been born but I wasn't up for it at that time).

I sewed her a few clothes when she was smaller but mostly tried to hold off - she has been growing so fast (already wearing mostly 12 month clothes and some 18 month!) and so it seemed silly to sew things that she would outgrow right away.  I am hoping that she is going to slow down her rate of growth a bit now, though, and I also find that clothes don't always fit her right because she has a very long torso but not so long arms and legs, so it seemed like a prime chance to sew her better fitting clothes.

baby outfit 4

I had sewn her a number of pairs of leggings when she was smaller (I think I have some cute pics of her in them so I will try to find those and post them later), and I had been meaning to sew more, so I sewed up two pairs over the weekend and another pair on Monday. The pattern is self-drafted, just tracing a pair of leggings that fit her well. These grey striped leggings were a favorite shirt of mine that had gotten a hole in the front near the hem (this happens to me all the time, I think its because my pants button rubs them? I'm not sure but it's super annoying). They are kind of lightweight but so cute on her! I also decided to try sewing her a little shirt... I traced a cute long-sleeved t-shirt that she has and used it to make the pattern, but added snaps to the front instead of buttons. The snaps were a bit of a fail because I didn't reinforce the fabric enough and now I don't think you could unsnap it easily without ripping the fabric. Luckily it still fits over her head without unsnapping so I'm just calling them decorative and going with it.

baby outfit 2

I really liked the way that shirt fit so I used the same self-drafted pattern to sew another very similar one on Monday, but this time with buttons, and I added a bit of length for our extra-long baby. I should mention that for all the leggings and these two shirts, I have been upcycling t-shirts (most bought at the goodwill outlet bins here in Portland for super cheap!) and I try to reuse the hems as much as possible - saves time and frustration hemming knits and gives them a more professional look. These pants are Anna Maria Horner's Quick Change Pants from her book, I made a number of pairs of them earlier and will have to share more about them later too!  I love the green and coral in these pants and so it's so great to have a shirt that goes so well with them - I think both of these shirts will get a ton of use, which is great!

baby leggings

I also sewed her another quick pair of leggings yesterday, and added this stamped tag in the back which should help tell the front from the back.

baby leggings label

Finally, the project that I made yesterday that I am most excited about is this ruffle peplum tunic!

Baby ruffle shirt

I started with the same self-drafted long sleeve t-shirt pattern, but cut the front piece on the fold (eliminating the buttonhole placket fabric), and put a buttonhole on the left shoulder instead of the seam.  This fabric is from a weird pair of lounge pants, believe it or not, so there wasn't enough hemmed fabric to recycle for the body of the shirt, so I left it unhemmed under the ruffles, which are also unhemmed (and cut on the bias mostly to maximize their length - still would have preferred it if they were a bit longer, but these were the longest pieces I could get diagonally across the bottom of the pants).  The shirt was cut to the same length as the regular t-shirt pattern and the ruffles are each 3" wide - one is sewn on about 1/4" about the bottom hem, and the other is sewn 2" above that.

Baby shirt detail

I love the little flower button I found in my collection to use here - I think it helps it look a bit more fancy and special.

baby ruffle shirt 2

The tunic length is great on Esther since she is so long - I don't have to worry about her shirt riding up immediately when she scoots around.  But speaking of how much she is scooting it does make it tough to get good photos of her in the outfits, particularly an outfit like this that is hard to see when she's sitting down.

baby ruffle shirt 3

Not to mention that she is always on the move and tends to immediately crawl over and try to grab the camera so there are a lot of shots like this:

baby outfit 3

I kind of can't believe that I sewed two tops and a pair of leggings yesterday, I really had a fire under me! (And the baby cooperated by napping well and going to bed on time). Today I didn't dedicate all my free time to sewing like yesterday but I did cut out and start sewing another tunic length top/dress for Esther that I am really excited about! I hope to finish it tomorrow and maybe start another top for her. I am kind of tempted to keep using this basic top pattern to sew tops until I run out of ideas but I should maybe stop myself after I make a few more or I'll have more tops than she'll ever wear. Not to mention that I have more ideas of other things I want to sew!

Thursday, October 17, 2013

knitted baby accessories

newborn baby hat 2

In the spirit of actually posting the various projects I've been making, in no particular order, I wanted to share some of the knitted accessories that I made for Esther.  I also have made her quite a few little tiny sweaters (love how fast baby sweaters are to knit up!) but I'll share those later.  This hat was the last knitting project I finished before she was born - I realized that I had knit her several larger hats but nothing newborn sized, and with a march due date I wanted to be sure she had a special handmade hat to wear in her first days!

newborn baby hat 1

I knit this hat with a variation of my basic baby hat pattern on ravelry and using Knit Picks felici sport yarn (which, ahem, I got on sale and have a bunch more of, so you may see another baby project in this yarn in the future).  Esther was just a few days old in this pictures and the hat fit her for her first month or so, and then it got pretty warm so she didn't need a hat anyways.

two baby hats

I had also made her several other hats before she was born, and conveniently now that it is getting chilly again, they both fit her now.  So that worked out well!  Both are improvised designs that are similar to that basic baby hat linked above.  On a recent outing she started trying to pull the hat off her head, though, so I may need to get to work on one with ties to keep it on pretty soon!

She gets very serious about looking around (and trying to eat the straps on the stroller) so here is a serious baby photo from a few weeks ago:

baby hat in action

Before she was born, I went on a bit of a baby legwarmer knitting spree.  I knit three pairs and was all geared up to knit several more but didn't get around to it.  Baby legwarmers are great since they can keep little baby legs warm while allowing easy diaper changes, or they can provide an extra layer of warmth under or over lightweight baby pants.  I had no idea what a huge baby we'd have, though, and Esther didn't get too much wear out of her little legwarmers before she outgrew them!  I bought her some of the super stretchy larger commercially made ones and she has been getting a lot of use out of them, so maybe I will motivate to knit her another larger pair.

baby legwarmers

Somehow I only got photos of her wearing this one pair of the legwarmers although I know she wore at least one other pair quite a bit. They're packed up now so you'll just have to take my word for it.

[Edited to add:]
Oh wait! I found some progress pics from my phone at least of the other two pairs of legwarmers.

2013-02-03 19.08.16


2013-01-16 22.59.50

Tuesday, October 08, 2013

Halloween Sewing

I'm still trying to get back to blogging regularly, as you can tell - in addition to being busy with the baby (and summer fun stuff until recently), I really have continued to struggle with what I should post about - I have such a backlog of fun things to share, I can't decide which to post so I just don't get around to posting! This is totally silly, I realize, but I do really want to share it all with you, so I'm going to just try to be better about jumping in and sharing something already. In this case, though, it was an easy choice since these photos have been sitting on my computer since last October and I wanted to be sure to share before halloween!

Halloween table runner

One of the wonderful things about owning a house and being somewhere we intend to stay a long time is that we have finally started acquiring grown-up furniture.  After years of having a tiny ikea dining room table that barely fit 4 placemats, we now have a lovely vintage dining room table with plenty of space for a table runner!  I have visions of making a whole slew of runners for our table but so far this halloween one that I whipped up last year is the only one that has come to fruition.

halloween runner 2

I had bought up this awesome Lizzy House halloween fabric last year and I was determined to actually use it rather than having it sit in my stash.  I thought these fun square in square blocks would be a great way to show it off (I am sure there is a real name for these blocks that I don't know - anyone?).  I just pieced them by measuring and cutting the squares and triangles but I realized after the fact that they would have been much faster and easier if I had foundation paper pieced them.

halloween runner 3

I backed and machine bound the runner with a solid grey kona fabric, with the goal of having the runner be reversible.  This is probably why I haven't motivated to sew any more runners since last year, the grey side of this has been a great all purpose, all season runner for our table that matches most of our placemats!  Making your runner reversible is a great way to get more bang for your buck (so to say), especially if you're making something like this where one side is really only useful for a few weeks a year.  I actually often lose track of the fact that this is actually our halloween runner and get a surprise when I take it off the table to wash it!  Which reminds me, it's been October for a week, I really need to go flip it over while it's still halloween season.

spiderweb coaster

In the top photo above, you can also catch a peek of this fun spiderweb mug rug that I whipped up last year.  It's a bit of a play on the traditional spiderweb block, but done in a more improv style.  This was also a fun chance to play around with my low volume grey fabrics!  Maybe this year (or realistically at this point, next year) I'll make a couple other cute mug rugs/trivets that are also halloween themed to make a set.

How about you, have you been doing any halloween sewing?
Related Posts Plugin for WordPress, Blogger...