Hello friends! It has been far too long since I posted here, but there is a good reason... Lawson and I are expecting a baby girl in March! My pregnancy has been going smoothly, but I was just completely wiped out for most of the summer. I have been feeling much better for the past couple months, but have been putting a lot of my energy into getting our house set up, getting ready for the baby, cooking, and working on various craft projects. But I miss blogging and really want to get back in the habit! So I'm planning to do some catch up posts over the coming weeks to share some of the projects that I have been working on these past several months.
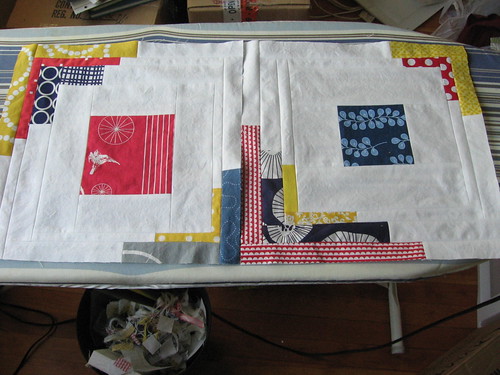
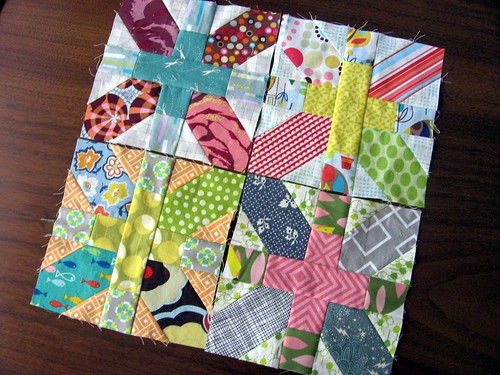
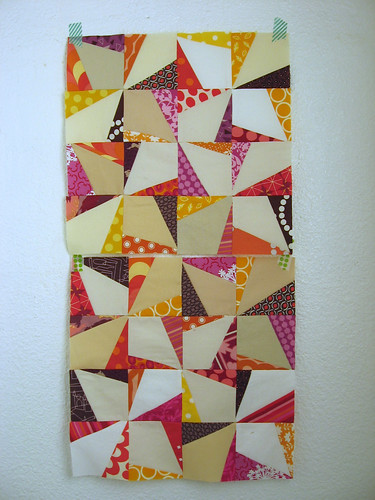
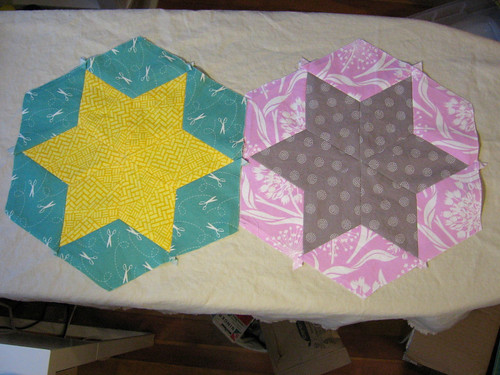
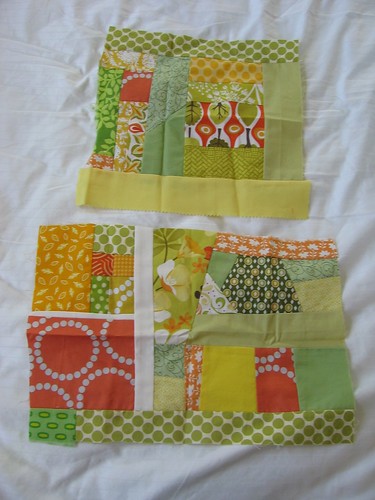
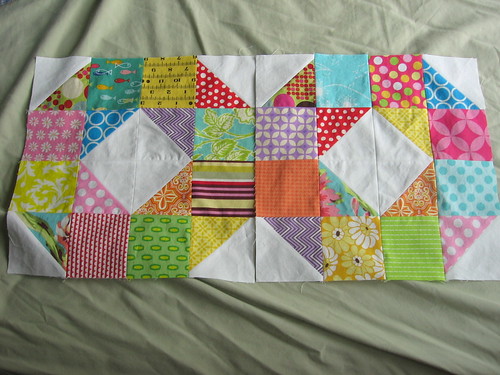
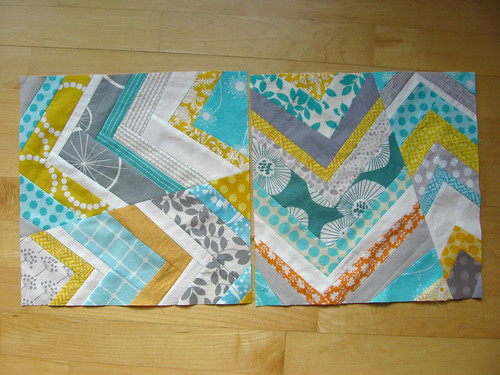
As a start, here are the bee blocks that I have made since July (!) for my do.good stitches bee circle, the love circle. I have really enjoyed participating in this bee for the past year and a half, and have been so inspired by the block choices each month, and by seeing the work of my other bee members, but I decided that it made sense for me to step down to focus on getting ready for baby. So these are my last bee blocks for now - although I hope to have time to participate in a bee again in the future as it has been such a great experience!
I love the design that these converging corners blocks make when all put together (and I love the nautical colors that Deb chose!) - see the finished quilt over on Deb's blog.
These + and x blocks for Ara Jane were so fun to put together - I definitely spent as much time picking out which scraps to use as I did actually sewing them. And the finished quilt is a stunner!
I love Natalie's tutorial for wonky pinwheels - the blocks are quick to make and the pattern they make is so fun! I always love the color palettes Natalie picks out and this one was no exception - check out the assembled quilt top, doesn't it just feel like fall?
I had been meaning to try English Paper Piecing so it was fun to make these 6-pointed star blocks for Rachel. I love the color palette she choose and can't wait to see the assembled quilt top!
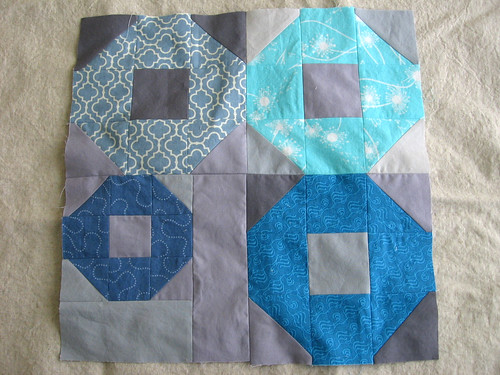
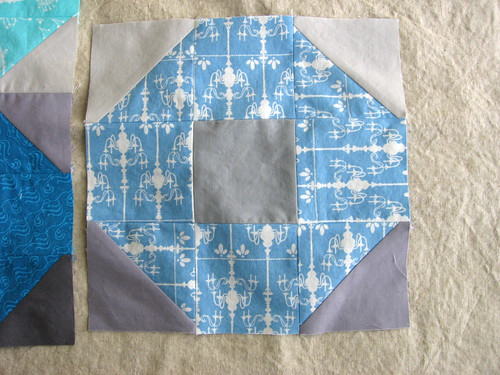
Some of my favorite bee blocks have been the ones where the quilter asked us to improvise off a theme (like the Asterisk blocks for Lee), so I was excited when Jacey asked us to make blocks based on a Shoo Fly but to have fun with them! I can't wait to see how the quilt comes together with all the different sizes and variations that folks made.
Thanks again to all my fellow love circle members! It has been so fun sewing together with you.
Wednesday, December 05, 2012
Saturday, August 04, 2012
Creampuff Recipe (mini-eclairs)
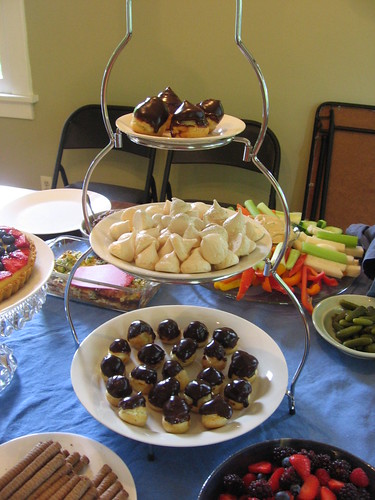
As I mentioned in my last post, about our bastille day themed housewarming party, I made creampuffs (eg, mini-eclairs) for the party and they were a big hit! I tried (arguably unsuccessfully) not to go too overboard with the baking, but I really wanted to try my hand at making an authentic french pastry - when I have visited france, the amazing range of delicious treats at the corner patisserie were one of my favorite things. Plus, it was a great excuse to get to use a new cookbook, Flour: Spectacular Recipes from Boston's Flour Bakery + Cafe, which I have been wanting to try out ever since I got it as a gift for the holidays. While I visit Boston pretty regularly, I have never been to this bakery, but I had heard great things about the cookbook, and just from reading through it I could tell that a lot of thought and testing had gone into the recipes. She has a lot of great tips in a techniques section, like just what temperature butter should be to best cream with sugar, how best to fold two ingredients together, and so forth - it's hard to absorb and remember in one reading but I'm sure I'll refer back to it over time to improve my baking.
So, I had pretty high expectations for the cookbook going in, and this recipe did not disappoint. I have never made creampuffs before, but a guest mentioned that she had had trouble when she tried making them in the past and they didn't rise well - I can only think that they turned out well because of the excellent instructions, or possibly just dumb luck. Hopefully if I make them again I can get it all to work as well! I'm pretty tempted to try some of the other delicious recipes in this cookbook before I repeat these, however. I had a lot of fun making them, but I'm not going to lie, as you can see from the extensive directions below, they were quite a bit of work - luckily, I knew what I was getting into and I did as much of the work the day before as I could and then basically just assembled them on the day of the party.
Chocolate-covered Creampuffs
Adapted from Flour
For the pate a choux (creampuff shells):
- 1/2 cup (1 stick) unsalted butter
- 1 tablespoon sugar
- 1/4 teaspoon kosher salt
- 1 cup water
- 1 cup all purpose flour
- 4 eggs, lightly whisked together
- 1 cup milk
- 1 teaspoon vanilla extract
- 1/2 cup sugar
- 3 tablespoons cake flour
- pinch of salt
- 1 egg
- 1 egg yolk
- 1/2 cup heavy cream
- 2/3 cup semisweet or bittersweet chocolate chips (or 4 ounces chopped semisweet or bittersweet chocolate)
- 1/2 cup heavy cream
To make the creampuff shells:
Preheat oven to 400 degrees, and line two baking sheets with parchment (or butter them). In a medium saucepan over medium heat (or I did this in a double-boiler to be sure I didn't overheat or scorch it), heat the butter, sugar, salt and water until the butter is melted. Do not boil - you don't want any of the liquid to cook off. Add the flour and stir until fully incorporated, using a wooden spoon. The recipe directs to keep stirring over medium heat until the mixture starts to get thicker and looks like a loose dough more than a stiff batter, and leaves a thin film on the bottom of the pan; she says this will take 3-4 minutes but mine seemed to get there very quickly, I'd say less than a minute, so I just stopped then.
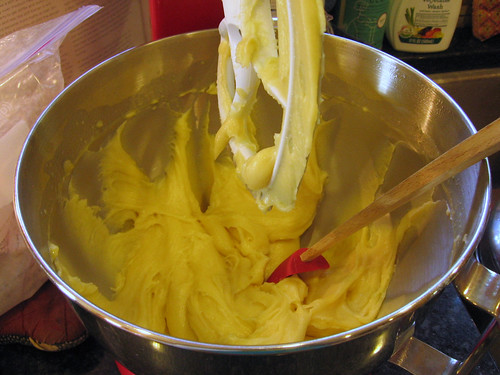
Transfer the dough to the bowl of a stand mixer, with the paddle mixer attached (I used the paddle attachment with built in scraper and it worked well). Mix on medium-low for 1 minute - you will notice steam coming off. (The recipe notes, if you prefer to work by hand you can mix in a bowl with a wooden spoon for 2-3 minutes). On medium-low speed (or beating quickly by hand), add the eggs gradually. Once the eggs have been added, increase the speed to medium and beat for about 20 seconds, until the dough looks shiny.
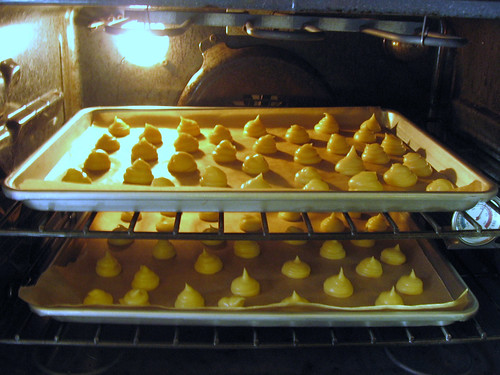
Using a pastry bag and the biggest tip you've got (the recipe calls for a 1 inch tip but I only had one that was probably 1/4", but it worked - or you could just use a plastic bag and snip off the corner), pipe out balls about 1.5" across onto the baking sheet. As you can see in the photo above, I didn't space mine too far apart and it was fine, but you don't want them closer than an inch or so apart. Bake at 400 for about 15 minutes, at which point the pastries should have puffed up and will be starting to brown. Turn the heat down to 325 and bake for another 1/2 hour, until they are fully browned. Place the pans on wire racks (or I just put them on empty burners on my stove) and let cool. If you are making in advance, you can store in an airtight container - they can be frozen for up to 2 weeks, or stored at room temperature for up to 2 days. To refresh, put them back on a baking sheet (straight from the freezer if frozen) and heat in a 325 oven - for 6-8 minutes if frozen, 2-3 minutes if not. Again, let cool completely before filling. (I made mine the day before and refreshed as the recipe directed and they didn't taste stale at all).
To make the cream filling:
The recipe uses a cream filling that is a mixture of a custard and whipped cream, which she calls "Tropez Cream" - it's a bit time intensive but I thought it was really delicious.
Scald the milk over medium high heat (heat until almost boiling, when bubbles begin to form around the edges, but do not boil) - the recipe suggests using a medium saucepan again, but I used the double boiler (probably not necessary for the scalding but I do think it makes the later steps harder to mess up - I pretty much always use a double boiler when I make custard for that reason). While the milk heats, mix together the sugar, flour, and salt in a small bowl, and whisk together the egg and egg yolk in a medium bowl. Slowly whisk the flour mixture into the egg mixture - it will be pasty and thick.
When the milk is heated, remove from the heat and slowly add it to the sugar/flour/egg mixture, whisking thoroughly as you go. Once all the milk is whisked in, scrape the mixture back into the saucepan and put over medium heat. Whisk continuously and strongly for 4-6 minutes (I found that it helped to hold the whisk in an oven mitt so my hand didn't overheat, but that may have also been from the steam from the doubleboiler). Initially the mixture will be very liquid and foamy but it will start to thicken and the bubbles will go away. When it thickens, you can stop whisking periodically and see if it is at a boil - when it bubbles, whisk again for 10 more seconds then remove from heat.
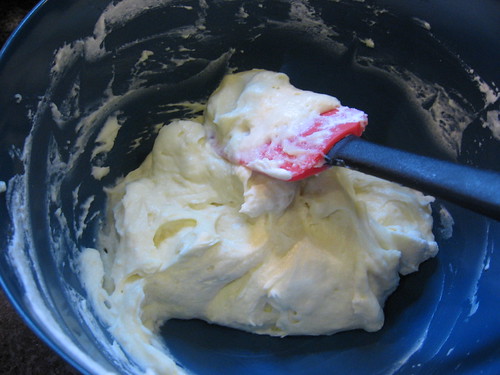
Pour the custard through a fine sieve into a heat-safe medium bowl, and stir in the vanilla extract. Cover with plastic wrap placed directly on the surface and refrigerate for at least 4 hours, until cold. Or you can refrigerate in an airtight container for up to 3 days (this is what I did, as I made the day before). Just before assembling the creampuffs, whip the heavy cream until it has soft peaks. Whisk the cold custard and then fold the whipped cream and the custard together using a rubber spatula. Refrigerate if not using immediately.
To make chocolate ganache:
I was relieved to find that this step was much simpler than making the other two parts. Like the creampuff shells and the custard, I made the ganache a day in advance and refrigerated it, but then I ended up having to microwave it to get it back to liquid (mostly because I hadn't given it long enough to come to room temperature). Since it was so easy to make, if I were making these again I would just wait and make it on the day of.
Put the chocolate in a small heat-proof bowl. Scald the cream over medium-high heat, and pour the hot cream over the chocolate. After it sits for 30 seconds to a minute, slowly mix it together until the chocolate is all melted and the mixture is smooth, then let cool to room temperature. (It can be stored in a container in the fridge for up to a week, and then brought back to room temperature to use).
To assemble the creampuffs:
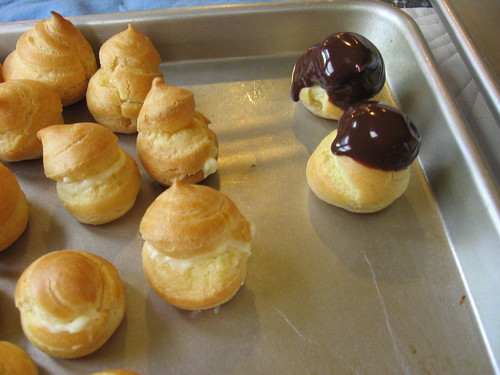
Fill a pastry bag with the cream filling, using a medium sized tip. Use the pastry tip, a knife, or just your fingers to open each puff enough to fill with the cream. I opened them from the side, which wasn't as pretty, and just noticed in writing this up that the recipe actually says to poke a hole in the bottom - maybe that would have worked better, although it seems like the cream might seep out then. There's a surprising amount of space in there for cream and I was impressed that the recipe made just about exactly the right amounts of cream filling and ganache for the cream puffs. Turn the puffs upside down and dip the tops in the ganache, and then let rest for a few minutes to let the chocolate set. (Maybe because I had microwaved it to get it softened up, mine never really set up so the chocolate was a bit runny - but still delicious - when I served them). Serve that day, ideally within 4 hours.
Tuesday, July 31, 2012
Bastille Day Housewarming Party
Lawson and I really like to entertain, so since we moved into our house in May, Lawson and I have been looking forward to having a housewarming party and breaking in our new house. Since the weekend of July 14th was the best time for us, we decided to have a Bastille day themed party - which turned out to be a great excuse to come up with a french-themed menu.
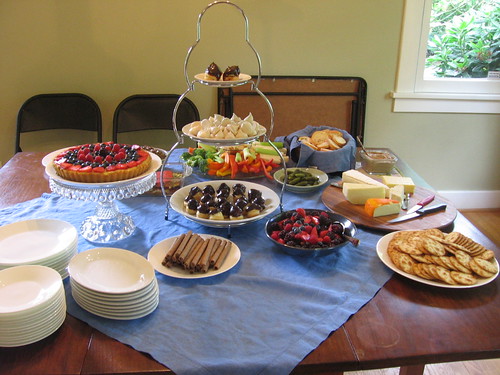
I may have gone a little overboard... we had a cheese plate and a veggie tray, and I cooked a number of favorite items such as french lentil salad and meringues. I made Smitten Kitchen's Zucchini and Ricotta Galette, which I had made once before and was just as yummy this time as the first time (although I didn't get a picture, so you'll have to take my word that it really does turn out as great as she says). I also made a lemon curd fruit tart that I had made before but which I hadn't made in years, and which was a great way to use fresh berries from the farmer's market, and I made a broccoli quiche which I had made before (although I wasn't as thrilled with how it turned out).
I tried out a few new recipes - a mushroom walnut pate, and creampuffs (mini-eclairs) which were a big hit, especially with the kids at the party. I'll be back to share recipes soon!
The party went really well and all the food was all a hit, although we were pretty wiped out afterwards. We are looking forward to entertaining more in our house now that we are getting to be mostly settled in!
Friday, July 06, 2012
3 months of bee blocks
I feel like every blog post I have written lately starts with an apology about how long it has been since I last blogged, so I won't do that, other than to say I certainly didn't intend for it to be this long and hope to get back into a more consistent blogging habit soon! In good news, we are all moved into our new house and getting closer to mostly unpacked. We are really enjoying the new house and I am hoping to have much more time for sewing and other fun pursuits soon!
So, here are my last three months of bee blocks that I made for the Love circle of the do.good stitches bee. Above are this past month's improv block for Jacey - I hadn't done much improv piecing before, and I really enjoyed making them! I'll definitely have to do some more improv projects soon.
For May, Deb asked us to make Patchwork Wheel blocks from (tutorial by Elizabeth of Don't call me Betsy). I had fun making these scrappy bright blocks and enjoyed the secondary pattern of a star that emerges when you put them together.
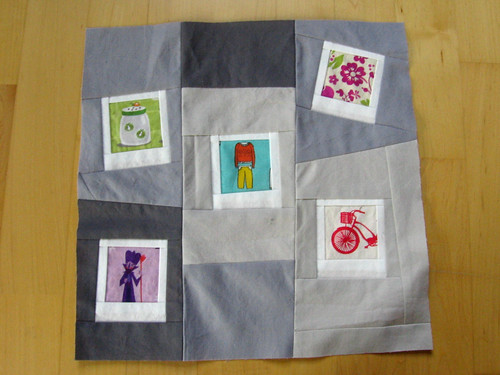
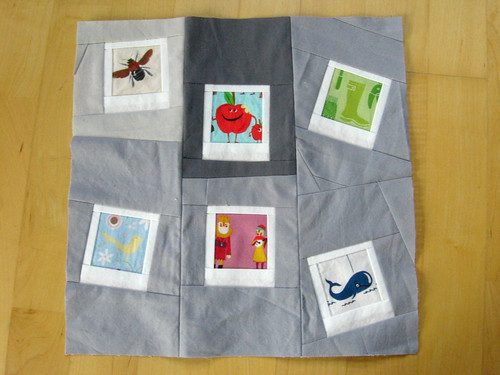
For April, Rachel asked us to make Polaroid blocks loosely following this tutorial - but said it was fine if they had fewer than 9 polaroids in each block. I liked the looser arrangement with fewer "photos" so I paper pieced each of the polaroids and then basically built each part up and fit it all together. It was really fun to get to fussy-cut some of my cute fabrics and showcase them with these blocks!
Sunday, May 06, 2012
end of winter knitting
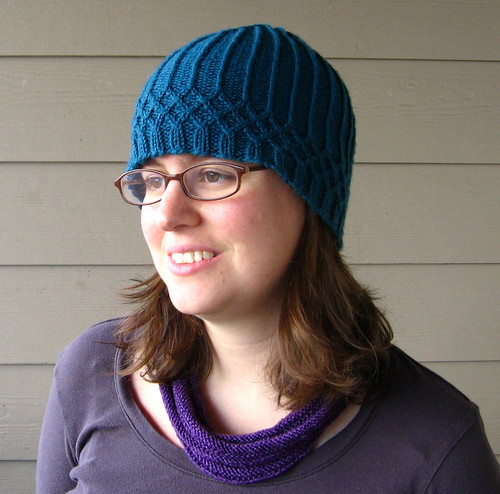
So, I have had in the back of my mind that I should do a knitting blog post soon, but I hadn't fully realized how long it had been since I had written one. So long, in fact, that all these items now seem out of place because the seasons have changed... oops. In my defense, it has only just started feeling warm here in Oregon and I actually just finished (and wore) one of the cowl (below) last week. Anyways, this is kind of a roundup of the end of my winter knitting for the year. Since I didn't have many hats or scarves that I had knit for myself (and those that I did have ended up in storage when we moved), I went on a bit of a winter accessories knitting bonanza this year, helped on by a temporary obsession with cowls - as seen in previous posts this winter here, here, here, and here.
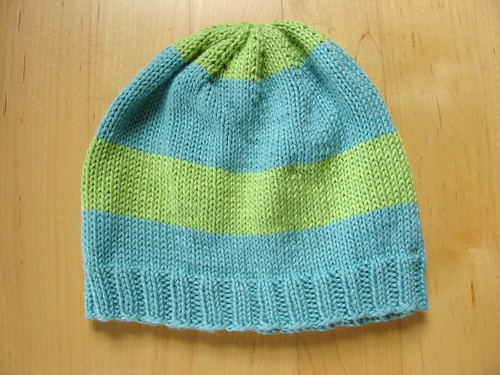
Pretty much all the projects in this post came out of desire to think of a use for a fun yarn more than anything, and the winter accessories kick was a good fit with trying out new yarns without having to commit to a big project. The hat above is the Claudia pattern, knit with 1 skein of superwash 220 that I bought exclusively because I loved the teal color. The hat is a bit snug and since it was warming up by the time I finished it, I didn't get much wear out if it this year, but I am hoping that it will break in well with more use next year.
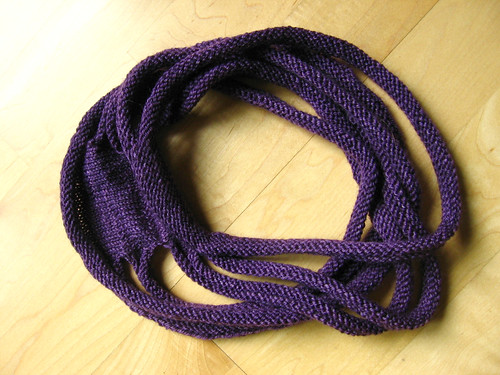
This necklace/cowl thing is made from the sevencircle pattern (although I ended up only making 6 circles), and was a great project for malabrigo sock yarn - which I had wanted to try but was hesitant to use for socks since it is 100% wool (no nylon) so it seemed like it would wear out quickly for socks. It is an interesting pattern, where you cast on a bunch of stitches, knit some rows, then cast off most of the stitches and cast back on a different number, repeat. You end up with loops attached by a small continuous section at the back that you can see in the photo above, and the back section mostly rolls up when you are wearing it and isn't too noticeable.
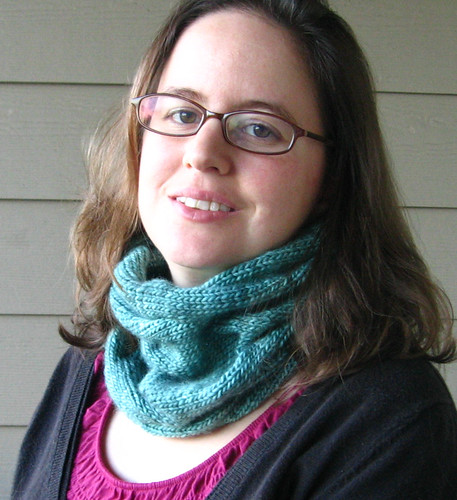
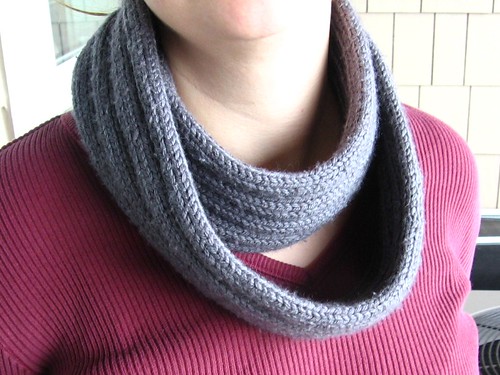
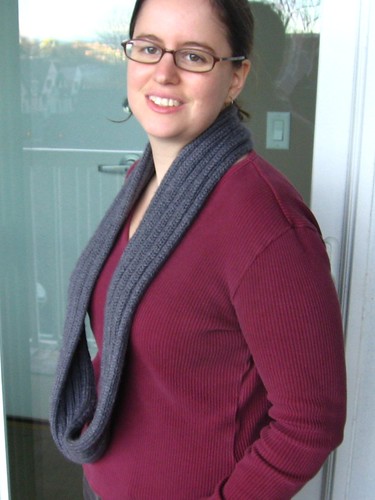
Finally, I just finished this cowl, the tuesday night cowl pattern, which was a great match for super soft tosh merino yarn. I had heard folks online gush about tosh, but after having some serious pilling with other single ply yarns like malabrigo, I was hesitant to buy this expensive yarn for a big project. I love the depth of color in the yarn, so it will be good to see how well it wears - if nothing else, I would definitely use it for more hats/scarves/cowls in the future, if not for a sweater (not that I have really been knitting adult-sized sweaters lately anyways).
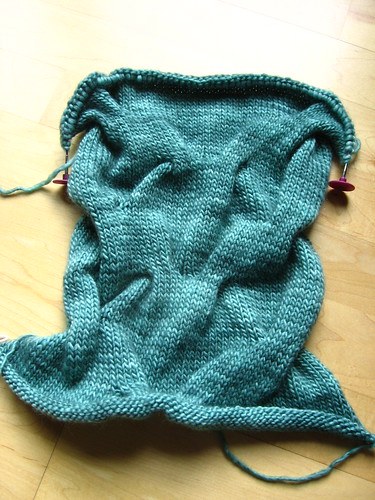
This pattern was really fun, with a series of really big cables that give it a neat folded texture when you are wearing it. The construction was cool too - you do a provisional cast on and then knit back and forth like you were making a scarf, and then at the end you do a grafting stitch to join the two sets of live stitches and make an invisible join to form the loop. I tried a new provisional cast-on technique which was so much easier than the chained cast-on I have done in the past. It was especially great because I was using my knitpicks interchangeable needles - since you end up with the new stitches held on a needle, I just took off the needle tips and put on the needle end caps while I was knitting making a convenient stitch holder. Then at the end when I was ready to graft I just put a needle tip back on one end and I was ready to start the kitchener stitch. (Apologies for all the lingo for any non-knitters reading this).
In other news, we are moving on Friday, so the next time I post may be from the new house (fingers crossed we will have internet there soon). I'll try to take some photos of the house to share here!
Saturday, April 21, 2012
1001 Peeps Half Square Triangle Quilt
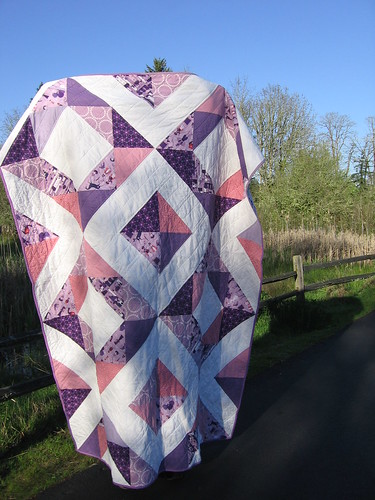
I finally finished up the twin-size half square triangle quilt that I have been working on today (which I mentioned when I posted about my HST placemats). Crafting time (and blogging time, clearly) has continued to be more scarce lately as we finalized our house purchase. Thanks for all the well wishes on my last post! We closed this week and will be moving in about a month, we are very excited!
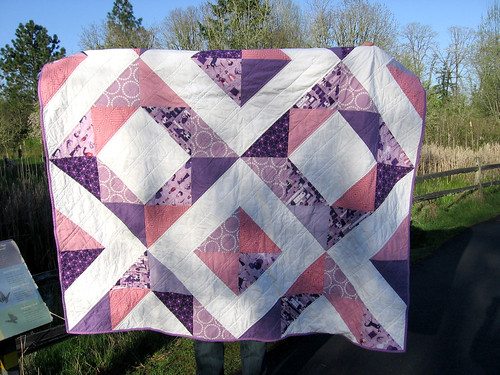
So, about the quilt - this is the first twin size quilt that I have pieced and then quilted myself and it made me even more impressed by folks that quilt bed size quilts on their home machines... it definitely took at lot of wrangling (and made me think about getting a nicer sewing machine with more room under the arm someday). It was gorgeous out today and we went for a walk in a nearby park and took some quick photos of the quilt while we were there.
Lawson was having a hard time holding it all up since it really is pretty big, you can get a better picture of the design in this photo where the quilt is folded 2/5 of the way down. It is a (late) 8th birthday present for my god-daughter, whose favorite color is purple. I knew she would love these 1001 peeps fabrics (by Lizzy House) as soon as they came out, and I think I bought them all a year or so ago - I'm glad that I was finally able to make this quilt for her!
The quilt layout is 8 blocks wide by 10 blocks high, and each HST block is 8" finished (so they were 8.5" unfinished). I wanted to go with a pretty large block size both to make the project more manageable, and to make sure that the characters in the fabric were visible. I made most of the blocks using the technique where you sew all around the edges a square and then cut it diagonally twice into 4 HST blocks (shown here), so I started with 13.5" squares of fabric (and then I did trim the blocks still, although I'm not sure it was really necessary).
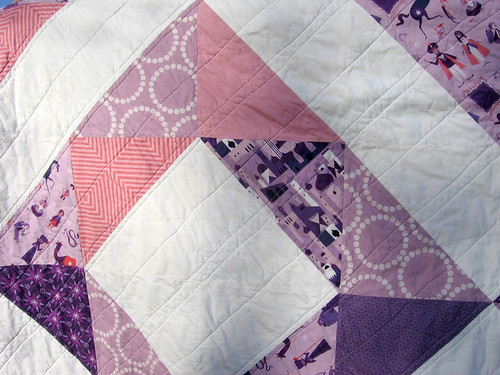
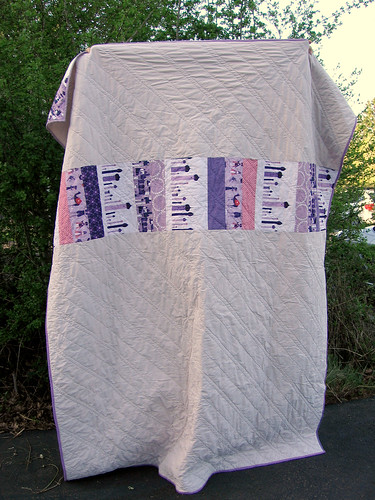
I quilted it with straight(ish) lines on the diagonal and used a pinkish-beige sheet for most of the backing, with a pieced strip inserted. I started with fat quarters of the 1001 peeps fabric and used almost all of it with this design, which worked out really well since I definitely hadn't planned it out before I bought the fabric! If you aren't familiar with this fabric line, you can see a bit more of the details of it in the photo above - it has some more abstract prints and also ones with little characters and scenes. It's super cute!
I'm linking up to Megan's Festival of Half Square Triangles over at Canoe Ridge Creations - there are lots of beautiful HST quilts entered, so definitely check it out if you haven't yet for some fun triangular inspiration! I'm also linking up my HST placemats from my last post :)
Monday, April 02, 2012
Aqua, Grey and Yellow
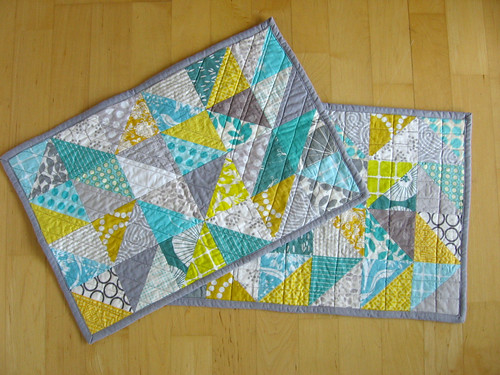
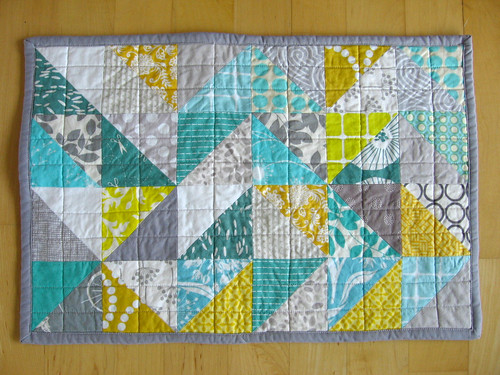
I just finished sewing my first quilt top with half square triangles (more on that later), and since I had never sewn half square triangles before, I wanted to do a quick project to practice before diving into making a whole twin sized quilt top. I made these using the method where you draw a diagonal line down the middle of a square and then sew 1/4" on either side of it - Jeni has a tutorial here. I originally planned to make a pillow top, but then midway through sewing up the rows I decided I was more excited about seeing these triangles on my table than on my couch, so I sewed up two more rows and made a set of placemats.
The finished triangles are 3" so these measure a nice 12"x18". I did my best to place them randomly, but I realized that with a scrappy patchwork version like this, where you don't have a defined light/dark or pattern/solid, pretty much any layout ends up looking like either zig-zags or flying geese. So I tried not to worry too much about the patterns that emerged and just went with it.
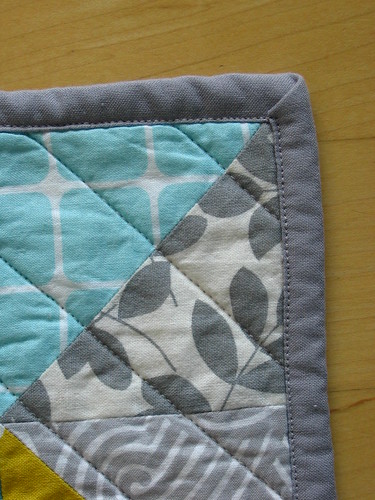
Both to save time, for more durability, and to practice my technique, I did the binding on these placemats all by machine - I have done this before but have to look it up each time, this time I followed AmandaJean's tutorial and was really happy with how it turned out!
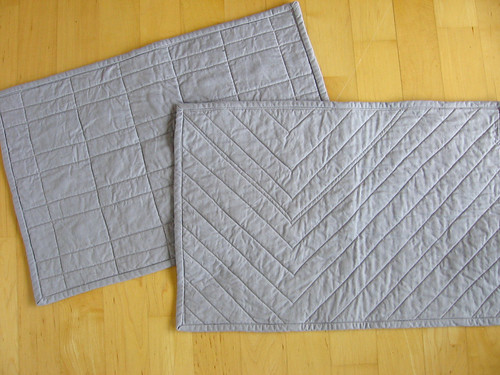
I bound and backed these in Kona Medium Grey, and had fun quilting them in two different patterns to create a little variety. I actually really love how the backs look, it makes me want to make a set of really basic solid placemats that just have fun quilting designs on them! Or maybe I'll just use the backs of these sometimes :) I had a lot of fun learning a new technique this way so I am thinking that I may use this same color palette (or something that goes) in the future to make other scrappy placemats with different patchwork techniques that I have been wanting to try out. Wouldn't that make a fun set?
Speaking of this great color combination... when I went to pull fabrics from my stash to make the HST blocks, I just gravitated toward this color combination, and it was only midway through all the cutting and piecing that it occurred to me that it was nearly exactly the color combination that Natalie had picked out for our March do.good stitches blocks. I guess it was lurking in my subconscious, too funny! It worked out well, though, because it meant that I had already gotten out all the fabrics that I needed to make my bee blocks this month. I had a lot of fun with this pattern (following this tutorial) and definitely want to do more with it in the future - maybe make a table runner? It was definitely nice to do some loose, improv-style piecing after lots of precise HST corners!
[ETA] I'm linking up to Megan's Festival of Half Square Triangles over at Canoe Ridge Creations - there are lots of beautiful HST quilts entered, so definitely check it out if you haven't yet for some fun triangular inspiration!
Monday, March 26, 2012
greetings from your absentee blogger
I've been a bit MIA around here lately, but I have a good excuse! We are in the process of buying our first house (closing in 3 weeks) so that has been eating up what spare time I had. We are very excited! I actually have still been squeezing in some time for crafts, I just haven't been good about taking photos and writing blog posts. So this is a knitting update of things that I made several weeks ago since the more recent projects still need to have ends woven in, photos taken, etc. This hat was a quick one that I made for the recent craft hope project to make hats and bags for kids with cancer.
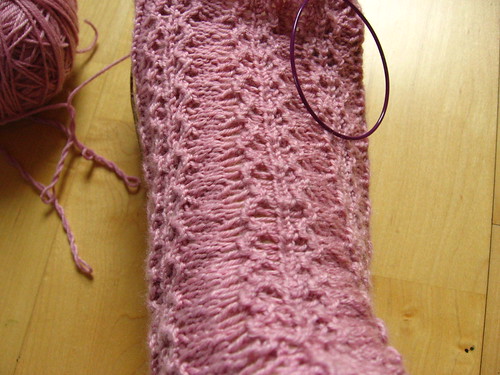
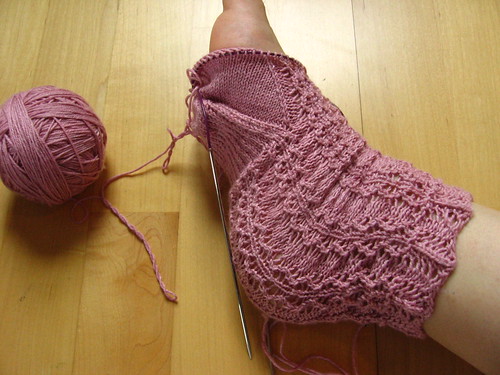
I also was knitting the rose ribs sock pattern from the book Sock Knitting Master Class, which I really should write more about at some point - it's a great book - but I didn't take the time to knit a gauge swatch or even to try on the socks until I was 2/3 through with the first one, and they are way. too. small. Bummer. The lace pattern was so pretty and not that hard to keep track of while knitting, so I may try to knit these again on larger needles or in the larger size at another time. But for now I decided I that my life was complicated enough right now and my knitting should be easy.
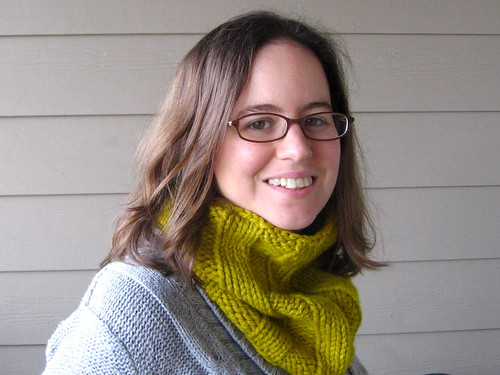
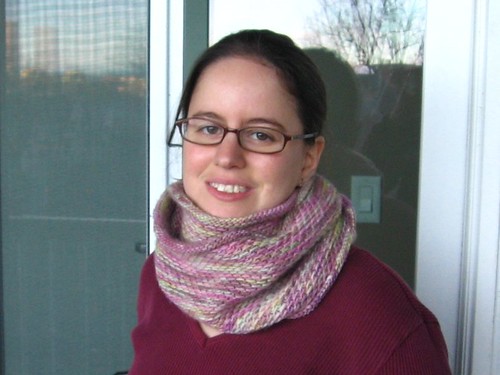
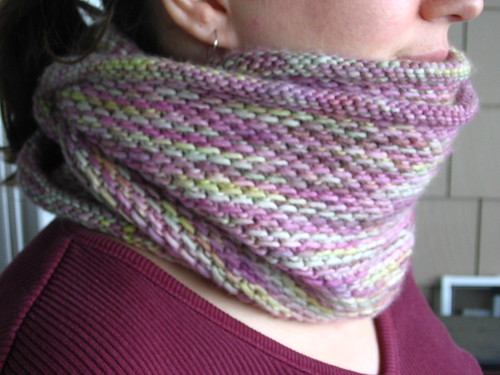
So I treated myself to some yummy soft malabrigo chunky yarn in this fun yellow/ochre/almost chartreuse color and knitted myself up a quick cowl (the luxe cowl pattern) which I found via angry chicken. I normally don't wear a lot of bright colors so I kind of surprised myself when I bought this yarn, and have surprised myself even more to find that I love wearing it! So I am kind of on a run of making cowls... it is starting to feel like spring here but I am tempted to make another before it warms up for real... maybe this one that a friend and I saw a sample for at a yarn shop here in Portland?
Happy spring to you!
Monday, March 12, 2012
Flannel Bathrobe
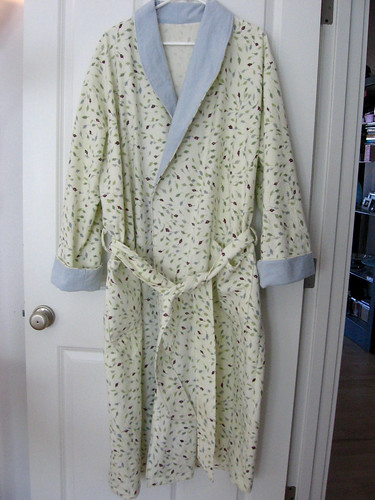
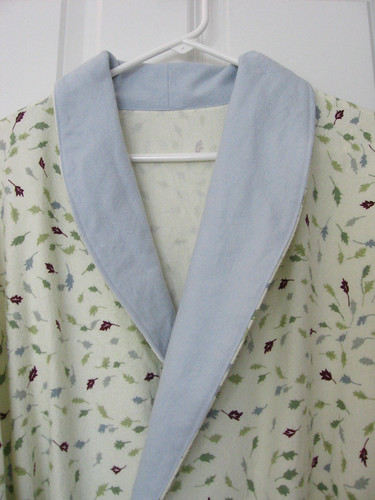
I have wanted a flannel bathrobe for a really long time, but have always been put off by the fact that they cost what seems like a lot of money, and couldn't I make myself one anyways? Now that I actually have made one, $60 bucks or more doesn't seem that expensive, I have to say. I couldn't stomach buying 6 yards of flannel fabric, so I bought this funny leafy patterned king size sheet at goodwill and then combined it with another flannel sheet that I had in my stash for the contrasting collar/cuffs.
The pattern that I used was Butterick 6837... the robes on the cover looked cute and "very loose fitting" sounded comfy. Unfortunately, I got so caught up in making the robe that I forgot that I am a short person and that I should pay attention to things like sleeve length and making the adjustments that make it worthwhile to have made yourself a custom garment. So, long story short, it's huge on me. The sleeves are way to long, the belt falls way below my waist, and "very loose fitting" is an understatement. I am trying to think of it as a wearable muslin, and conveniently it fits Lawson perfectly so I gave it to him. Lawson pointed out that this robe is not exactly manly and then had the great idea that I could dye it green or blue - so I may do that at some point in the future.
Although really, now that I have "given" it to him, it doesn't annoy me that it's oversized if it's because I am borrowing my husband's robe... so I have basically claimed it back. I bought another sheet to make another one if I have the time and energy, and honestly I am not sure if I do make another one if I will use this pattern and try to adjust it, or if I will just find a new pattern that is a bit more fitted. Luckily I am not in a rush, since I now do have a nice snuggly (if extremely baggy) robe to wear!
Sunday, February 26, 2012
Bento Bikes Baby Quilt
Good friends of ours are having a baby at any moment, and I had been holding on to this fabric to make them a baby quilt for a while, and got it done just in time. Now that they have recieved the quilt I can share it with you!
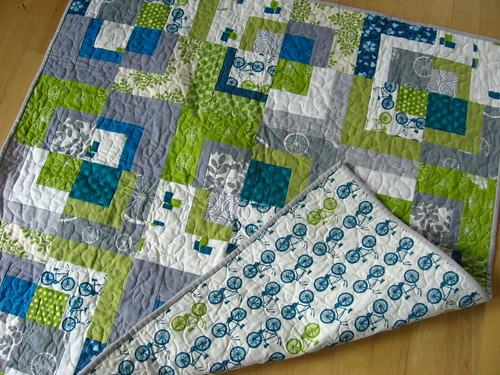
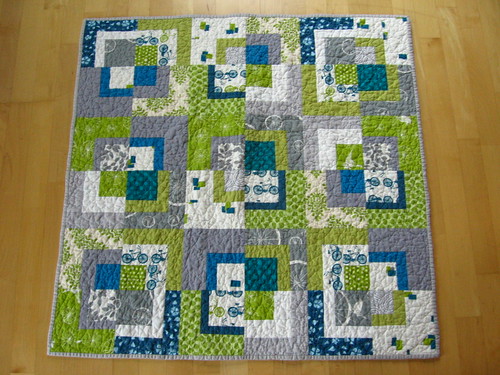
Here's a photo of the whole quilt, post washing. They are both avid bicyclists, so when the Avalon fabric line from Birch fabrics came out, I knew it would be perfect for them! I used a number of fabrics from the line and then supplemented with other grey, green, and teal fabrics from my stash.
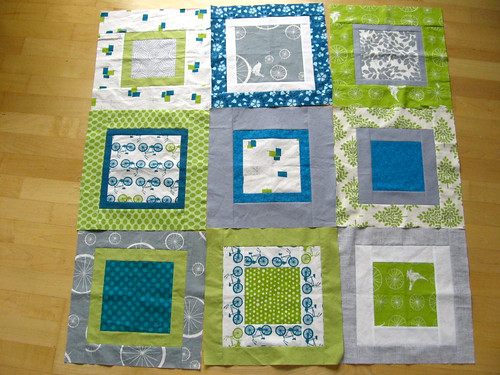
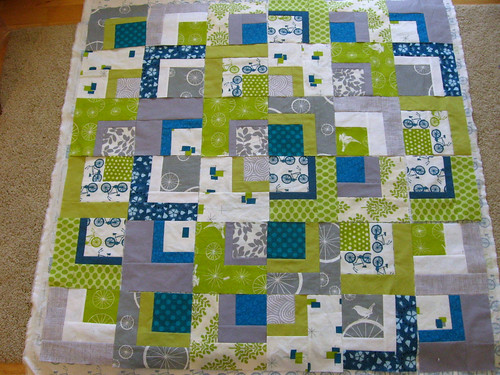
To make this bento box design, I made nine log cabin/square within square blocks and then cut them into quarters. Each of the larger blocks was 13.5" square before I cut them up, which was kind of a pain of a size to make, but was the right size to get the final quilt size I wanted (since I had a yard and 1/4 of backing fabric - so my final quilt was something like 39" square). I used different size center squares to start and different width strips, so that the blocks would each be different. I tried to keep in mind how the blocks would look when cut into quarters as I pieced them, so that each quarter would look good on its own. I almost chickened out and left them as whole squares, but I went ahead and cut them up.
I also considered this layout which I like too, but I ended up deciding that I liked a regular bento box layout better.
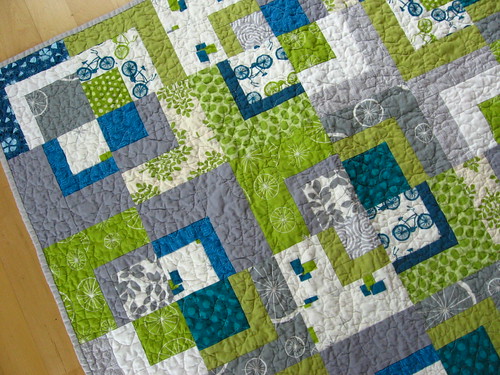
I couldn't find the little quilting table extension thing for my machine when I went to free-motion quilt this, so the quilting was a bit frustrating (and far from perfect) but it all looked fine after a good wash and dry. And the soon to be parents loved it, which is the most important thing!
I'll be linking up to Sew Modern Monday on Canoe Ridge Creations - click over to check out other modern sewing finishes!
Tuesday, February 21, 2012
Bee blocks and 1/4" seams
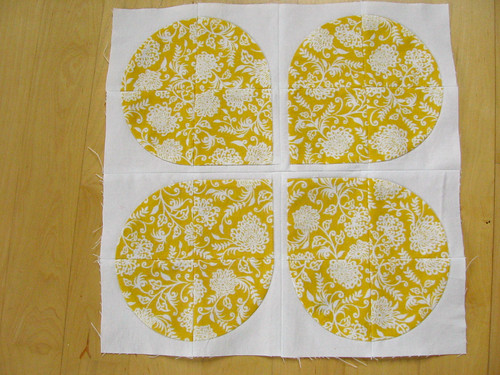
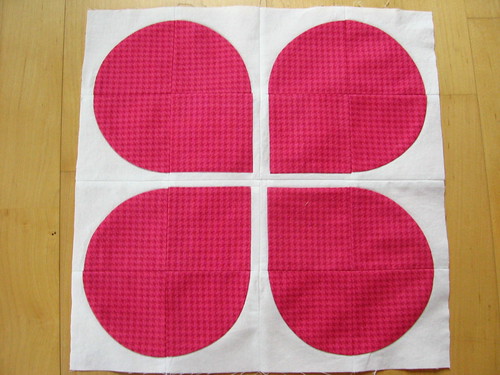
After a much needed month-off (and a reprieve to turn in my December blocks late), I finished my February bee blocks for the do.good stitches love circle this past weekend. Ara Jane picked the fun Retro Flowers pattern (which Christina kindly donated for us to use for this quilt). Ara Jane asked for bright blocks in warm colors, hopefully these fit the bill! I wasn't too intimidated by the curves in this block after sewing two drunkard's path quilts, but actually matching the seams correctly was somehow tricker than I expected (and I didn't get it perfect, as you can see on my first block below). I still enjoyed the block and am happy with how they turned out, though!
One thing that I have definitely been working on with my quilting over the past year has been getting a more reliable 1/4" seam, which if you make precisely quilted blocks you will know is the key to getting things to match up well and turn out the right size. I definitely still have room for improvement but I thought that I would share a few tips including one issue that came up specifically with this block.
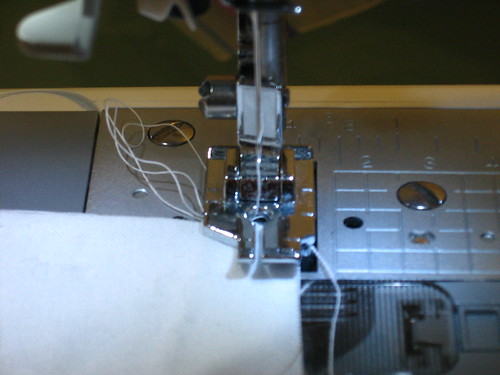
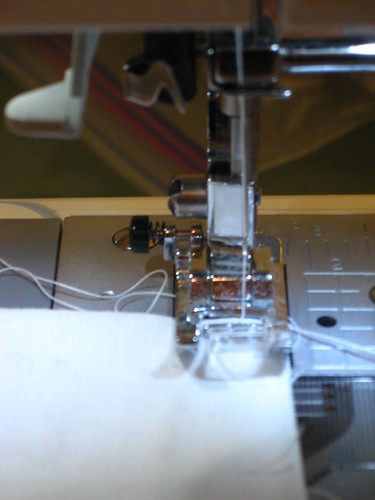
Earlier this year I bought this quarter inch foot (above) for my brother sewing machine. It was really cheap and definitely helped make it easier to line up the quarter inch seam with the side, but I found that it wasn't as precise as I had hoped... and it drives me kind of crazy that you have to use the center needle setting or your needle will hit the foot, and the default for my machine is a different position, so if I leave this foot on my machine, I will inevitable forget to change the stitch setting when I turn the machine on and mess up my needle. One thing that I have found that I really like to use this foot for is sewing curves. I think mostly because it helps me keep close to a 1/4" seam, but doesn't have too large a foot area and create puckers or anything.
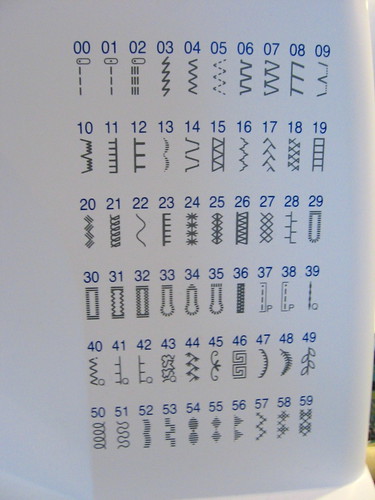
I know that lots of folks have a 1/4" foot with a metal guard on the side to make it more exact where the fabric is supposed to line up, and maybe someday I will get one of those. In the meantime, I have been using a trick which I picked up at the sewing summit. My machine has a ton of stitches, most of which I never use, and I never understood why there were special stitches for piecing and quilting. In one of the classes at the sewing summit they set up the machines using one of the piecing settings and let us know that that positioned the needle 1/4" in from the edge of the regular foot. Wow! I have been using this setting ever since and have found it to be more reliable for getting a 1/4" seam than my special 1/4" foot. This is setting #37 on my machine, and at least if you have a brother or a babylock you probably have a similar setting. This may be old news to folks but I thought I would share in case anyone else has been in the dark on this one! (and I still haven't figured out what the special "quilting" stitches are and how they are different from regular stitches - if you know, please do share).
Actually the hardest seams for me to sew in this block were the final ones where you join the four quarters of the block together, because the pieces you are sewing are each 1/2" wide to the next seam, which at least for me meant that when I sewed a 1/4" seam with the regular needle position, my foot was getting pushed out of place (towards the fabric edge, making a smaller seam allowance), by the thicker fabric from the previously sewn seam. Maybe if I had a nicer machine this wouldn't have happened, and I could have used a walking foot but that seemed like a pain. In the end I sewed these seams with my needle all the way to the left position (position 00 on my machine) which meant only less than 1/4" of my foot was on the fabric to the left of the needle and I just did my best to keep a 1/4" seam, which wasn't perfect. Has anyone else had this problem when sewing patchwork where the finished width is 1/4" or less, and if so, I'd love to hear if you came up with a better solution!
Wednesday, February 08, 2012
A surprise hat and a few cowls
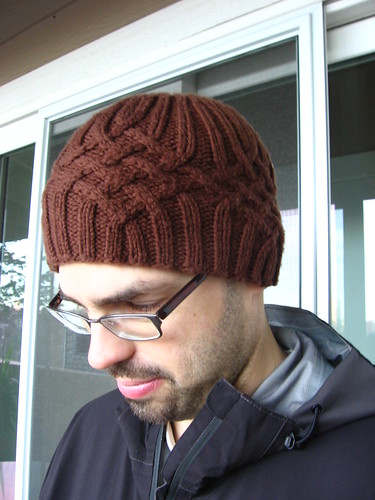
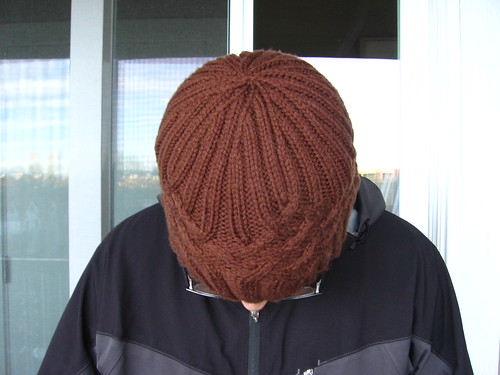
It is a testament to how little time I have had for blogging lately that it is the second week in February and I am only just now getting around to posting about the hat that I made Lawson for Christmas. Every weekend I kept forgetting to take pictures of him wearing it, so much so that I finished another two knitting projects in the meantime... so we had a little photoshoot this weekend and now I can finally share! I knit this hat using the Knotty but nice pattern from Knitty and I love how it turned out... this was the first time I had made traveling cables like this (my term - is that what they are really called?) and it was surprisingly easier than I expected. Details of my project are on ravelry here.
The best part about this hat was that it was a surprise! I had shown Lawson the pattern and he helped pick out the yarn, but he had no idea that I was actually making it for him for Christmas, and was totally shocked when I gave it to him. Mostly I was able to knit it in carpool or when he was out of the house, but I ended up frogging it a bit because I thought it was too small, and so I was still knitting it up to the last minute whenever he would go out for an errand (or even sometimes when he was in the other room). I felt pretty sneaky!
After that, I had been really wanting to make myself a cowl, and I found this pattern (looped loop) on Ravelry and thought it would be perfect. I really love how it turned out, it has a twist in it (a full twist, not a moebius half twist), so when you wrap it around your neck twice it loops around itself perfectly and there is no twist. I didn't think I would like it as much wrapped just once, but I am finding that I also like it that way... it is super comfy and I have been wearing it all the time since I made it! Ravelry details here.
I decided to continue right on and make the honey cowl next, because I got this gorgeous, soft Manos Maxima yarn as a christmas gift and it just seemed like the perfect pattern for it. I probably should have gone up a needle size to get better drape in the fabric, but I actually like that it is pretty dense fabric and really warm. I haven't actually worn this yet since it has been pretty warm here, but it will be great for outdoor adventures or for trips back east in the winter. I wanted it to wrap around twice but still fit pretty snugly, so I used somewhat fewer stitches than the large size - I think I used 210 but I don't actually remember; Ravelry details here.
The yarn really is as soft and delicious as it looks - I think I may have to get more of this to make other projects! It reminds me a lot of Malabrigo worsted but doesn't seems as pilly, which is nice.
I actually may make myself yet another cowl - more of a single wrap/neckwarmer type - but for now I have cast on a pair of lacy socks which are pretty fun!
And I have been working on a few sewing projects too, but don't have any photos of them yet. While I am not looking forward to getting up an hour earlier, I am looking forward to daylight savings time and the possibility of it actually being light any time that I am home during the week so that I could have time to take photos!
Subscribe to:
Posts (Atom)

