Wednesday, January 08, 2014
Lone Star Mini Quilt and mini-tutorial
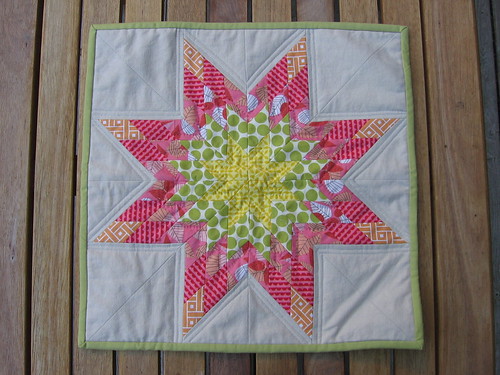
I am nearly caught up with my blogging backlog, and I wanted to share this project from over a year ago (!) - a lone star mini quilt which I made for my friend Natalie of Greenleaf Goods. Natalie was so nice and sent me some lovely placemats made with Lotta Jansdotter's Bella fabric when we moved into our new house, so when she moved to Boston I knew I wanted to sew something up for her, too. I had seen some lone star quilts in her pinterest boards and I thought a mini quilt would be just the thing to brighten up her space!
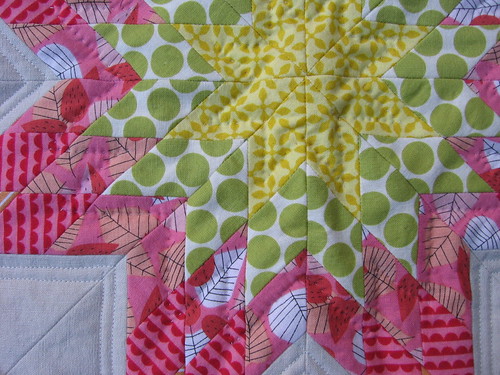
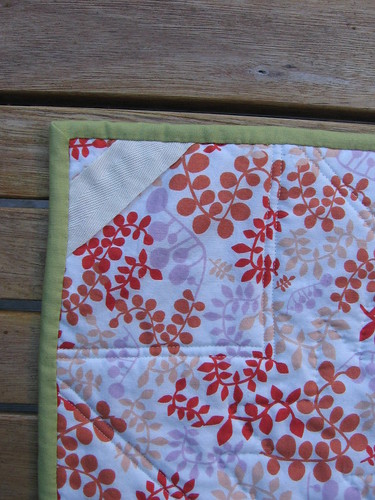
I pulled some fabrics in a palette that I thought Natalie would like and machine pieced the star (more on that below) and it came together pretty quickly! I added a few lines of echo quilting around the star and some hand quilted lines inside the star. When I bound it I added twill tape to two corners for hanging.
Here's a quick mini-tutorial on how I did the machine piecing (I know that I looked at several tutorials online when I was figuring this out but it was so long ago now that I'm afraid I don't remember where to link to them). This isn't a full tutorial with all the measurements and everything you'd need to exactly recreate this mini-quilt but it should be enough to show you how to do this technique.
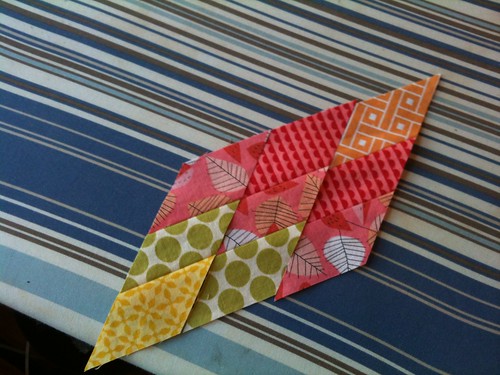
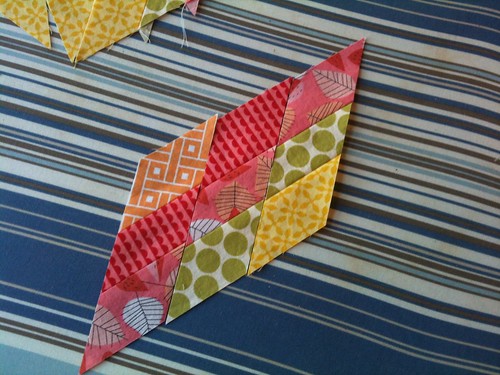
If you look at the star, it is made up of 8 sections, each of which has 3 columns (or rows, if you prefer) of 3 diamonds. Each of those three columns has a different set/order of fabrics. Cut strips of fabric long enough that you'll be able to cut 8 units out of each strip (one for each section of the star), and piece them together in your groups of three, staggering the ends if you wish (to save fabric). Cut into diamond shapes at a 45 degree angle making sure to account for the seam allowance in determining the width to cut. ** I don't have notes on what width/length strips I used or how wide I cut the diamonds but I can go back and try to recreate this info if folks are interested **
Once you have your strips cut, lay them out as they will be sewn together, like this:
Make sure they are not laid out like this!
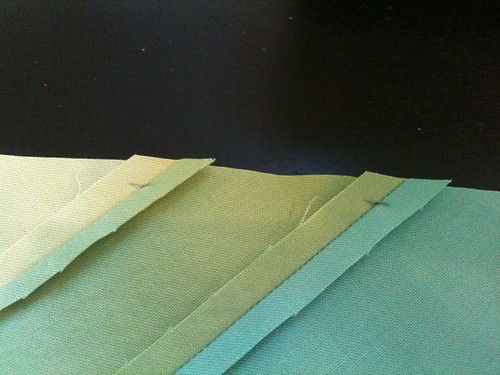
Then you will piece them in the order you have laid them out. (The next set of photos are in different fabrics because I was testing the technique before I made the real quilt). In order to match your points, first take a pencil and use a ruler to mark the 1/4" line at each of the seams.
Then lay your two strips that you are piecing right sides together and put a pin through the two seams at the point where you have marked. Check that your pin is going through exactly at the seam on both sides, then secure your pins and sew the seam with a 1/4" seam allowance (going through the marked points).
Press open and sew the second seam for each section in the same way.
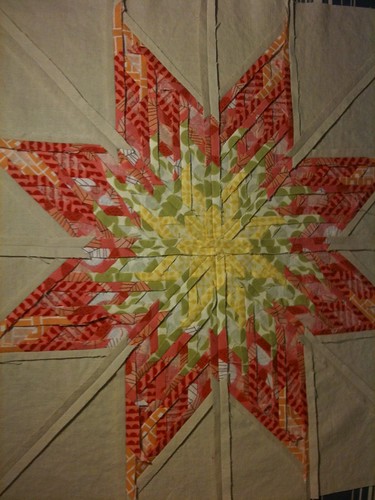
Then I added triangles of background fabric to each section, pieced them together and squared it up. Here is a view of the finished piecing - I love how neat all the seams look pressed open.
Labels:
diamond,
mini-quilt,
quilting,
tutorial
Subscribe to:
Post Comments (Atom)



great... very beautiful
ReplyDeleteLove this!
ReplyDelete