Thursday, February 06, 2014
Winter 2014 Kids Clothes Week
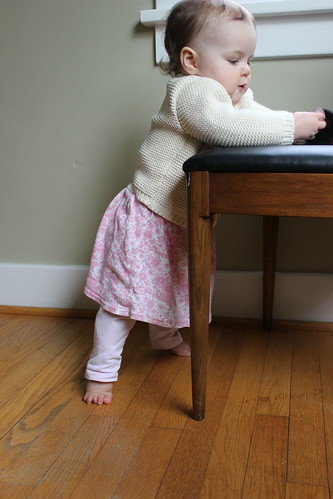
Last week was the winter 2014 Kids Clothes Week challenge, and I was able to nearly meet the challenge to sew kids clothes for an hour each day all week... I missed one day because Esther was teething and was having trouble sleeping and I've been having problems with waking her up by sewing if she is sleeping too lightly, so I didn't want to push it by trying to sew. Really hoping she outgrows this problem soon or I may have to rethink having my sewing area upstairs near her bedroom. In any case, I was happy that I got to sew so much and I made some cute (and useful) new clothes for Esther! I had had the idea to make a skirt attached to leggings after seeing a pair of leggings with a shorter ruffle attached on a friend's baby.
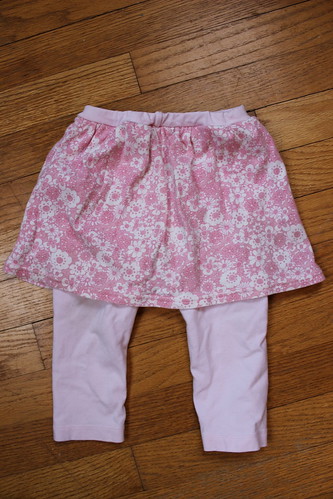
I made both the leggings and the skirt from upcycled knit shirts, reusing the original hems. It turned out really cute although for the next iteration I will probably make the skirt a bit shorter! Having the skirt attached to the leggings makes it a bit less likely to get in the way when she's crawling and also just makes it easier dressing and undressing her (which it feels like I do a thousand times a day with diaper changes etc).
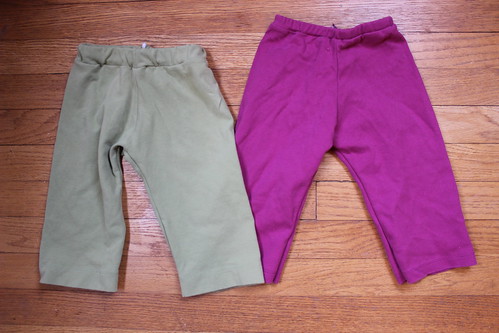
I also made several pairs of upcycled pants/leggings - these two were made from heavy interlock turtlenecks which turn out to make the perfect weight for cold weather baby pants. I didn't get a picture of another pair of leggings I made out of a cute pink fabric with tiny white hearts on it - unfortunately the fabric stretched out quite a bit when she wore them so that's a bummer, but she'll still probably get some good use out of them for the next few weeks around valentine's day. You can see the green pants are super comfy:
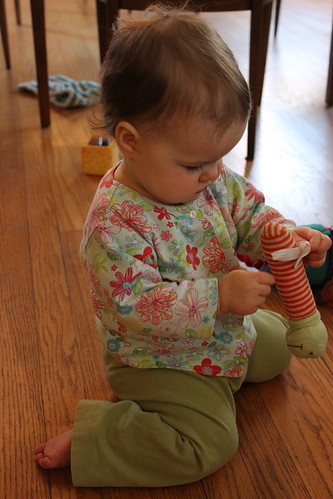
I also made a couple upcycled knit cardigans similar to the ones I made for the last KCW (here and here) but in a big larger size. As you may be able to tell from the photos in this post, getting Esther to stay still long enough to get a good photo of her wearing the clothes I make continues to be a challenge, she is really always on the go (or trying to grab the camera), not to mention that she doesn't love having her clothes changed - so I didn't get shots of all the clothes on her. You can still get a pretty good idea of this shirt, though, I think - I improvised the v-neck and am really happy with how the binding I put on around the neck/placket turned out.
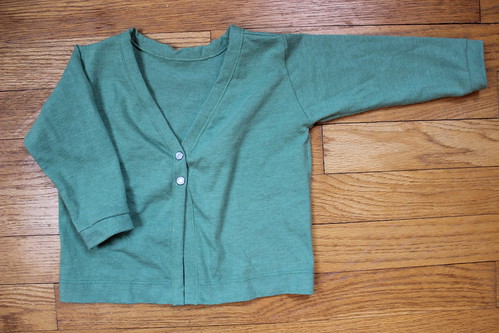
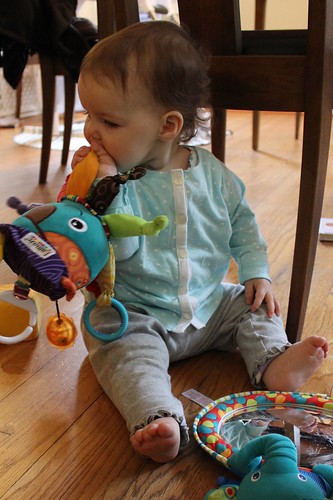
My favorite project from this KCW is definitely this aqua cardigan, which should fit her for quite a while - the sleeves are rolled up about 2-3" here.
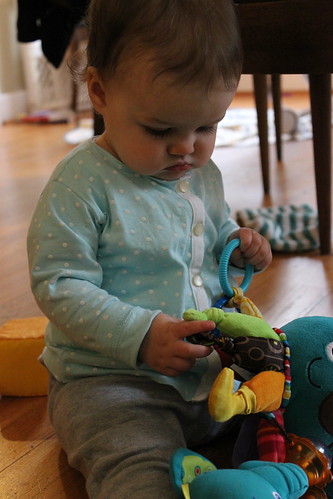
I love how the white binding on the button placket gives this a sophisticated look and the white buttons echo the polka dots. She has gotten a ton of use out of the cardigans I made her for the last KCW so I may just keep making them in successively larger sizes as she grows!
Wednesday, January 08, 2014
Lone Star Mini Quilt and mini-tutorial
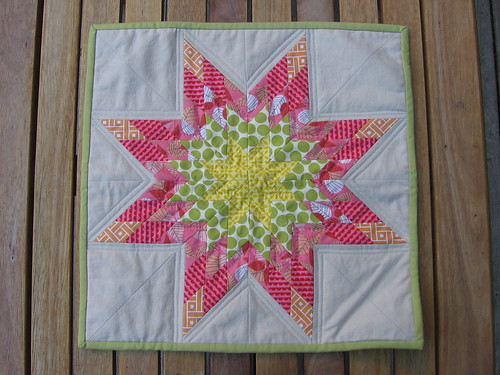
I am nearly caught up with my blogging backlog, and I wanted to share this project from over a year ago (!) - a lone star mini quilt which I made for my friend Natalie of Greenleaf Goods. Natalie was so nice and sent me some lovely placemats made with Lotta Jansdotter's Bella fabric when we moved into our new house, so when she moved to Boston I knew I wanted to sew something up for her, too. I had seen some lone star quilts in her pinterest boards and I thought a mini quilt would be just the thing to brighten up her space!
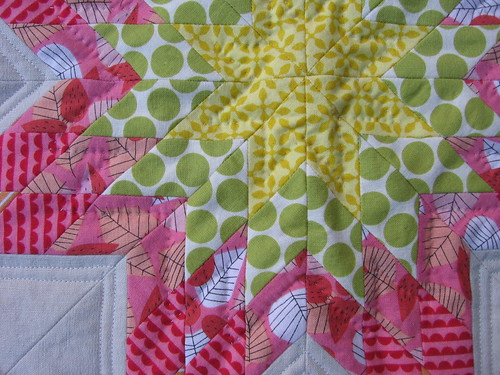
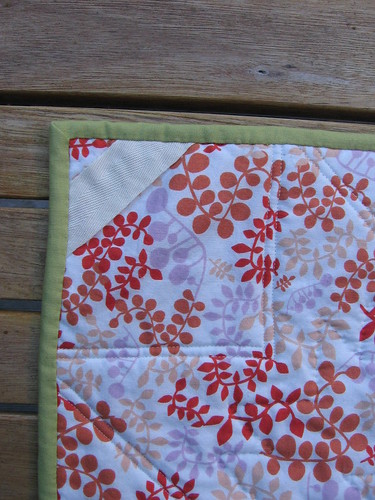
I pulled some fabrics in a palette that I thought Natalie would like and machine pieced the star (more on that below) and it came together pretty quickly! I added a few lines of echo quilting around the star and some hand quilted lines inside the star. When I bound it I added twill tape to two corners for hanging.
Here's a quick mini-tutorial on how I did the machine piecing (I know that I looked at several tutorials online when I was figuring this out but it was so long ago now that I'm afraid I don't remember where to link to them). This isn't a full tutorial with all the measurements and everything you'd need to exactly recreate this mini-quilt but it should be enough to show you how to do this technique.
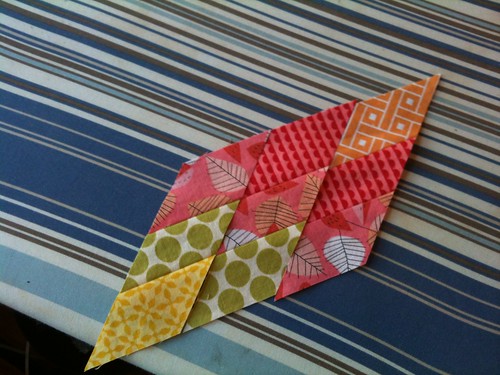
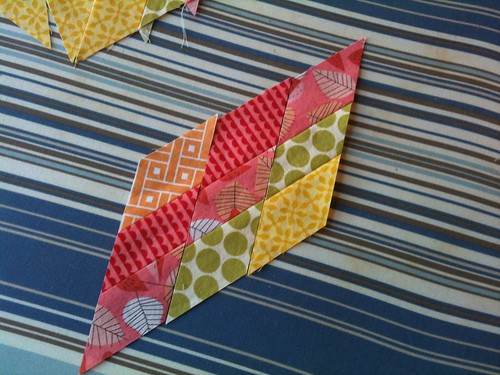
If you look at the star, it is made up of 8 sections, each of which has 3 columns (or rows, if you prefer) of 3 diamonds. Each of those three columns has a different set/order of fabrics. Cut strips of fabric long enough that you'll be able to cut 8 units out of each strip (one for each section of the star), and piece them together in your groups of three, staggering the ends if you wish (to save fabric). Cut into diamond shapes at a 45 degree angle making sure to account for the seam allowance in determining the width to cut. ** I don't have notes on what width/length strips I used or how wide I cut the diamonds but I can go back and try to recreate this info if folks are interested **
Once you have your strips cut, lay them out as they will be sewn together, like this:
Make sure they are not laid out like this!
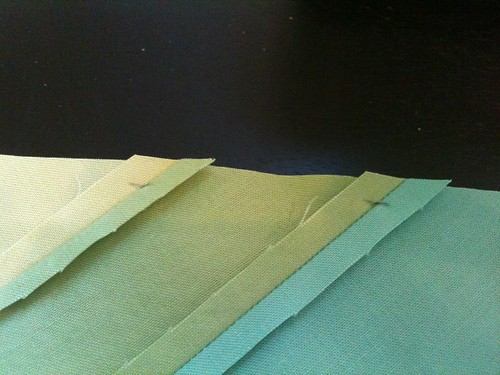
Then you will piece them in the order you have laid them out. (The next set of photos are in different fabrics because I was testing the technique before I made the real quilt). In order to match your points, first take a pencil and use a ruler to mark the 1/4" line at each of the seams.
Then lay your two strips that you are piecing right sides together and put a pin through the two seams at the point where you have marked. Check that your pin is going through exactly at the seam on both sides, then secure your pins and sew the seam with a 1/4" seam allowance (going through the marked points).
Press open and sew the second seam for each section in the same way.
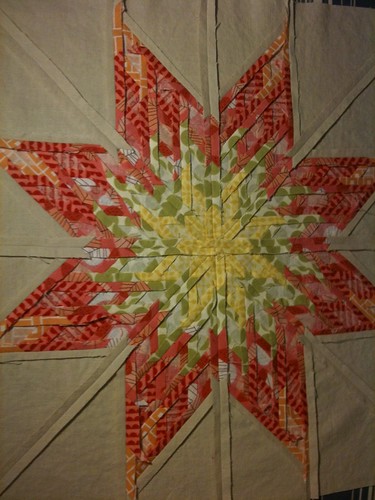
Then I added triangles of background fabric to each section, pieced them together and squared it up. Here is a view of the finished piecing - I love how neat all the seams look pressed open.
Thursday, December 19, 2013
Sweaters for Esther
If I didn't have a blogging backlog I could probably write a whole post about each of these sweaters that I knit for Esther... but as it is, I am glad that I have managed to get photos of her in each of them and excited to share with you! I finished basically all the knitting on these sweaters before Esther was born but didn't finish any of them all the way before she got here... I think it was similar to her quilt, it was as though by not finishing the sweaters all the way she wouldn't come yet. Doesn't quite work that way though, huh?
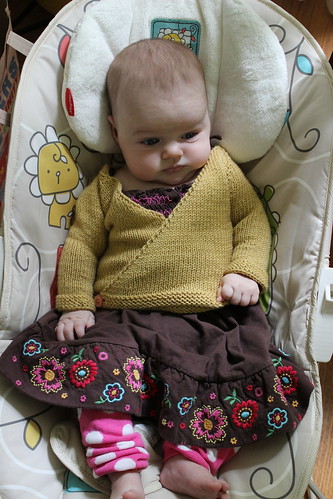
This yellow kimono style sweater was simple to knit and luckily only required a few buttons to finish it up after she came - I knit it in a newborn size but it was stretchy enough to fit her from a few weeks old until she was several months old. Worked out perfectly that I only made her this one tiny sweater since she was spitting up all the time and I didn't really want to put her in a sweater too often. The pattern was quick and easy, I can see myself making it again either in a bigger size for Esther or as a small one for another baby.
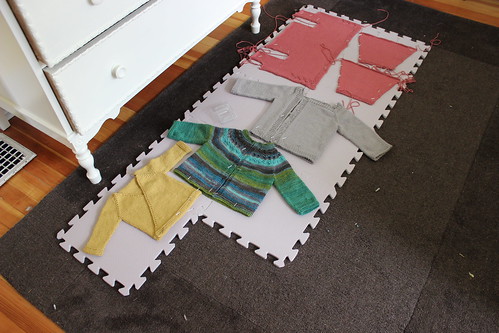
Speaking of how these didn't quite get finished before she arrived - here's a photo of the sweaters blocking that I took four days before she was born. I remember it being a bit awkward crawling around on the floor getting them all pinned! Not totally intentionally, the other three sweaters that I made for her were all about the same size (9-12 months)... but it worked out great, since she has finally stopped outgrowing her clothes every 3 seconds and is actually getting a good amount of wear out of them. Plus they ended up fitting just right for the cold season, hopefully they will still fit through most of the rest of winter/spring.
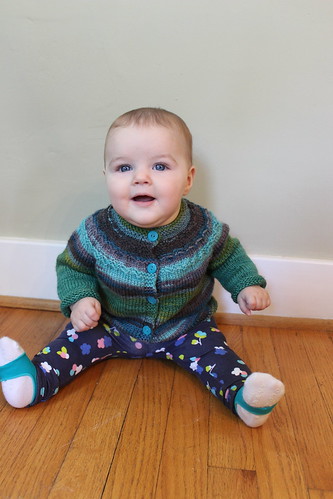
This stripey green sweater is from the same seamless yoked sweater pattern that I used for this yellow baby cardigan. It's a fun pattern and a quick knit, I may make it again! The yarn is some fun liberty wool that I picked up on a trip to Olympia, WA - I bought three balls and managed to match up the patterning in the yarn so that the sleeves fell at the right point in the pattern and matched eachother! I had just enough yarn for the sweater. It's a little psychedelic but I really like how it turned out and she looks so cute in it!
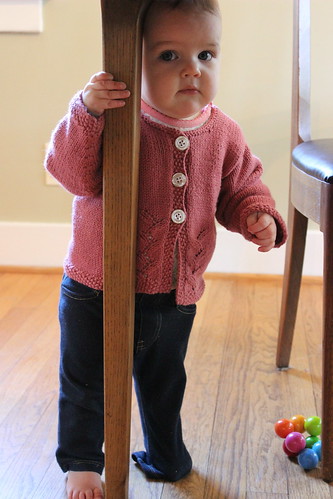
This pink provence baby cardigan is the one that tripped me up the most of all of them. I guess I have gotten spoiled by knitting so many sweaters with no finishing that having to seam all the pieces, and then pick up stitches for a collar and button band, was just too much for me (especially when very pregnant and then when Esther came along). It didn't help that I outsmarted myself by knitting the body of the cardigan in one piece rather than separate back, left front, and right front pieces - and then that made the seaming to insert the sleeves trickier. But I finally powered through it and finished up the sweater a couple weeks ago and I love how it looks on her. And it just now is starting to fit her well so I don't feel too bad about taking so long to finish it. Also I have to say I think this photo is the cutest. I love the look on her face and also how she somehow managed to get her pants leg pulled down over her foot. It's all about the pulling up and standing around here lately.
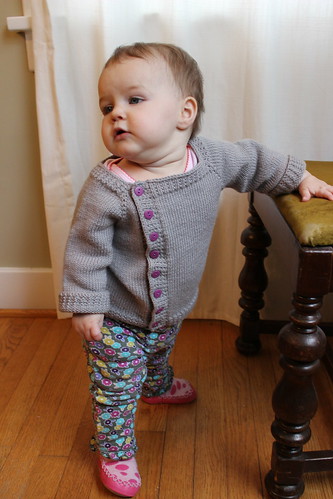
This grey offset wraplan sweater also gave me a bit of a tough time, but I finished the knitting so long ago that I can't totally remember what the issue was. I think they had you pick up the neckline after knitting the sweater and it just annoyed me because it could easily have been knit in one piece. And I maybe had issues with the button band (I think I overcompensated and have too many stitches, which made it kind of wavy, but it's not really too bad). I love the offset opening on this, but the width of the neckline irks me - you can always see her onesie underneath like you see in the photo below. This sweater is actually still a bit big on her so hopefully as she grows into it more this won't be as much of an issue. I was pretty determined to make her mostly gender neutral sweaters/clothes when I was pregnant - since I'm not super into girly stuff and so that we could still use them for a potential future sibling no matter that baby's sex - although of course now that she's here it seems kind of silly and I don't mind dressing her in girly things. But these basics are nice too, and this one strikes a nice balance with the purpley buttons.
There's actually a funny story about this sweater. When I was knitting it, I showed Lawson the pattern a few times, which has an octopus appliqued on the front. I was describing the sweater to Lawson and the idea of an offset cardigan wasn't ringing any bells, so I reminded him that it had an octopus on it in the pattern (but I wasn't going to put an octopus on the one I was making). The first time we talked about it he asked why not (I just didn't feel like it), and the second time he responded with "I still haven't received a good explanation for why there won't be an octopus!" So we joked about him wanting the octopus but he did give it up. Plus we got a cute octopus onesie as a gift at our baby shower so that helped too.
If you're interested in what yarn I used for each sweater or those types of details, the info's all in my ravelry projects as always!
This yellow kimono style sweater was simple to knit and luckily only required a few buttons to finish it up after she came - I knit it in a newborn size but it was stretchy enough to fit her from a few weeks old until she was several months old. Worked out perfectly that I only made her this one tiny sweater since she was spitting up all the time and I didn't really want to put her in a sweater too often. The pattern was quick and easy, I can see myself making it again either in a bigger size for Esther or as a small one for another baby.
Speaking of how these didn't quite get finished before she arrived - here's a photo of the sweaters blocking that I took four days before she was born. I remember it being a bit awkward crawling around on the floor getting them all pinned! Not totally intentionally, the other three sweaters that I made for her were all about the same size (9-12 months)... but it worked out great, since she has finally stopped outgrowing her clothes every 3 seconds and is actually getting a good amount of wear out of them. Plus they ended up fitting just right for the cold season, hopefully they will still fit through most of the rest of winter/spring.
This stripey green sweater is from the same seamless yoked sweater pattern that I used for this yellow baby cardigan. It's a fun pattern and a quick knit, I may make it again! The yarn is some fun liberty wool that I picked up on a trip to Olympia, WA - I bought three balls and managed to match up the patterning in the yarn so that the sleeves fell at the right point in the pattern and matched eachother! I had just enough yarn for the sweater. It's a little psychedelic but I really like how it turned out and she looks so cute in it!
This pink provence baby cardigan is the one that tripped me up the most of all of them. I guess I have gotten spoiled by knitting so many sweaters with no finishing that having to seam all the pieces, and then pick up stitches for a collar and button band, was just too much for me (especially when very pregnant and then when Esther came along). It didn't help that I outsmarted myself by knitting the body of the cardigan in one piece rather than separate back, left front, and right front pieces - and then that made the seaming to insert the sleeves trickier. But I finally powered through it and finished up the sweater a couple weeks ago and I love how it looks on her. And it just now is starting to fit her well so I don't feel too bad about taking so long to finish it. Also I have to say I think this photo is the cutest. I love the look on her face and also how she somehow managed to get her pants leg pulled down over her foot. It's all about the pulling up and standing around here lately.
This grey offset wraplan sweater also gave me a bit of a tough time, but I finished the knitting so long ago that I can't totally remember what the issue was. I think they had you pick up the neckline after knitting the sweater and it just annoyed me because it could easily have been knit in one piece. And I maybe had issues with the button band (I think I overcompensated and have too many stitches, which made it kind of wavy, but it's not really too bad). I love the offset opening on this, but the width of the neckline irks me - you can always see her onesie underneath like you see in the photo below. This sweater is actually still a bit big on her so hopefully as she grows into it more this won't be as much of an issue. I was pretty determined to make her mostly gender neutral sweaters/clothes when I was pregnant - since I'm not super into girly stuff and so that we could still use them for a potential future sibling no matter that baby's sex - although of course now that she's here it seems kind of silly and I don't mind dressing her in girly things. But these basics are nice too, and this one strikes a nice balance with the purpley buttons.
There's actually a funny story about this sweater. When I was knitting it, I showed Lawson the pattern a few times, which has an octopus appliqued on the front. I was describing the sweater to Lawson and the idea of an offset cardigan wasn't ringing any bells, so I reminded him that it had an octopus on it in the pattern (but I wasn't going to put an octopus on the one I was making). The first time we talked about it he asked why not (I just didn't feel like it), and the second time he responded with "I still haven't received a good explanation for why there won't be an octopus!" So we joked about him wanting the octopus but he did give it up. Plus we got a cute octopus onesie as a gift at our baby shower so that helped too.
If you're interested in what yarn I used for each sweater or those types of details, the info's all in my ravelry projects as always!
Sunday, December 08, 2013
New Pattern Prices and Discount Until New Year
I haven't mentioned my PDF sewing patterns in a while here, but they are still available for purchase in my Meylah shop and in my Etsy Shop -- and now automatic digital download is available from both shops, so you can get sewing right away!
I have been thinking for a while that the $6 price for the patterns did not reflect the complexity of the patterns, or the current market for these types of patterns. I am proud of these patterns and put a ton of work into writing them, and I would hate for anyone to think that the low price was a reflection of a lower quality product. So I have decided to raise my prices to $8 per pattern, which I think is still a great deal!
For one last chance to buy the patterns at the old price, use the coupon code "NEWYEAR" on Etsy for 25% off (bringing the price for each pattern back down to $6). This coupon code is only good until December 31st, so if you have been thinking of buying one of my patterns now is a great time to do so!
I have been thinking for a while that the $6 price for the patterns did not reflect the complexity of the patterns, or the current market for these types of patterns. I am proud of these patterns and put a ton of work into writing them, and I would hate for anyone to think that the low price was a reflection of a lower quality product. So I have decided to raise my prices to $8 per pattern, which I think is still a great deal!
For one last chance to buy the patterns at the old price, use the coupon code "NEWYEAR" on Etsy for 25% off (bringing the price for each pattern back down to $6). This coupon code is only good until December 31st, so if you have been thinking of buying one of my patterns now is a great time to do so!
Subscribe to:
Posts (Atom)