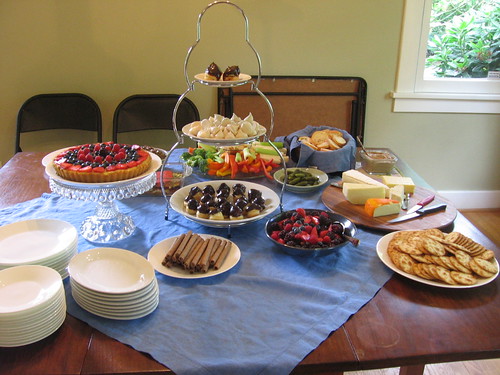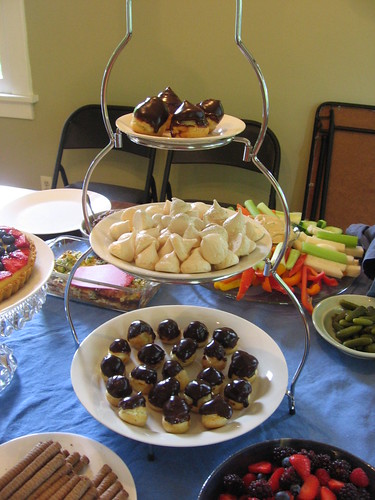
As I mentioned in my last post, about our bastille day themed housewarming party, I made creampuffs (eg, mini-eclairs) for the party and they were a big hit! I tried (arguably unsuccessfully) not to go too overboard with the baking, but I really wanted to try my hand at making an authentic french pastry - when I have visited france, the amazing range of delicious treats at the corner patisserie were one of my favorite things. Plus, it was a great excuse to get to use a new cookbook, Flour: Spectacular Recipes from Boston's Flour Bakery + Cafe, which I have been wanting to try out ever since I got it as a gift for the holidays. While I visit Boston pretty regularly, I have never been to this bakery, but I had heard great things about the cookbook, and just from reading through it I could tell that a lot of thought and testing had gone into the recipes. She has a lot of great tips in a techniques section, like just what temperature butter should be to best cream with sugar, how best to fold two ingredients together, and so forth - it's hard to absorb and remember in one reading but I'm sure I'll refer back to it over time to improve my baking.
So, I had pretty high expectations for the cookbook going in, and this recipe did not disappoint. I have never made creampuffs before, but a guest mentioned that she had had trouble when she tried making them in the past and they didn't rise well - I can only think that they turned out well because of the excellent instructions, or possibly just dumb luck. Hopefully if I make them again I can get it all to work as well! I'm pretty tempted to try some of the other delicious recipes in this cookbook before I repeat these, however. I had a lot of fun making them, but I'm not going to lie, as you can see from the extensive directions below, they were quite a bit of work - luckily, I knew what I was getting into and I did as much of the work the day before as I could and then basically just assembled them on the day of the party.
Chocolate-covered Creampuffs
Adapted from Flour
For the pate a choux (creampuff shells):
- 1/2 cup (1 stick) unsalted butter
- 1 tablespoon sugar
- 1/4 teaspoon kosher salt
- 1 cup water
- 1 cup all purpose flour
- 4 eggs, lightly whisked together
- 1 cup milk
- 1 teaspoon vanilla extract
- 1/2 cup sugar
- 3 tablespoons cake flour
- pinch of salt
- 1 egg
- 1 egg yolk
- 1/2 cup heavy cream
- 2/3 cup semisweet or bittersweet chocolate chips (or 4 ounces chopped semisweet or bittersweet chocolate)
- 1/2 cup heavy cream
To make the creampuff shells:
Preheat oven to 400 degrees, and line two baking sheets with parchment (or butter them). In a medium saucepan over medium heat (or I did this in a double-boiler to be sure I didn't overheat or scorch it), heat the butter, sugar, salt and water until the butter is melted. Do not boil - you don't want any of the liquid to cook off. Add the flour and stir until fully incorporated, using a wooden spoon. The recipe directs to keep stirring over medium heat until the mixture starts to get thicker and looks like a loose dough more than a stiff batter, and leaves a thin film on the bottom of the pan; she says this will take 3-4 minutes but mine seemed to get there very quickly, I'd say less than a minute, so I just stopped then.
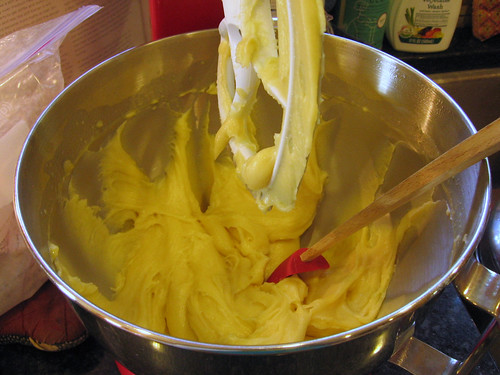
Transfer the dough to the bowl of a stand mixer, with the paddle mixer attached (I used the paddle attachment with built in scraper and it worked well). Mix on medium-low for 1 minute - you will notice steam coming off. (The recipe notes, if you prefer to work by hand you can mix in a bowl with a wooden spoon for 2-3 minutes). On medium-low speed (or beating quickly by hand), add the eggs gradually. Once the eggs have been added, increase the speed to medium and beat for about 20 seconds, until the dough looks shiny.
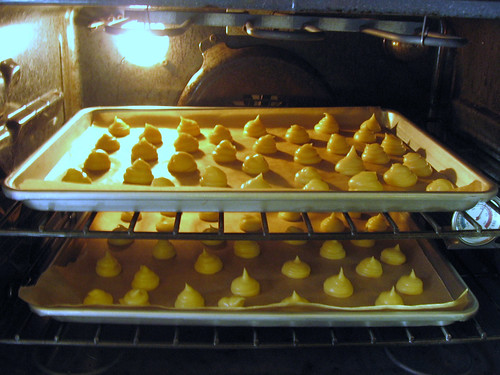
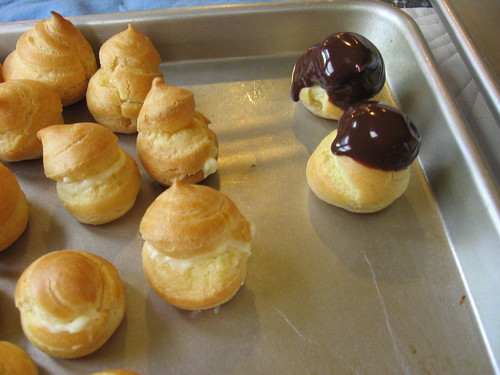
Using a pastry bag and the biggest tip you've got (the recipe calls for a 1 inch tip but I only had one that was probably 1/4", but it worked - or you could just use a plastic bag and snip off the corner), pipe out balls about 1.5" across onto the baking sheet. As you can see in the photo above, I didn't space mine too far apart and it was fine, but you don't want them closer than an inch or so apart. Bake at 400 for about 15 minutes, at which point the pastries should have puffed up and will be starting to brown. Turn the heat down to 325 and bake for another 1/2 hour, until they are fully browned. Place the pans on wire racks (or I just put them on empty burners on my stove) and let cool. If you are making in advance, you can store in an airtight container - they can be frozen for up to 2 weeks, or stored at room temperature for up to 2 days. To refresh, put them back on a baking sheet (straight from the freezer if frozen) and heat in a 325 oven - for 6-8 minutes if frozen, 2-3 minutes if not. Again, let cool completely before filling. (I made mine the day before and refreshed as the recipe directed and they didn't taste stale at all).
To make the cream filling:
The recipe uses a cream filling that is a mixture of a custard and whipped cream, which she calls "Tropez Cream" - it's a bit time intensive but I thought it was really delicious.
Scald the milk over medium high heat (heat until almost boiling, when bubbles begin to form around the edges, but do not boil) - the recipe suggests using a medium saucepan again, but I used the double boiler (probably not necessary for the scalding but I do think it makes the later steps harder to mess up - I pretty much always use a double boiler when I make custard for that reason). While the milk heats, mix together the sugar, flour, and salt in a small bowl, and whisk together the egg and egg yolk in a medium bowl. Slowly whisk the flour mixture into the egg mixture - it will be pasty and thick.
When the milk is heated, remove from the heat and slowly add it to the sugar/flour/egg mixture, whisking thoroughly as you go. Once all the milk is whisked in, scrape the mixture back into the saucepan and put over medium heat. Whisk continuously and strongly for 4-6 minutes (I found that it helped to hold the whisk in an oven mitt so my hand didn't overheat, but that may have also been from the steam from the doubleboiler). Initially the mixture will be very liquid and foamy but it will start to thicken and the bubbles will go away. When it thickens, you can stop whisking periodically and see if it is at a boil - when it bubbles, whisk again for 10 more seconds then remove from heat.
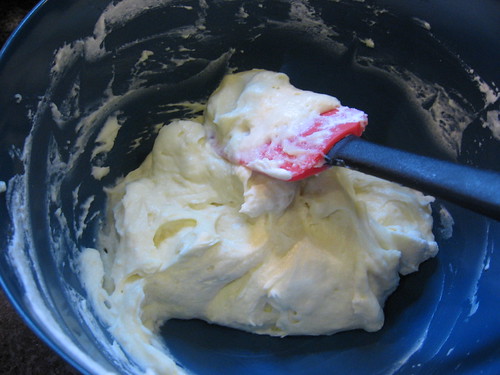
Pour the custard through a fine sieve into a heat-safe medium bowl, and stir in the vanilla extract. Cover with plastic wrap placed directly on the surface and refrigerate for at least 4 hours, until cold. Or you can refrigerate in an airtight container for up to 3 days (this is what I did, as I made the day before). Just before assembling the creampuffs, whip the heavy cream until it has soft peaks. Whisk the cold custard and then fold the whipped cream and the custard together using a rubber spatula. Refrigerate if not using immediately.
To make chocolate ganache:
I was relieved to find that this step was much simpler than making the other two parts. Like the creampuff shells and the custard, I made the ganache a day in advance and refrigerated it, but then I ended up having to microwave it to get it back to liquid (mostly because I hadn't given it long enough to come to room temperature). Since it was so easy to make, if I were making these again I would just wait and make it on the day of.
Put the chocolate in a small heat-proof bowl. Scald the cream over medium-high heat, and pour the hot cream over the chocolate. After it sits for 30 seconds to a minute, slowly mix it together until the chocolate is all melted and the mixture is smooth, then let cool to room temperature. (It can be stored in a container in the fridge for up to a week, and then brought back to room temperature to use).
To assemble the creampuffs:
Fill a pastry bag with the cream filling, using a medium sized tip. Use the pastry tip, a knife, or just your fingers to open each puff enough to fill with the cream. I opened them from the side, which wasn't as pretty, and just noticed in writing this up that the recipe actually says to poke a hole in the bottom - maybe that would have worked better, although it seems like the cream might seep out then. There's a surprising amount of space in there for cream and I was impressed that the recipe made just about exactly the right amounts of cream filling and ganache for the cream puffs. Turn the puffs upside down and dip the tops in the ganache, and then let rest for a few minutes to let the chocolate set. (Maybe because I had microwaved it to get it softened up, mine never really set up so the chocolate was a bit runny - but still delicious - when I served them). Serve that day, ideally within 4 hours.