Tuesday, July 05, 2011
The Process of Making Stained Glass
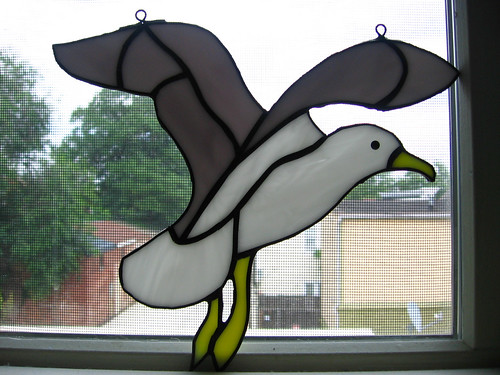
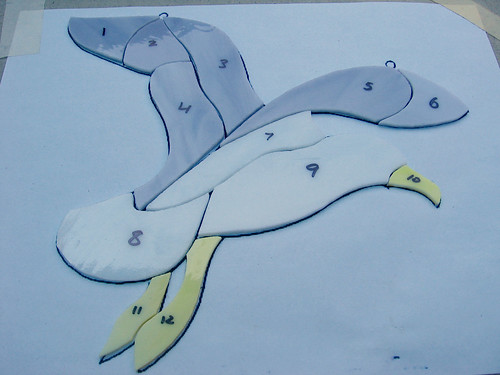
I made this sea gull stained glass suncatcher a few weeks ago, after having made a number of other stained glass items recently (see here, here, and here). Since I have posted quite a few of my finished pieces stained glass, I thought it would be fun to show a bit more about the process of making it. While this isn't really intended to be a full tutorial (making stained glass is pretty complicated), it can give you a flavor of what is involved... maybe you will want to learn more and try it yourself!
This shows the process of making copper foil stained glass - the other major technique is lead came stained glass, which I have also done (for instance, my recent prairie style window, or my earlier window that I designed).
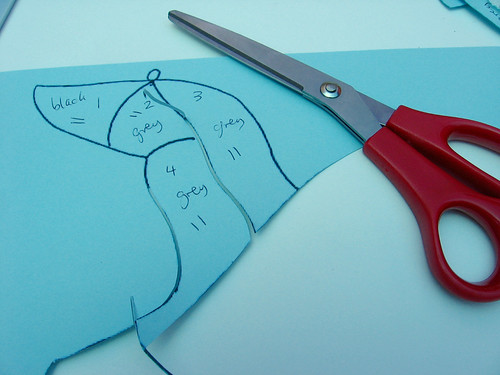
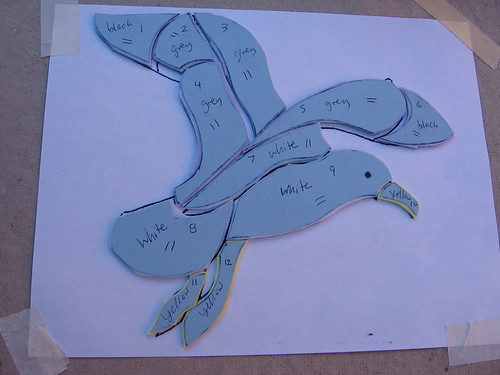
For both techniques of making stained glass, the way I learned to do it is to start with a paper pattern (here is the sea gull pattern I used for this piece). Then you cut apart the pieces of the pattern using a special kind of scissors that removes a thin strip of paper to make room for the lead or copper that will ultimately go between the pieces (a thinner strip for copper than for lead). Before you cut it apart you number the pieces and label them with which color glass they will be, and directional markings if needed.
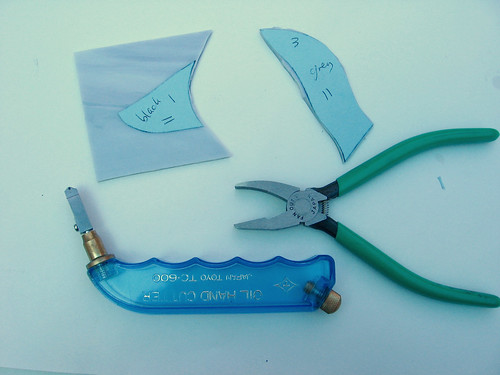
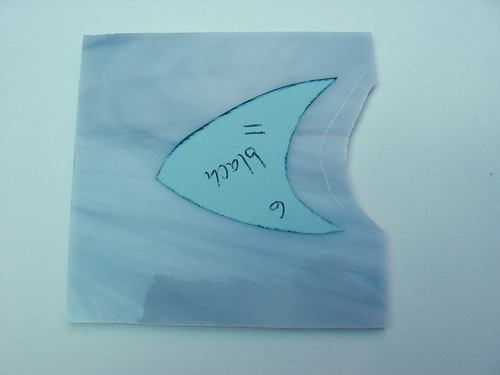
After cutting out the paper pieces, you glue each piece to the corresponding piece of glass (being careful to orient it as desired along the pattern/grain of glass). You need to leave a fair amount of glass around the shape so that you will be able to cut it out as accurately as possible using a scoring wheel and grozing pliers.
For each cut, you basically score a straight or curved line and then snap off the excess glass with the pliers - for steep curves, you can't do it in a single cut but rather must make a series of nested cuts one at a time.
I am still working on refining my cutting skills - I am getting better but still definitely find that there is extra glass that sticks out past the paper edge (I think it is pretty hard to avoid this). The goal is to get the pieces to fit together perfectly with just that small gap in between to leave room for the copper foil.
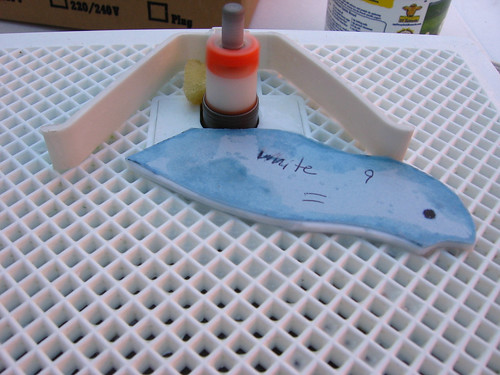
To get the pieces down to that size, you can use a glass grinder, which uses a diamond blade to grind off the extra glass. After the pieces are ground down to the right size, you remove the paper by soaking the piece in water.
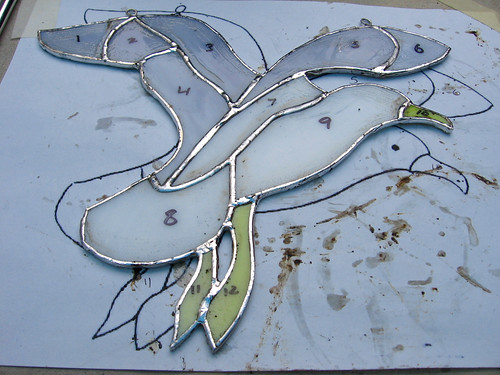
I tend to overgrind my pieces (so they are too small) so I was happy that I did a pretty good job on this one getting all the pieces to fit together well! You can see that after I took off the paper I relabeled each piece with permanent marker right on the glass to be sure to keep track of which piece went where and which side was up.
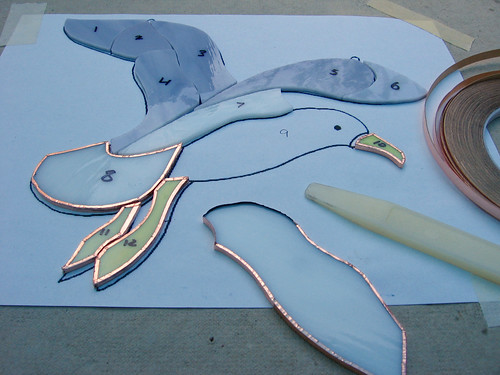
Since I was using the copper foil technique, I then wrapped each piece of glass in an adhesive backed copper foil tape, adhering the tape to the glass by pressing/rubbing it with a plastic tool called a fid.
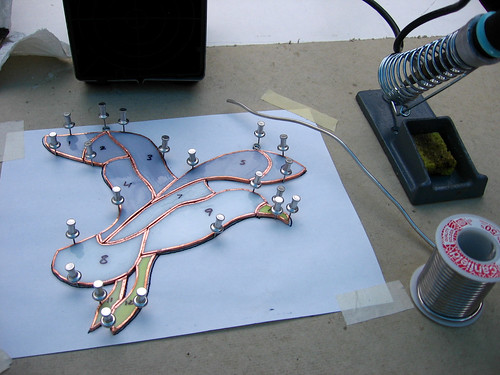
Then I fit all the pieces together again and held them in place using special metal pushpins - see how they copper foil fills in pretty much all the gaps?
Then I painted a flux on the copper foil and soldered all the pieces together, and coated the edges in solder too. For larger pieces you would be fitting them into a zinc or lead frame, but since this is a small suncatcher it should be fine with just the copper foil edges. You can see I also soldered in copper wire loops for hanging the piece.
Finally, I used a special soap to clean off the flux and then I applied a chemical patina to turn the metal black, and the piece was finished!
I hope you enjoyed this quick overview of the stained glass making process... This will probably be the last stained glass I make for a while since I work outside and it is now ridiculously hot out in DC, plus we are getting ready to pack up for our big move to Oregon soon!
Labels:
crafts,
glass,
stained glass
Subscribe to:
Post Comments (Atom)

Beautiful piece! You are definitely multi-talented!
ReplyDeleteLeAnn
This is beautiful!
ReplyDeleteI'm sure that I would love stained glass making . . . it seems a lot like quilting! It's on my "to do someday" list for sure!
this is something I've always admired and I've always wanted to try. But the material is so expensive... I think you also need some nice space dedicated to it as well. I recently saw that there is a neighbour giving workshops in her house and I'm seriously thinking of going to one.
ReplyDeleteyour work is rally beautiful!
I have always wondered how you made these! This is so cool-- and requires a totally different skill set! I love when the stained glass pops up on your blog :)
ReplyDelete